Palace of the Dead
Palace of the Dead
- Level
- 1 (Sync: 60)
- Difficulty
- Normal
- Party size
- Flexible
1-4 man • 1-4
- Unsyncing
- Not Allowed
- Time limit
- 60 minutes
- Phoenix Down
- Available
- Duty Finder
- None (NPC entrance)
- Req. quest
- The House That Death Built
- Entrance
- South Shroud (X:25.2, Y:20.6)
- Region
- The Black Shroud
- Patch
- 3.35
In the subterranean city of Gelmorra, deep within a forgotten corner of Issom--Har, stout-hearted explorers have uncovered the entrance to a labyrinthine dungeon. Those who set foot inside its maddening halls find their vigor drained by an irresistible fog of innervation, and repeated excursions have failed to map its seemingly inconstant architecture. After hearing chilling accounts of spectral denizens, locals took to the whispering of a "Palace of the Dead", and the Wood Wailers now seek the assistance of adventurers in laying bare its haunted secrets...
— In-game description
Palace of the Dead is a level 1 deep dungeon introduced in patch 3.35 with Heavensward.
It is located in South Shroud at Quarrymill (X:25.2 Y:20.6), and is unlocked by the quest ![]() The House That Death Built. As a roguelike dungeon[1], the Palace of the Dead's objective is to descend each varying floor, fighting creatures along the way while dealing with hazardous environments, until eventually reaching a boss that awaits at the bottom level.
The House That Death Built. As a roguelike dungeon[1], the Palace of the Dead's objective is to descend each varying floor, fighting creatures along the way while dealing with hazardous environments, until eventually reaching a boss that awaits at the bottom level.
Completing floor 50 of Palace of the Dead is a prerequisite to unlocking the other deep dungeons in the game. To facilitate this, changes were implemented in patch 7.31 to allow players to progress through early floors much easier, even if solo.
Quests
| Quest | Type | Level | Quest Giver | Unlocks | Rewards |
|---|---|---|---|---|---|
| The House That Death Built | 17 | Nojiro Marujiro | Options: 1 Hard Leather Wristbands1 Fang Necklace 2 Allagan Bronze Piece | ||
| The Nightmare's End | 50 | Balan | I'll Sleep When I'm Dead | ||
| What Lies Beneath | 17 | Wood Wailer Expeditionary Captain | |||
| Dead but Not Gone | 60 | Wood Wailer Expeditionary | Dead Tired |
Mechanics
The Palace of the Dead has specific features for characters and data saving.
Entry interface
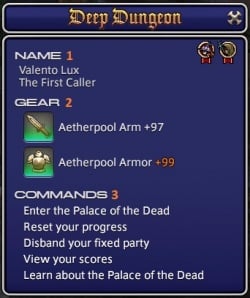
Players can enter the dungeon or manage character data by talking to Wood Wailer Expeditionary Captain, located in Quarrymill. He offers the following interface:
Each option means:
- 1- Name — Character name and title.
- 2- Gear — Character aetherpool gear level, including armor and arm (more information below).
- 3- Commands — Commands to enter Palace of the Dead, manage save data, reset save data, or learn more about the dungeon.
Important: Regardless of which option is chosen (new run, load slot, reset slot, etc.), the aetherpool gear level will never be erased. The only way that aetherpool data may be lost is by expending gear level for Padjal or Kinna weapons (more information below).
Enter the Palace of the Dead
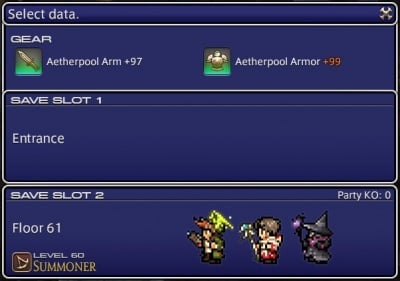
This option serves to enter the dungeon. It offers two slots to save your progression within Palace of the Dead. You may pick an empty slot to start a new run, or load a previously saved run.
Entering the Palace of the Dead has the following requirements:
- Class requirement: Disciple of War or Disciple of Magic
- Item level requirement: None
- Item level sync: None
- Party size: Light Party (up to four players)
- Time limit: 60 minutes
- There are extra requirements depending on floor range:
- 51-100 — Players are required to complete floor 50 and the quest
 What Lies Beneath.
 - 101-200 — Players are required to be in a fixed party.
- 51-100 — Players are required to complete floor 50 and the quest
There are two options to manage Palace of the Dead entry:
- Enter with a fixed party: You will start the run with a pre-made party (or solo), and you can only load this slot with members having the same respective progress slot available (this includes all party members and party composition chosen upon registering). This is also the only way to progress past level 100.
- Enter with a matched party: The Duty Finder will attempt to match a party seeking the same floor as your party. Similarly, you can only load this slot with members having the same respective progress slot available. You may only progress up to level 100 using this option.
Additionally, there are two floors from which players can start:
- Floor one: Start on floor number 1.
- Floor fifty-one: Start on floor number 51. This option is only available after you have cleared floor 50 and completed
 The Nightmare's End.
Reset your progress
This option will prompt you to reset your progress, and it will completely erase your data. Remember that this process cannot be undone.
Disband your party
This option converts a fixed party saved data to a matched party saved data, and reset pomander information. Under these conditions you will be able to be matched with other players who are currently playing on the same floor as you. If any members of a fixed party are unable to enter the deep dungeon after the deletion of save data or usage of the world transfer service, they must select "Disband your fixed party" to carry over their save data.
View your scores
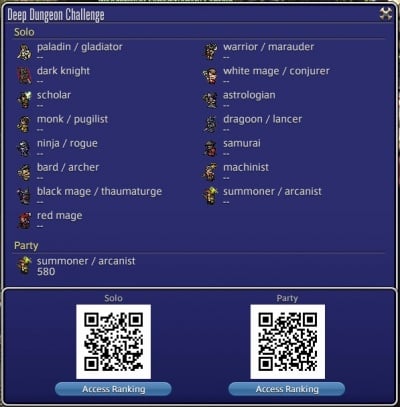
When challenging the Palace of the Dead, players receive a score based on a number of factors such as highest floor reached and number of enemies slain. Separate scores for both solo and party play will be assigned after being defeated or clearing certain floors. The scores of players who venture beyond floor 100 may also appear on the rankings page on the Lodestone.
This option shows your score per class/job, and takes you to the Lodestone.
Learn about the Palace of the Dead
This option shows additional information about the Palace of the Dead.
Character growth
The Palace of the Dead employs a set of rules and mechanics unique to the deep dungeon.
Level
Upon registering for floor one, players will start at level 1 regardless of their current class or job level; for floor fifty-one, players will continue from level 60. By defeating monsters that appear in the dungeon, players will be able to gain EXP and level their characters up to 60 while below floor 51. The levels gained in progression of the dungeon, however, will not be the same as what players will receive upon clearing.
Your level inside the PotD can exceed your class level.
All enemies players encounter in the Palace of the Dead will give a fixed amount of EXP regardless of the number of members in your party or the difference in level between you and the enemy. Rested experience and experience bonuses besides the Armory Bonus (e.g. food or FC Buffs) will also be ignored.
Players have the full 60 minutes to run around and level up, but once you move forward you can't go back and keep your progress. The actual character experience gained is based on your current PotD level when you complete the set of floors. The amount is approximately 30% of a level for the first 10 floors, and is incrementally 10% higher for completing each subsequent floor set. This experience is awarded every time the floor set (10 floors) is cleared.
Note: Tables updated in patch 6.11.[2]
Experience for Floors 51-60
| Level | Experience | EXP with Armory Bonus |
|---|---|---|
| 1 | 900 | 1800 |
| 2 | 1485 | 2970 |
| 3 | 2160 | 4320 |
| 4 | 2340 | 4680 |
| 5 | 3150 | 6300 |
| 6 | 4050 | 8100 |
| 7 | 5040 | 10080 |
| 8 | 6120 | 12240 |
| 9 | 7290 | 14580 |
| 10 | 7695 | 15390 |
| 11 | 9000 | 18000 |
| 12 | 10395 | 20790 |
| 13 | 11880 | 23760 |
| 14 | 12420 | 24840 |
| 15 | 12960 | 25920 |
| 16 | 13500 | 27000 |
| 17 | 14040 | 28080 |
| 18 | 14580 | 29160 |
| 19 | 15120 | 30240 |
| 20 | 15660 | 31320 |
| 21 | 16200 | 32400 |
| 22 | 16740 | 33480 |
| 23 | 17280 | 34560 |
| 24 | 17820 | 35640 |
| 25 | 18360 | 36720 |
| 26 | 20475 | 40950 |
| 27 | 22680 | 45360 |
| 28 | 24975 | 49950 |
| 29 | 27360 | 54720 |
| 30 | 28080 | 56160 |
| Level | Experience | EXP with Armory Bonus |
|---|---|---|
| 31 | 28800 | 57600 |
| 32 | 31365 | 62730 |
| 33 | 32130 | 64260 |
| 34 | 32895 | 65790 |
| 35 | 35640 | 71280 |
| 36 | 38475 | 76950 |
| 37 | 39330 | 78660 |
| 38 | 42300 | 84600 |
| 39 | 45360 | 90720 |
| 40 | 48510 | 97020 |
| 41 | 49500 | 99000 |
| 42 | 50490 | 100980 |
| 43 | 51480 | 102960 |
| 44 | 52470 | 104940 |
| 45 | 53460 | 106920 |
| 46 | 56925 | 113850 |
| 47 | 57960 | 115920 |
| 48 | 61560 | 123120 |
| 49 | 62640 | 125280 |
| 50 | 105300 | 210600 |
| 51 | 107055 | 214110 |
| 52 | 108810 | 217620 |
| 53 | 110565 | 221130 |
| 54 | 112320 | 224640 |
| 55 | 114075 | 228150 |
| 56 | 115930 | 231660 |
| 57 | 117585 | 235170 |
| 58 | 119340 | 238680 |
| 59+ | 121095 | 242190 |
There are no adjustments to or restrictions on any actions, role actions, or statuses. However, players must first reach the required level in the dungeon to have access to them. Players will even have the opportunity to gain actions and statuses above their current level regardless of whether they have completed the necessary class or job quests.
Please note that players who have entered the deep dungeon with a class will be restricted from using any job actions. Role slots become available at the levels at which they would during normal leveling.
Consumables
You can use any consumable item, including those from outside the PotD. HQ potions will drop from enemies inside. A good supply of HQ potions will make jobs without heals viable as well as Sustaining Potions exchanged from Gelmorran Potsherds or randomly dropped from enemies, but they will need to beware of traps. Several traps within cause long-duration status effects which can be cleansed normally using the respective potions. Food will provide a benefit to stats, but not to EXP gained.
Aetherpool Gear
When entering the Palace of the Dead, players are assigned an aetherpool rating. It's a measure of your character strength and defense within the PotD, and should be directly considered a stat. As long as the player completes a floor set (every 10 floors), any gains made are permanent (saved). It is the only attribute which affects your character in PotD (aside from level), and it's not tied to any class, weapon, or gear.
Strengthening aetherpool gear
Aetherpool gear can be enhanced by opening Silver Coffers. These coffers appear randomly on each floor and have a low chance of dropping from enemies (higher under the effect of a Pomander of Fortune). When enhancing gear, there is a chance of failure that varies depending on the current level of your gear and the floor where the silver coffer is found. Aetherpool gear can be enhanced to a maximum strength of +99. In the event the strength of your aetherpool gear exceeds the maximum allowed by your current floor, its attributes will be synced.
Fully upgrading your aetherpool gear requires repeating floors. However, the chance that aetherpool level is unchanged upon opening a silver coffer increases as the difference between the floor containing the coffer and your current (non-synced) aetherpool level increases, i.e. it's not possible to farm floors 1-10 to maximize your stats for example. Failed attempts at enhancing aetherpool gear will show the message "Your aetherpool arm/armor remains unchanged." It is possible to maximize aetherpool levels by farming floors 51-60, which are also the most popular for leveling.
In patch 7.31, the following changes were made to allow players to progress faster:
- The minimum aetherpool gear strength enhancement from opening silver coffers has been increased from +1 to +5.
- The success rate of aetherpool gear strength enhancement when opening silver coffers before floor 101 has been increased.
- Enhancement to aetherpool gear strength when defeating a boss has been increased from +1 to +10.
- Aetherpool gear strength can only be enhanced up to a certain level before floor 51.
- Aetherpool gear strength is now guaranteed to be enhanced upon defeating bosses on every boss floor, and upon completing floor 200.
- Defeated enemies will now drop sustaining potions.
These changes allow players to much more easily clear floors 1-50 starting from scratch, even if solo. They were implemented because clearing floor 50 is a prerequisite for unlocking other deep dungeon.
Progress and syncing
Upon successfully finishing a Palace of the Dead run – completing all ten floors – any aetherpool progress and Accursed Hoards obtained are kept. Failing to complete the duty due to time running out or party KO, before finishing the tenth level, will result in lost progress to experience, attained aetherpool gear level, and Accursed Hoards obtained.
After level 1, your aetherpool gear will be synced if its rating is higher than four above your current level.
Gear durability and spiritbonding
Aetherpool gear is not subject to durability loss, nor can it gain spiritbond when inside the Palace of the Dead. This also applies to any gear equipped upon entering the instance.
Floor mechanics
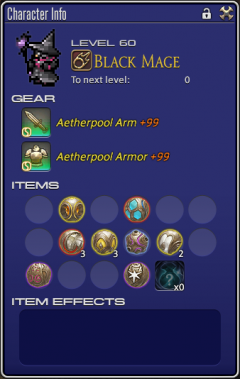
Inside Palace of the Dead, players are subject to various mechanics. The Character Panel is changed to show the player's current aetherpool gear level (arm and armor), current pomanders available, and active pomanders. The map is also changed to show each floor map; note that it is hidden at the start and it's uncovered as players progress throughout the rooms.
Map
Hitting M now shows the Palace of the Dead floor map along with a header UI.
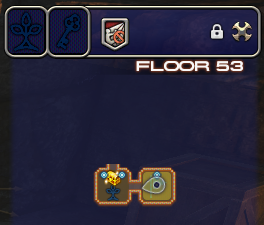
The map displays the following information:
- Header UI
- Cairn of Return activation status (more information below).
- Cairn of Passage activation status (more information below).
- Map enchantments — Each floor can have active enchantments on it; these change various aspects of gameplay such as quicker cast/recast time, or reduced party damage, etc. More information below.
- Floor level.
- Map UI
- Floor rooms — The rooms are uncovered as players visit them. The Pomander of Sight uncovers the whole floor at once.
- Each floor may contain additional information:
- Green flag — This is the initial room when you are first transported into the floor.
- Leaf-like icon — This icon denotes the Cairn of Return.
- Key-like icon — This icon denotes the Cairn of Passage.
- Golden chests — These are the Golden Coffers, which contain buffs in them (more information below).
- Silver chests — These are Silver Coffers; they offer a chance to strengthen your aetherpool gear (more information below).
- Bronze chests — These are Bronze Coffers; they contain items in them (more information below).
- PS: If a room contains a Golden Coffer, the map will always display only a golden chest icon there. This means such room still has a chance to have a Bronze/Silver Coffer. That may confuse groups that use a Pomander of Sight to reveal the whole floor, and are seeking Bronze/Silver Coffers.
Cairn of Return
The Cairn of Return is a magical resurrection device within Palace of the Dead. It serves to resurrect fallen party members. Similarly to the Cairn of Passage, in order to use it players need to kill creatures until it lights up. For groups with no jobs able to resurrect, it's very important to have the Cairn of Return activated in case someone dies.
The Cairn of Return indicates how far it is from activation by the header icon above the floor map.
Cairn of Passage

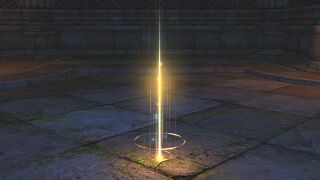
The Cairn of Passage is a magical transportation area within Palace of the Dead. It serves to teleport the group to the next floor. In order to activate it, players need to kill creatures in the floor until it lights up. Once it lights up, all party members must stand within the glowing area to teleport to the next floor. Note that the Cairn of Passage won't teleport the group if someone is in combat, therefore requiring to kill any aggroed creatures, or if someone is dead.
Cairn of Passage indicates how far it is from activation by the header icon above the floor map.
Character panel
Character panel is changed while inside Palace of the Dead, and displays information related to the current floor or set of floors.
This UI displays the following information:
- Level, class/job, and experience to the next PotD level.
- Aetherpool gear level — This is broken into arm (strength) and armor (defense), each can increase up to +99.
- Items — This is a list of all pomanders obtained in the current run, as well as accursed hoards acquired.
- Item effects — This is a list of all active pomander effects inside PotD.
Environment
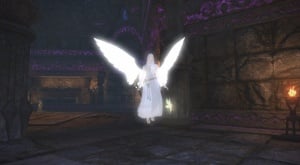
The Palace of the Dead is a dangerous place, and its danger increases at each floor the group descends. Floors are composed of rooms which contain mostly hostile creatures awaiting players to attack, but they may also hold treasures for those bold enough to venture forward. Each group of ten floors, called a floor set, is considered a PotD run, and beating all ten levels will complete the duty.
All creatures inside PotD are aggressive (with one exception). Creature density varies with each room and floor level, and as players descend to lower floor sets, some patrolling mobs will start roaming the rooms to catch players off guard. At every tenth level there will be a boss guarding the exit; beating the boss completes the floor set, and awards players all rewards obtained over the course of the duty.
Hostile coffers
These hostile coffers are random, and can be encountered in most levels:
- General Coffer Trap — Some coffers will become Mimics upon opening them. Which ones(bronze, silver or gold) depends on the floorset. From 1 to 30 they will be in bronze, 31 to 40 will be silver and 41+ will be gold. Mimics can apply the Pox debuff, which causes damage over time for 10 minutes, they should be killed quickly before having a chance to apply the debuff, though depending on the type of coffer this cast can be stunned or silenced.
- Silver Coffer Trap — This silver coffer looks like a regular one, but will explode upon opening, dealing about 80% of your max HP. It's recommended players don't attempt to continue walking until they have their health back. It's fairly common for groups to wipe because players chain Silver Coffer Traps with explosion traps, since both cause high AoE damage, instead of standing still to recover their health.
Floor enchantments
There is a chance for some floors to have one or more special effects, known as enchantments. Most enchantments are detrimental, but some are beneficial. Using a Pomander of Purity will remove all enchantments from the current floor.
Enchantments are divided in to three groups. It is possible to receive zero or one enchantment from each group upon spawning in a new floor, but not possible to receive more than one in the same group. Higher floors have a greater chance for more enchantments to spawn.
Group 1
| Enchantment | Description | Notes |
|---|---|---|
| Use of abilities is prohibited for all party members. | ||
| Accuracy of all party members is reduced. | This enchantment effectively causes all attacks to miss more often. | |
| Damage dealt by all party members is reduced. | ||
| Weaponskill recast time, spell recast time, and auto-attack delay for all party members are reduced. | ||
| Maximum HP of all party members is reduced. | ||
| Maximum HP and MP of all party members are increased. |
Group 2
| Enchantment | Description | Notes |
|---|---|---|
| HP regeneration for all party members is disabled. | Applies to out-of-combat passive HP regeneration. This also applies to HP regen of enemies | |
| Use of items (including pomanders) is prohibited for all party members. | Pomanders of Serenity are still usable (and remove the effect). | |
| Knockback and draw-in effects for both enemies and allies are disabled. | The Manticore transformation no longer one-shots enemies since that effect depends on the knockback. | |
| Use of the action Sprint is prohibited for all party members. | Also removes the Jog status. |
Group 3
| Enchantment | Description | Notes |
|---|---|---|
| Enemy movement speed is increased. Enemies also deal more damage while taking less. | The environment acquires a gloomy, pink-filled mist effect. |
Pomanders
Pomanders are items exclusive to Palace of the Dead acquired by opening Golden Treasure Coffers. Each pomander has an effect that may change party strengths, enemies around them, or the room itself. There are three pomanders which affect the next floor: Pomander of Affluence, Pomander of Alteration, and Pomander of Flight; all other pomanders take effect immediately for the current floor. For example, Pomander of Sight immediately reveals the current floor, while Pomander of Affluence will increase the number of treasure coffers for the next floor.
Pomanders are shared by the party and can have a maximum stack of 3 per type, any excess will be returned unless the pomander is used. All obtained and active pomanders are listed in the changed character panel.
Some pomanders are exclusive to Palace of the Dead and are not found in the other deep dungeons. These are bolded in the table below.
| Pomander | Description | Notes |
|---|---|---|
| Removes all traps from the current floor. | This pomander doesn't remove coffer traps. | |
| Reveals the current floor's map and the location of all hidden traps. | While all hidden traps become visible, they can still be triggered. Useful for finding the exit quickly. | |
| Increases damage dealt and HP recovered via healing magic by 30%. | This effect lasts for 8 minutes. | |
| Decreases damage received by 40%. | This effect lasts for 8 minutes. If solo, this pomander is required to survive fighting some enemies in higher floors. | |
| Increases the number of treasure coffers on the next floor. | Number of coffers is increased by 50%, rounded down. Useful if low on important pomanders. | |
| Decreases the number of enemies on the next floor. | This also decreased the amount of kills needed to open the Cairn of Passage on the next floor. Both the number of enemies per room and number of kills required are halved (rounded up). Synergizes with Affluence (fewer enemies in the way of coffers) but anti-synergistic with Alteration (fewer enemies affected). | |
| Changes the enemy occupying a random room on the next floor into a mimic or a mandragora. | Mandragoras are passive mobs that die instantly after being aggroed. Both Mimics and Mandragoras have a higher chance to drop chests. | |
| Removes the Pox status. | This is for the Accursed Pox debuff applied by Mimics. | |
| Increases the chance enemies on the current floor will drop treasure coffers. | Useful for restoring pomander stocks and if planning to kill many enemies in the current floor. | |
| Transforms all targets within range into a frog, imp, or chicken. | Polymorphs all enemies within a 20 yalm radius of the user into harmless creatures for 30 seconds, though they retain their normal HP and defense values and can still autoattack, the damage of these autoattacks depend on what the enemy turns into:
This effect generates a large amount of enmity for the user. | |
| Removes all enchantments from the current floor. | Use if current floor's enchantments cannot be handled and party does not have a Pomander of Rage. | |
| Reveals the current floor's hidden treasure. | The effect of this pomander is carried over until an Accursed Hoard is found, therefore it's not required to reactivate it unless its effect is consumed. | |
| Instantly raises the first party member to be KOed. | Cannot spawn on floors 181+. Useful if player is about to die during a solo run. | |
| Transforms user into a manticore. | Manticore's attack will instantly kill non-boss enemies. However, this will not instantly kill enemies when the floor has the Knockback Penalty enchantment. Useful for clearing a floor quickly, but be careful of traps. | |
| Transforms user into a succubus. | The Succubus transformation can cast Void Fire II, an AoE Fire spell that applies Vulnerability Up (to a max of 5 stacks). Useful for speeding up boss fights. | |
| Transforms user into Kuribu. | Appears only on floor 51+. Kuribu can cast Heavenly Judgement, a placeable AoE Light spell that stuns targets and deals greatly increased damage to undead. Particularly useful for floors 91-100 and 191-199. Prevents adds from resurrecting in the floor 100 boss. Use to kill the floor 140 boss quickly. |
Note: Some pomanders won't have any effect upon using more than one, this includes Pomander of Purity, Pomander of Safety, Pomander of Serenity, Pomander of Sight, Pomander of Steel, and Pomander of Strength. The last two will only refresh the applied buff.
Traps
As players progress, they will arrive on floors with traps scattered around the rooms that will be set off when walked across. These traps are invisible unless a player has a Pomander of Sight which can reveal their locations. At most one trap will spawn per room, and traps do not spawn in starting rooms. Using a Pomander of Safety will remove all traps in the current floor.
As a general rule, the best way to prevent accidentally stepping on traps is to hug the walls, but there are some room layouts that may have traps by the wall.
| Trap | Effect | Notes |
|---|---|---|
 Enfeebling Trap Enfeebling Trap |
Causes Enervation status. | Enervation decreases damage dealt by 20% and increases damage taken by 30% for 60 seconds. This cannot be dispelled with Esuna. |
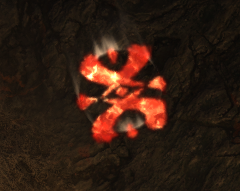 Impeding Trap Impeding Trap |
Causes Pacify and Silence statuses (30 seconds). Pets and enemies are also affected by this. | These can be dispelled with Esuna. |
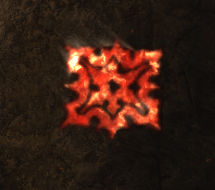 Landmine Landmine |
Causes approximately 80% of current HP damage to everything in range (including enemies) when stepped on. | Since this does damage depending on your current HP, this trap alone can never kill you, unlike the silver coffer trap which does damage of the player's max HP. |
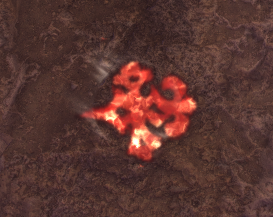 Luring Trap Luring Trap |
Spawns three random enemies from the floor to attack you. | All enemies will aggro on the person who stepped on the trap after a few seconds. |
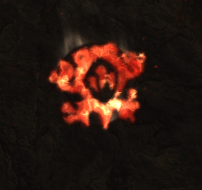 Toading Trap Toading Trap |
Causes Toad status for 20 seconds, transforming the player into a toad. | Toad debuff decreases your maximum HP by 30% and prevents you from taking any action; this includes sending a pet to attack, and even opening treasure coffers. There are a few enemies (e.g. snakes) that have insta-kill mechanics when the player is transformed. |
Treasure coffers
Treasure coffers are special chests scattered around rooms with each floor inside Palace of the Dead. They contain varied items and each type works differently:
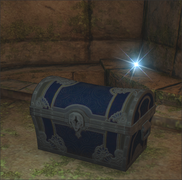
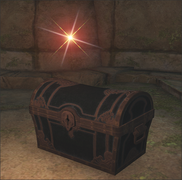
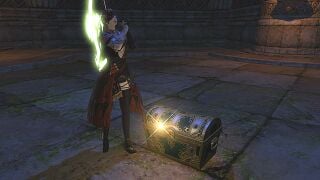
- Golden Coffers: These coffers yield pomanders.
- Silver Coffers: These coffers strengthen aetherpool gear, but may occasionally trigger an explosion trap.
- Bronze Coffers: These coffers will always offer an item, including a Max-Potion , a Gelmorran Potsherd or a Phoenix Down.
All three types can turn into Mimics depending on the floorset.
-
Golden Coffer
-
Silver Coffer
-
Bronze Coffer
The Accursed Hoard
While exploring the Palace of the Dead, players will, on occasion, discover hidden treasure known as the Accursed Hoard. These items are counted on the character panel as players unveil their respective treasure coffers. Since these coffers are hidden by default, players can discover them by remaining stationary for a brief period of time at various locations, or they may activate a Pomander of Intuition, which reveals them. Upon using the aforementioned pomander players will have a notification stating whether there's an Accursed Hoard in the current floor, and can then seek out a golden glowing light to reveal the coffer.
Upon saving progress and exiting the Palace of the Dead, all party members are granted the same number of Accursed Hoards which will translate into a trimmed sack item. Players can take these items to the Expedition Bishop at Quarrymill in the South Shroud (x25.1,y20.6) to have it appraised and discover what lies within.
-
Accursed Hoard Coffer.
-
A golden glowing light signals there's an Accursed Hoard Coffer at such location.
Contents
Depending on the Palace of the Dead's level, Accursed Hoards are translated into different trimmed sacks. Each sack contains varied items which range from fireworks to materia or even minions and mounts:
- Bronze-trimmed Sacks — Floors 1-50
- Iron-trimmed Sacks — Floors 51-100
- Silver-trimmed Sacks — Floors 101-150
- Gold-trimmed Sacks — Floors 151-200
Appraising these sacks at the Expedition Bishop will unveil their contents. If the outer ring flashes it will be a rare treasure, if the outer ring does not flash it will be a normal treasure.
Floors
- Floors 1-10
- Floors 11-20
- Floors 21-30
- Floors 31-40
- Floors 41-50
- Floors 51-60 (preferred for
 experience)
 - Floors 61-70
- Floors 71-80
- Floors 81-90
- Floors 91-100
- Floors 101-110
- Floors 111-120
- Floors 121-130
- Floors 131-140
- Floors 141-150
- Floors 151-160
- Floors 161-170
- Floors 171-180
- Floors 181-190
- Floors 191-200
Each floor has all mechanics mentioned before; what varies among each floor set are enemies, patrolling enemies, insta-kill enemies, enchantments, trap density and bosses. Players can also obtain better trimmed sacks at each 50 floors, as well as a guaranteed Gelmorran Potsherd from level 100 onwards.
Rewards
Floor 10
Under Level 50
 Experience
 1,000 Gil
Level 50-99
 Experience
 1,000 Gil
 10 Allagan Tomestones of Poetics
Level 100
 Experience
 1,000 Gil
 10 Allagan Tomestones of Poetics
 20 Allagan Tomestones of Mathematics
 5 Allagan Tomestones of Mnemonics
Floor 20
Under Level 50
 Experience
 1,500 Gil
Level 50-99
 Experience
 1,500 Gil
 20 Allagan Tomestones of Poetics
Level 100
 1,500 Gil
 20 Allagan Tomestones of Poetics
 40 Allagan Tomestones of Mathematics
 20 Allagan Tomestones of Mnemonics
Floor 30
Under Level 50
 Experience
 2,000 Gil
Level 50-99
 Experience
 2,000 Gil
 30 Allagan Tomestones of Poetics
Level 100
 2,000 Gil
 30 Allagan Tomestones of Poetics
 60 Allagan Tomestones of Mathematics
 30 Allagan Tomestones of Mnemonics
Floor 40
Under Level 50
 Experience
 3,000 Gil
Level 50-99
 Experience
 3,000 Gil
 50 Allagan Tomestones of Poetics
Level 100
 3,000 Gil
 30 Allagan Tomestones of Poetics
 60 Allagan Tomestones of Mathematics
 30 Allagan Tomestones of Mnemonics
Floor 50
Under Level 50
 Experience
 3,000 Gil
Level 50-99
 Experience
 3,000 Gil
 50 Allagan Tomestones of Poetics
Level 100
 3,000 Gil
 50 Allagan Tomestones of Poetics
 100 Allagan Tomestones of Mathematics
 50 Allagan Tomestones of Mnemonics
Floor 60
Under Level 50
 Experience
 2,000 Gil
Level 50-99
 Experience
 2,000 Gil
 30 Allagan Tomestones of Poetics
Level 100
 2,000 Gil
 30 Allagan Tomestones of Poetics
 60 Allagan Tomestones of Mathematics
 30 Allagan Tomestones of Mnemonics
Floor 70
Under Level 50
 Experience
 2,000 Gil
Level 50-99
 Experience
 2,000 Gil
 30 Allagan Tomestones of Poetics
Level 100
 2,000 Gil
 30 Allagan Tomestones of Poetics
 60 Allagan Tomestones of Mathematics
 15 Allagan Tomestones of Mnemonics
Floor 80
Under Level 50
 Experience
 2,000 Gil
Level 50-99
 Experience
 2,000 Gil
 30 Allagan Tomestones of Poetics
Level 100
 2,000 Gil
 30 Allagan Tomestones of Poetics
 60 Allagan Tomestones of Mathematics
 15 Allagan Tomestones of Mnemonics
Floor 90
Under Level 50
 Experience
 2,000 Gil
Level 50-99
 Experience
 2,000 Gil
 30 Allagan Tomestones of Poetics
Level 100
 2,000 Gil
 30 Allagan Tomestones of Poetics
 60 Allagan Tomestones of Mathematics
 30 Allagan Tomestones of Mnemonics
Floor 100
Under Level 50
 Experience
 3,000 Gil
Level 50-99
 Experience
 3,000 Gil
 50 Allagan Tomestones of Poetics
Level 100
 3,000 Gil
 50 Allagan Tomestones of Poetics
 100 Allagan Tomestones of Mathematics
 50 Allagan Tomestones of Mnemonics
Floor 110 and Onwards
Under Level 50
 Experience
 2,000 Gil
Level 50-99
 Experience
 2,000 Gil
 30 Allagan Tomestones of Poetics
Level 100
 2,000 Gil
 30 Allagan Tomestones of Poetics
 60 Allagan Tomestones of Mathematics
 30 Allagan Tomestones of Mnemonics
If you have reached floor 50 or 100
A Gelmorran Potsherd will be awarded. This item can be traded to the NPC E-Una-Kotor in the South Shroud at Quarrymill.
If you have reached floor 200
A Firecrest or a Glass Pumpkin will be awarded. This item can be traded to the NPC E-Una-Kotor in the South Shroud at Quarrymill.
Aetherpool weapons
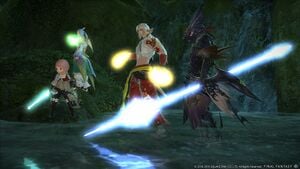
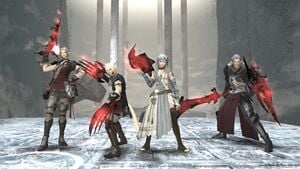
If you have strengthened your aetherpool arm and aetherpool armor to +10 in addition to clearing floor 50 of the Palace of the Dead, you can receive an Aetherpool Grip.
Receiving a grip will reduce the strength of your aetherpool arm and armor by 10 each.
3 grips can be exchanged for a Padjali Weapon of your choosing by speaking with the NPC E-Una-Kotor in the South Shroud.
After clearing floor 100 of the Palace of the Dead, a Padjali Weapon + 6 grips can be exchanged to enhance it into a Kinna Weapon.
Tips and tricks
The tips and tricks below have been collected from players and are intended to make Palace of the Dead runs safer and more productive:
- Try and stay close to your group to avoid being wiped alone.
- When crossing rooms, walk close to the walls, when doing this properly you will avoid all traps(with a few exception where they are specifically against the wall, though these are more on the higher floors, e.g. 150+)
- Save pomanders instead of using them in any situation, unless your party is capped at three pomanders. Some guidelines are as following:
- Don't bother with Silver Chests if everybody in the party has +99/+99 Aetherpool Gear as these chests may trigger a bomb.
- Avoid opening Silver Chests when either you or a nearby party member is below 80% Max HP, as that person will die.
- Healers are advised to aid a member suffering from Pox by casting a regen on them if possible.
- If a party member triggers a Lure Trap, on higher floors it can be advised to let the member that triggered it die, resetting the enemies spawned by the trap.
- The Landmine trap can be very useful to take out a bunch of enemies all at once, especially on Tanks since they can use their invulnerabilities. Other classes can use the
 Pomander of Witching to aid with this. Though this can be very risky!
Notes
There are three other deep dungeons currently available in the game. These broadly share the same fundamental rules and mechanics with Palace of the Dead, though there are a few exceptions. These Deep Dungeons are:
 Heaven-on-High, introduced with Patch 4.35 of Stormblood
 Eureka Orthos, introduced with Patch 6.35 of Endwalker
 Pilgrim's Traverse, introduced with Patch 7.35 of Dawntrail
Achievements
The Palace of the Dead is associated with the following achievements:
| Name | Points | Task | Reward | Patch |
|---|---|---|---|---|
| In Too Deep I | 5 | Clear the 10th floor of the Palace of the Dead. | - | 3.35 |
| In Too Deep II | 5 | Clear the 20th floor of the Palace of the Dead. | - | 3.35 |
| In Too Deep III | 5 | Clear the 30th floor of the Palace of the Dead. | - | 3.35 |
| In Too Deep IV | 5 | Clear the 40th floor of the Palace of the Dead. | - | 3.35 |
| In Too Deep V | 10 | Clear the 50th floor of the Palace of the Dead. | - | 3.35 |
| In Too Deep VI | 10 | Clear the 100th floor of the Palace of the Dead. | 3.45 | |
| In Too Deep VII | 10 | Clear the 150th floor of the Palace of the Dead. | - | 3.45 |
| In Too Deep VIII | 20 | Clear the 200th floor of the Palace of the Dead. | - | 3.45 |
| Pal-less Palace I | 10 | Clear the 1st through the 50th floors of the Palace of the Dead solo and record a score on floor 51 or below. | - | 3.45 |
| Pal-less Palace II | 10 | Clear the 1st through the 100th floors of the Palace of the Dead solo and record a score on floor 101 or below. | 3.45 | |
| Pal-less Palace III | 20 | Clear the 1st through the 200th floors of the Palace of the Dead solo. | 4.0 | |
| For the Hoard I | 5 | Discover a piece of the Accursed Hoard. | - | 3.4 |
| For the Hoard II | 5 | Discover 100 pieces of the Accursed Hoard. | - | 3.4 |
| For the Hoard III | 10 | Discover 1,000 pieces of the Accursed Hoard. | 3.4 | |
| For the Hoard IV | 20 | Discover 5,000 pieces of the Accursed Hoard. | - | 3.4 |
| For the Hoard V | 20 | Discover 10,000 pieces of the Accursed Hoard. | 4.35 | |
| For the Hoard VI | 20 | Discover 20,000 pieces of the Accursed Hoard. | 6.35 | |
| For the Hoard VII | 20 | Discover 30,000 pieces of the Accursed Hoard. | 7.35 | |
| The Trouble with Buried I | 10 | Discover a piece of the Accursed Hoard without using a pomander of intuition. | - | 3.4 |
| The Trouble with Buried II | 20 | Discover 100 pieces of the Accursed Hoard without using a pomander of intuition. | 3.4 | |
| Aetherpool Party: Sword & Shield | 10 | Obtain a Padjali blade and a Padjali shield. | - | 3.35 |
| Aetherpool Party: Knuckles | 10 | Obtain a pair of Padjali knuckles. | - | 3.35 |
| Aetherpool Party: Axe | 10 | Obtain a Padjali axe. | - | 3.35 |
| Aetherpool Party: Spear | 10 | Obtain a Padjali spear. | - | 3.35 |
| Aetherpool Party: Bow | 10 | Obtain a Padjali longbow. | - | 3.35 |
| Aetherpool Party: Daggers | 10 | Obtain a pair of Padjali daggers. | - | 3.35 |
| Aetherpool Party: Cane | 10 | Obtain a Padjali cane. | - | 3.35 |
| Aetherpool Party: Rod | 10 | Obtain a Padjali rod. | - | 3.35 |
| Aetherpool Party: Grimoire | 10 | Obtain a Padjali grimoire. | - | 3.35 |
| Aetherpool Party: Codex | 10 | Obtain a Padjali codex. | - | 3.35 |
| Aetherpool Party: Greatsword | 10 | Obtain a Padjali greatsword. | - | 3.35 |
| Aetherpool Party: Revolver | 10 | Obtain a Padjali revolver. | - | 3.35 |
| Aetherpool Party: Astrometer | 10 | Obtain a Padjali astrometer. | - | 3.35 |
| Aetherpool Party: Katana | 10 | Obtain a Padjali katana. | - | 4.0 |
| Aetherpool Party: Rapier | 10 | Obtain a Padjali rapier. | - | 4.0 |
| Aetherpool Party: Gunblade | 10 | Obtain a Padjali gunblade. | - | 5.0 |
| Aetherpool Party: War Quoits | 10 | Obtain a pair of Padjali war quoits. | - | 5.0 |
| Aetherpool Party: War Scythe | 10 | Obtain a Padjali war scythe. | - | 6.0 |
| Aetherpool Party: Milpreves | 10 | Obtain an array of Padjali milpreves. | - | 6.0 |
| Aetherpool Party: Twinfangs | 10 | Obtain a pair of Padjali twinfangs. | - | 7.0 |
| Aetherpool Party: Fan Brush | 10 | Obtain a Padjali fan brush. | - | 7.0 |
| Some Kinna Wonderful | 10 | Obtain a piece of kinna gear. | 3.45 |
Music
Floors 1-49
| Section | Theme |
|---|---|
| Floors 1-3 | The Merry Wanderer Waltz |
| Floors 47-49 | My Soul to Keep |
| Random 3-floorset | Tenacity |
| Random 3-floorset | The Promise of Plunder |
| Random 3-floorset | Engage |
| Random 3-floorset | A Fell Air Falleth |
| Random 3-floorset | Breaking Boundaries |
| Random 3-floorset | The Dark's Kiss |
| Random 3-floorset | The Emperor's Wont |
| Random 3-floorset | Spiral |
| Random 3-floorset | The Scars of Battle |
| Random 3-floorset | Birds of a Feather |
| Random 3-floorset | Horizons Calling |
| Random 3-floorset | Dark Vows |
| Random 3-floorset | The War Room |
| Random 3-floorset | A Light in the Storm |
| Random 3-floorset | Riptide |
| Random 3-floorset | Forgotten by the Sun |
| Random 3-floorset | The Warrens |
| Random 3-floorset | Aftermath |
| Random 3-floorset | Tricksome |
| Random 3-floorset | Silver Tears |
| Random 3-floorset | Emerald Labyrinth |
| Random 3-floorset | Enraptured |
| Random 3-floorset | Tears for Mor Dhona |
Floors 51-99
| Section | Theme |
|---|---|
| Floors 97-99 | Fog of Phantom |
| Random 3-floorset | Descent |
| Random 3-floorset | Like a Summer Rain |
| Random 3-floorset | Jewel |
| Random 3-floorset | Slumber Eternal |
| Random 3-floorset | Roar of the Wyrm |
| Random 3-floorset | Heavy Rain |
| Random 3-floorset | Ink Long Dry |
| Random 3-floorset | Poison Ivy |
| Random 3-floorset | Unbreakable |
| Random 3-floorset | Down the Up Staircase |
| Random 3-floorset | No Sound, No Scutter |
| Random 3-floorset | The Ancient City |
| Random 3-floorset | Holy Consult |
| Random 3-floorset | Apologies |
| Random 3-floorset | The Gauntlet |
| Random 3-floorset | Hyper Rainbow Z |
| Random 3-floorset | Up at Dawn |
| Random 3-floorset | Grounded |
| Random 3-floorset | Bibliophobia |
| Random 3-floorset | He Who Continues the Attack |
| Random 3-floorset | Quicksand |
Floors 101-199
All above random 3-floorset tracks, including Notice of Death.
Bosses
| Section | Theme |
|---|---|
| Floors 10-40 Bosses | Brothers in Arms |
| Floor 50 Boss | Blackbosom |
| Floors 60-90 Bosses | Ominous Prognisticks |
| Floor 100 Boss | Blasphemous Experiment |
| Floors 110-190 Bosses | Revenge Twofold |
Lore
A Maddening Labyrinth
The entrance to a labyrinthine dungeon was uncovered in the subterranean city of Gelmorra, deep within a forgotten corner of Issom-Har. An irresistible fog of enervation drains the vigor of those who set foot inside its maddening halls, and repeated excursions have failed to map its seemingly inconstant architecture. After hearing chilling accounts of spectral denizens, locals took to whispering of a “Palace of the Dead,” and the Wood Wailers turned to adventurers to assist with laying bare its secrets.
Edda Blackbosom
A girl thought to be Edda, a missing adventurer, has been spotted within the Palace of the Dead. Suspected of dabbling in necromancy, the erstwhile conjurer may even be involved in birthing the horrors of the haunted labyrinth. Another theory suggests that she may already be dead, and, in the same manner as the other spectral denizens, has become a pawn to some malevolent power.
Nybeth Obdilord
According to the testimony of an intrepid adventurer, this undead necromancer was encountered in the depths of the Palace of the Dead. Nybeth Obdilord claimed himself the master of the shifting maze, and spoke of pursuing the secrets of immortality. Beyond this, however, little is known of his origins or his purpose.
More
Labeled a “Cairn of Return” by adventurers, this arcane device bears the holy symbol of Nophica, and is thus likely an artifact of Gelmorra. The artifact’s construction, however, serves the purpose of a mundane sconce and nothing more—some suggest that any eldritch properties it now possesses were imbued by an enchantment originating from without the ruins.
References
- ↑ Or "roguelikelike", according to the standards of "How Roguelike is your game"
- ↑ Palace of the Dead (floors 51-60) EXP Chart (patch 6.11)

