The Sil'dihn Subterrane
The Sil'dihn Subterrane

- Level
- 90 (Sync: 90)
- Item Level
- 575 (Sync: 635)
- Difficulty
- Normal
- Party size
- Flexible
1-4 man • 1-4
- Unsyncing
- Not Allowed
- Time limit
- 90 minutes
- Phoenix Down
- Available
- Duty Finder
- V&C Dungeon Finder
- Tomestones
 15
15 - Req. quest
- A Key to the Past
- Entrance
- Central Thanalan (X:16.8, Y:23.6)
- Region
- Thanalan
- Patch
- 6.25
- Links
- GT TC
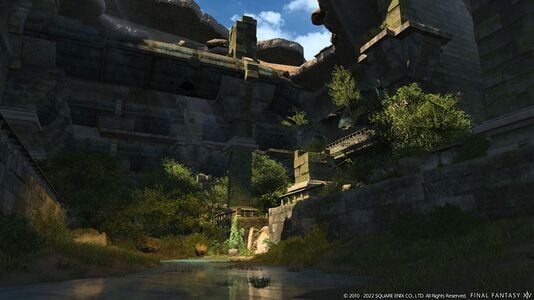
An extensive warren of tunnels and waterways stretches beneath the barren lands of Thanalan, but none come now to marvel at this remnant of fallen Sil'dih. Its memories lie undisturbed, festering silently in the dark and the damp. Yet not for much longer. You have come at the personal behest of Nanamo Ul Namo, and together will you throw open the gate to the desert nation's troubled past.
— In-game description
The Sil'dihn Subterrane is a level 90 variant dungeon introduced in patch 6.25 with Endwalker.
The dungeon's rewards are cosmetic in nature: the Noir Glamour Set can be acquired for the currency obtained from 24 runs of the dungeon, while the Silkie mount is obtained for completing all 12 Sil'dih Survey Records (i.e., different endings depending on the dungeon mechanisms activated and paths taken).
Objectives
The party may unlock up to one entry in the Sil'dih Survey Record per instance.
| # | Icon | Name | Path | Solution |
|---|---|---|---|---|
| 1 | Whom the Silkie Serves | Left | When reaching the two eyes puzzle, guess correctly (blue sack to the right of the north door, and yellow sack in the south-east most corner). Once through the teleporter, defeat the enemies and then open the door hidden behind the rubble before Nanamo opens the gate. | |
| 2 | Pride and Acceptance | Left | When reaching the two eyes puzzle, guess correctly (blue sack to the right of the north door, and yellow sack in the south-east most corner). Let Nanamo open the gate uninterrupted. | |
| 3 | A Spot in the Sunlight | Left | When reaching the two eyes puzzle, fail it. Proceed through to the next room, hitting all the cotton spores before/during defeating the enemies. | |
| 4 | A Key Memory | Left | When reaching the two eyes puzzle, fail it. Proceed through the dungeon as normal, avoiding all of the cotton spores. | |
| 5 | In Father's Stead | Right | Take a left on the lift, and select the first option ("The blessed spark") when at the door blocking your path. | |
| 6 | Ul'dah's Sin to Bear | Right | Take a left on the lift, and select the second option ("The sacred fire") when at the door blocking your path. | |
| 7 | To Learn More of Myrrh | Right | After the first boss, take the lift to the right and kill the drakes from largest to smallest (father, mother, brother, sister, drakeling). After killing the wraiths, interact with the Myrrh Incense Burner on the right side of the wraith room. Interact with the sarcophagus and kill the boss. | |
| 8 | Ul'dah and Sil'dih | Middle | Fight the final boss after failing the scale puzzle and use the right lever. | |
| 9 | Raising the Flag | Middle | Fight the final boss after failing the scale puzzle and use the left lever. | |
| 10 | My Mother's Eyes | Middle | Put the correct totem on the scales (Helm on the left, Fruit on the Right), then at the next chamber, click the Nald Statue. | |
| 11 | The Thorne Legacy | Middle | Put the correct totem on the scales (Helm on the left, Fruit on the Right), then at the next chamber, click the Thal Statue. | |
| 12 | In Parchment We Trust | Right | This is the path to Thorne Knight. After the first boss, take the lift to the right and kill the drakes from largest to smallest (father, mother, brother, sister, drakeling). After killing the wraiths, interact with the Myrrh Incense Burner on the right side of the wraith room. Once you reach the sarcophagus, target it, then use the emotes |
Enemies
Left Path
- Aqueduct Bat
- Aqueduct Uragnite
- Aqueduct Eft
- Aqueduct Pudding
- Aqueduct Mossling
- Aqueduct Odqan
- Aqueduct Genomos
- Aqueduct Leafkin
- Aqueduct Adamantoise
- Aqueduct Golem
- Aqueduct Snurble
- Aqueduct Fluturini
- Aqueduct Goobbue
- Aqueduct Leshy
Middle Path
- Water Sprite
- Aqueduct Focalor
- Aqueduct Sarcosuchus
- Aqueduct Elbst
- Aqueduct Gelatin
- Sil'dihn Python
- Sil'dihn Dhruva
- Sil'dihn Urolith
- Sil'dihn Dullahan
- Sil'dihn Golem
- Sil'dihn Hollow
- Sil'dihn Visage
Right Path
- Aqueduct Goosefish
- Aqueduct Wamoura
- Aqueduct Gigantoad
- Aqueduct Slug
- Aqueduct Hecteyes
- Aqueduct Ameretat
- Forgotten Cliffmole
- Forgotten Sabotender
- Forgotten Campeador
- Forgotten Phoebad
- Forgotten Spider
- Forgotten Dhara
- Forgotten Drakefather
- Forgotten Drakemother
- Forgotten Drakebrother
- Forgotten Drakesister
- Forgotten Drakeling
- Forgotten Revenant
- Forgotten Wraith
Bosses
Failing any boss mechanic will result in a ![]() Vulnerability Up debuff.
Vulnerability Up debuff.
First boss of all paths.
- Colossal Strike: Tankbuster.
- Exploding Catapult: Light damage to the entire party and summons several explosive barrels with either a red "burst" design on its top, or a blue "ring" design. The red-topped barrels explode in a large circle around them, while the blue-topped ones explode in a large ring around them.
- Colossal Slam: Cone attack in the direction of a random player.
- Subterranean Shudder: Has various effects depending on which path the party has taken and what decision was made before encountering Geryon.
- Left Path: There will be four drains on both the east and west sides of the arena. The choice of whether or not to clear the pipes affects the attack.
- Cleared Drain: One of the drains will light up cyan, causing water to spill out and knock back players from its location.
- Clogged Drain: Two to four of the drains will light up red, causing mud to spill out and form damaging puddles on the ground for a short duration.
- Center Path: The direction the Bulkhead Handle is turned determines the effect of the attack.
- Turn Left: To the east and west of the arena are vents with fans. One set will begin to spin, indicating that players will be dragged across the arena toward that side.
- Turn Right: To the east and west of the arena are platforms. Boulders will be carried onto them, then roll across the arena in a straight line during the next Exploding Catapult cast, dealing massive damage to players they crush.
- Right Path: Mechanic is based on what fluid bursts from the pipe prior to the boss and is completely random.
- Water: Two opposite quadrants of the arena churn, followed by the other two. The quadrants explode for damage in the order they began churning.
- Ceruleum: Two adjacent quadrants of the arena explode, dealing damage and creating a puddle on them that deals damage over time.
- Left Path: There will be four drains on both the east and west sides of the arena. The choice of whether or not to clear the pipes affects the attack.
- Colossal Launch: Geryon slams the ground, dealing light damage to the party and causing all explosive barrels to flip over, turning red to blue and vice versa.
- Colossal Swing: Geryon jumps to the center of the arena and swings in a 180 degree arc in a random cardinal direction.
- Colossal Charge: Geryon jumps to the north or south of the arena and creates an energy shield that he angles to the east or west. He then charges across the arena in a line, knocking back players and barrels in his path to the indicated direction. A barrel pushed by this attack will have its explosion radius overlap with the safe area of any blue barrels on that side.
- Gigantomill: Geryon moves to the center of the arena and launches multiple cross AoEs while rotating clockwise or counterclockwise.
 Soapy Sidekick: Silkie
Second boss of the left path.
- Total Wash: Unavoidable roomwide AoE that deals high damage.
- Squeaky Right/Left: The boss will attack the arena twice in a conal AoE in front of it, followed by an attack that hits two thirds of the arena based on the side of the arena indicated by the attack, with a safe zone in the opposite third of the arena.
- Chilling Suds: The boss coats its tail in ice and fires four line AoEs in a cross pattern after casting Soap's Up.
- Bracing Suds: The boss coats its tail in wind and fires an arena wide AoE with a safe zone within its hitbox after casting Soap's Up.
- Soap's Up: Fires an attack pattern based on the prior Suds spell.
- Slippery Soap: The boss will slide in a short AoE and immediately fire whichever Suds spell was previously stocked.
- Spot Remover: The boss summons several water puddles around the arena that inflict a heavy Dropsy debuff if the player enters them.
- Dust Bluster: The boss fires a large knockback from the center of the arena that will push players to the edge of the arena.
- Fresh Puff: The boss summons three non targetable "Puffs" around the arena and inflicts them with Chilling Suds.
- Soaping Spree: The Puffs and the boss fire the Chilling Suds pattern from their hitboxes, creating small safe zones around the arena.
- Carpet Beater: A high damage tankbuster that hits the player with the highest enmity.
If the door puzzle was solved correctly and the Ewer was discovered:
- Eastern Ewers: Several large Ewers appear on the edge of the arena and fire water cannons while slowly moving from one edge of the arena to the other, dealing high damage if they come in contact with a player.
If the door puzzle was solved correctly and the Ewer was not discovered:
- Wash Out: A massive jet of water appears on one edge of the arena and fires after a short delay, knocking players to the other edge of the arena.
If the door puzzle was not solved correctly and the flowers were touched:
- Silken Puff/Sweep: Several non-damaging puddles appear on the arena, with Puffs appearing on the edge of the arena. When the Puffs reach the puddles, they are delayed, creating an opening for players to move to a safe area out of the line of the Puffs.
If the door puzzle was not solved correctly and the flowers were left alone:
- Fresh Puff/Puff and Tumble: The boss summons a line of Puffs on the edge of the arena, which move to the other side, firing several AoEs as they go. Players must time their movements to move between the AoEs firing to avoid damage.
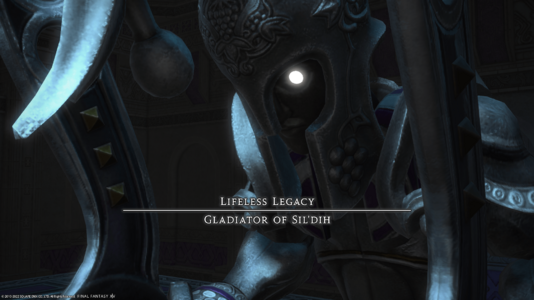
Lifeless Legacy: Gladiator of Sil'dih
Second boss of the middle path.
- Flash of Steel: Unavoidable heavy damage roomwide AoE.
- Ring of Might: The boss will move to the center of the arena. A gauge will appear over its head, with three circles on the floor. The gauge above the boss will fill to one of three lines with a color corresponding to one of the circles on the floor. Once the cast finishes, the boss will fire an AoE in accordance with how full the gauge was. Shortly after, the remaining arena will be hit by a second AoE.
- Sculptor's Passion: The boss will face a player and fire an untelegraphed, high damage line AoE.
- Rush of Might: The boss will move to a corner of the room, charging the same gauge from Ring of Might, charging forward to the corresponding line and firing an AoE that fills the arena, before turning around and firing a second AoE behind it.
- Wrath of Ruin: Several orbs are summoned to each edge of the arena, firing line AoEs in sets of two, creating several small safe zones across the arena.
- Sundered Remains: An AoE is dropped in the center of the arena, followed by several AoEs in a clockwise pattern, filling the arena. After a short delay, the AoEs will detonate in the order they appeared in, starting with the center.
- Mighty Smite: Heavy damage tankbuster that targets the player with the highest enmity.
If the pedestal was not balanced and the left lever was thrown:
- Landing/Shattering Steel: Four proximity markers are placed at the corners of the arena, with large boulders landing on the markers. three of the four boulders will be cracked, and will shatter when the boss casts Shattering Steel, leaving the player behind them unprotected. Players must stand behind the uncracked boulder to break the boss's line of sight, then move away from the boulder after the attack, as it will explode.
If the pedestal was not balanced and the right lever was thrown:
- Biting Wind/Shattering Steel: four air vents open on the floor of the arena, with one firing a large green arrow into the sky. When the boss begins casting Shattering Steel, players must step onto the vent with the arrow to be launched into the air, taking light damage with good timing, in order to receive the Liftoff buff and have it last long enough to avoid the boss's attack.
If the pedestal was balanced and the Statue of Thal was selected:
- Hateful Visage: Two statues are summoned to two corners of the arena, and fire large line AoEs across the arena. the statues will then both rotate either clockwise or counterclockwise roughly thirty degrees and fire again. This attack will repeat three times until the statues have rotated a full ninety degrees.
If the pedestal was balanced and the Statue of Nald was selected:
- Hateful Visage: The boss summons several two-faced statues around the arena, with one face of each statue firing an AoE that fills a quarter of the arena. Players must locate the area of the arena where none of the faces are firing an AoE to avoid damage.
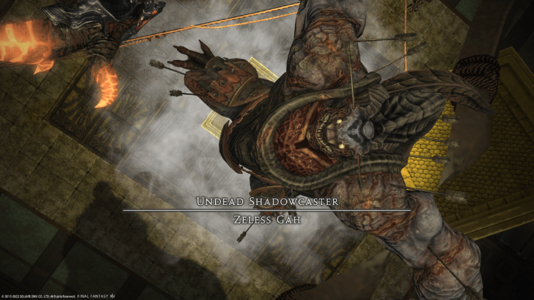
Undead Shadowcaster: Zeless Gah
Second boss of the right path. Please note that the arena is surrounded by a ring of fire that inflicts a high damage Burns debuff.
- Show of Strength: Unavoidable roomwide AoE that deals high damage and activates the fire border around the edge of the arena.
- Infern Gale: One of the scepters around the arena fires a large knockback.
- Firesteel Fracture: A high damage tankbuster that targets the player with the highest enmity.
- Infern Ward: four scepters appear and fire a persistent line AoE that knock the player back slightly and inflict a Stun debuff if the player touches them.
- Infern Brand: The boss summons several fire orbs around the arena that explode after a short delay, creating small safe zones around the arena.
- Cast Shadow: The boss fires two sets of four line AoEs with a short delay between each set, dealing high damage if the player is hit.
- Cryptic Portal: The boss will place a portal underneath a fire orb, which is tethered to a portal. After a short cast the orb is moved to the portal. There is a second variation where the portal is swung to the other side of the fire orb then warped. Players touching these portals will also be warped.
- Pure Fire: A large AoE is summoned under a player and explodes shortly after.
If the incorrect response is given at the stone door:
- The boss will cast both Infern Gale and the fire orb version of Infern Brand.
If the correct response is given at the stone door:
- Infern Brand: The fire orbs are replaced with large fire panels that grow after a short time fire large line AoEs across the arena. The boss will also not cast Infern Gale or Infern Well.
If the rites are not performed at the Sarcophagus but the incense burner was collected:
- Infern Well: One of the scepters fire a pull in marker, then fires a large point-blank AoE, dealing high damage if players are pulled into it.
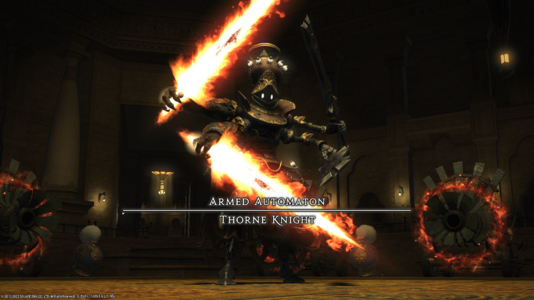
Armed Automaton: Thorne Knight
Secret second boss of the right path, path 12.
- Spring to Life: The boss tethers to the cannons on one side of the arena, and the mammets on another. After a short cast, both will fire line AoEs across the arena, creating safe zones.
- Blistering Blow: High damage tankbuster that targets the player with the highest enmity.
- Fore Honor: The boss fires a forward facing untelegraphed AoE that deals high damage.
- Slashburn: The boss fires a large red fire line AoE and two massive blue fire cone AoEs, each in a different direction. There is a variant of this attack that tethers the swords together, and switches the location of the AoEs, requiring players to move to the correct safe zone in anticipation of the swap. This can be dodged easily by standing on the midline of the red portion of the attack, as you will then be standing between the blue AoEs once the positions swap.
- Signal Flare: The boss drops three sets of lines of large AoEs across the arena that will detonate after the arena is filled in the order they appeared.
- Blaze of Glory: Two large fire orbs are summoned to the arena that fire large line AoEs in a cross pattern. This is paired with either Spring to Life or Slashburn.
- Cogwheel: Unavoidable roomwide AoE that deals high damage.
Loot
The Sil'dihn Subterrane uses personal loot, so players have to be sure to click and loot each chest themselves. At the start of the dungeon, if the party chooses the same door that the NPC suggests, an additional treasure coffer will spawn on the path.
| Name | Type | Item Level | Rarity | Quantity |
|---|---|---|---|---|
| Sil'dihn Potsherd | Other | 1 | Basic | 1 |
| Name | Type | Item Level | Rarity | Quantity |
|---|---|---|---|---|
| Sil'dihn Potsherd | Other | 1 | Basic | 2 |
| Name | Type | Item Level | Rarity | Quantity |
|---|---|---|---|---|
| Gladiator of Sil'dih Card | Triple Triad Card | N/A | 1 | |
| Sil'dihn Potsherd | Other | 1 | Basic | 2 |
| Name | Type | Item Level | Rarity | Quantity |
|---|---|---|---|---|
| Shadowcaster Zeless Gah Card | Triple Triad Card | N/A | 1 | |
| Sil'dihn Potsherd | Other | 1 | Basic | 2 |
| Name | Type | Item Level | Rarity | Quantity |
|---|---|---|---|---|
| Sil'dihn Potsherd | Other | 1 | Basic | 2 |
| Thorne Knight Card | Triple Triad Card | N/A | 1 |
Treasure Coffers
 Treasure Coffer
| Name | Type | Item Level | Rarity | Quantity |
|---|---|---|---|---|
| Deceiver's Diamonds | Other | 1 | Basic | 1 |
| Sewer Skink | Minion | N/A | Basic | 1 |
| Sponge Silkie | Minion | N/A | Basic | 1 |
| Sil'dihn Chair | Other | 1 | Basic | 1 |
| Sil'dihn Side Table | Other | 1 | Basic | 1 |
| Sabotender Parasol | Other | 1 | Basic | 1 |
| Sil'dihn Kitchen Shelf | Other | 1 | Basic | 1 |
Achievements
This duty is associated with the following achievements:
| Name | Points | Task | Reward | Patch |
|---|---|---|---|---|
| Squeaky Clean | 5 | Defeat the silkie in the Sil'dihn Subterrane variant dungeon. | - | 6.25 |
| Shadows' Past | 5 | Defeat Shadowcaster Zeless Gah in the Sil'dihn Subterrane variant dungeon. | - | 6.25 |
| Hollow Victory | 5 | Defeat the gladiator of Sil'dih in the Sil'dihn Subterrane variant dungeon. | - | 6.25 |
| Secrets Of Sil'dih | 5 | Defeat the Thorne Knight in the Sil'dihn Subterrane variant dungeon. | - | 6.25 |
| Mapping the Realm: The Sil'dihn Subterrane | 10 | Discover every location within the Sil'dihn Subterrane variant dungeon. | - | 6.25 |
| Dig Deep: The Sil'dihn Subterrane | 10 | Unlock all survey records in the Sil'dihn Subterrane. | Silkie Whistle | 6.25 |
For the achievement Mapping the Realm: The Sil'dihn Subterrane, each path has a small section that seems to open randomly.
Music
| Section | Theme |
|---|---|
| Main | To the Sun (Piano Collections) |
| Mid-Boss | On Blade's Edge |
| Final Bosses | Finality |
| Secret Final Boss | Heroes Forge Ahead |
Gallery
Gear Images
-
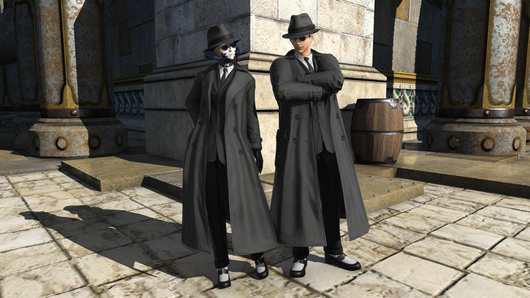 Noir Glamour Set Front
 -
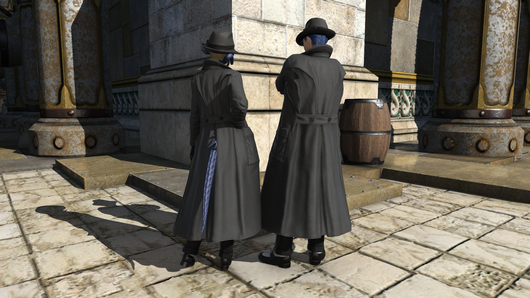 Noir Glamour Set Back


Dungeon Images
-

-
-

-

-
-
-
-
 Map
Map


| Endwalker (Lv. 90) | |||||
|---|---|---|---|---|---|
| Dawntrail (Lv. 90-100) | |||||