Sohr Khai
Sohr Khai

- Level
- 60 (Sync: 60)
- Item Level
- 200
- Difficulty
- Normal
- Party size
- Light Party
4 man • 1 1
1  2
2 
- Unsyncing
- Allowed
- Time limit
- 90 minutes
- Phoenix Down
- Available
- Duty Finder
- Dungeons (Heavensward)
- Roulette
- High-level Dungeons
- Tomestones
 50
50 - Req. quest
- Winning Over the Wyrm
- Entrance
- The Churning Mists (X:7.8, Y:27.8)
- Region
- Dravania
- Modes
 Duty Support
 Explorer
- Base EXP
 155,200
- Patch
- 3.3
- Links
- EDB GT TC
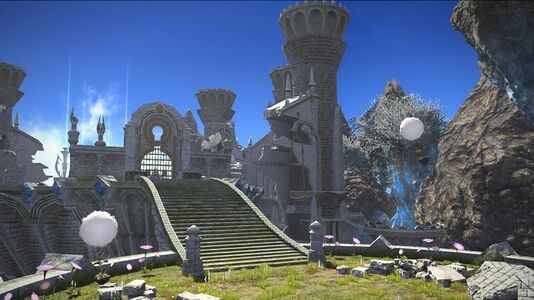
Majestic and forgotten, its existence unrecorded in the annals of man, a palace rests atop my clouds in the farthest reaches of the Churning Mists. This skyborne splendor was once home to Ratatoskr, brood-sister to Hraesvelgr and Nidhogg, until the treachery of mortals ensured that its stones would never again ring under the she-wyrm's talons. The dragons named it "Sohr Khai," a grieving apology for their failure to avert her fate, and they watched with infinite sadness as Ratatoskr's empty roost was overrun by bird and beast.
— In-game description
Sohr Khai is a level 60 dungeon introduced in patch 3.3 with Heavensward. With the addition of Duty Support in patch 6.3, changes to progression and bosses were implemented.
Duty Support
| Aymeric | Alphinaud | Temple Banneret | |
|---|---|---|---|

|

|

| |
| Class | |||
| Role | Tank or DPS | Healer or DPS | DPS |
Objectives
- Overcome Unsevered Despair: 0/1
- Overcome Unstifled Prayer: 0/1
- Defeat Hraesvelgr: 0/1
Enemies
- Cloud Gardener
- Garden Cloudtrap
- Sanctuary Skipper
- Enchanted Fan
- Garden Melia
- Garden Sankchinni
- Pomguard Pompincher
- Pomguard Pomchopper
- Captain Mogsun
- Sohr Khai Buzzard
- Sohr Khai Anzu Egg
- Sohr Khai Cockerel
- Sohr Khai Anzu
- Sanctuary Tsanahale
- Kargas
- Hraesvelgr Broodling
- Holy Wyvern
- Blizzard Dragon
Bosses
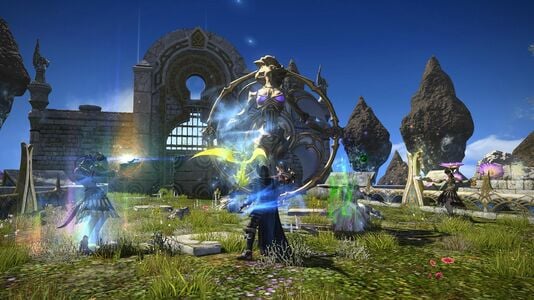
Just like Thornmarch, this fight is primarily about managing the adds that spawn. However, this fight is much easier.
Moglin will periodically attempt to revive the adds; knock them away with abilities or auto-attack to prevent them from resurrecting. Healers should be on the lookout for Moglin casting Holy, which will do unavoidable AoE damage to the entire party.
Captain Mogsun - if he is alive and within range of Moglin, he'll tether to him and make him invincible. Take him down ASAP!
Resurrecting Moogles - Moogles of various classes will spawn throughout the fight. They're not too hard to kill, but as they die, Moglin will periodically drop purple AoE circles (kind of like the summoning circles from first boss of Haukke Hard) on the Moogles' corpses. Attack the corpses to knock them out of the circles, otherwise they'll be revived at full health (this applies to Captain Mogsun too). Be advised that if you knock the corpses to the edge of the arena, they can be quite difficult to move again should the need arise. Direct them toward the center instead, if possible.
Note: kill the 3 moogles when they spawn, then when he casts revive (the circles) shoot the dead moogles out of the circle then continue to kill the boss, then he will summon more moogles kill them and then he does those purples circles to try to revive them shoot them out again then repeat till boss dead!
- Kill the adds that spawn. Knock them out of the circles to prevent them from resurrecting.
- AoE heal through Moglin's casts of Holy.
- Otherwise, tank-and-spank.
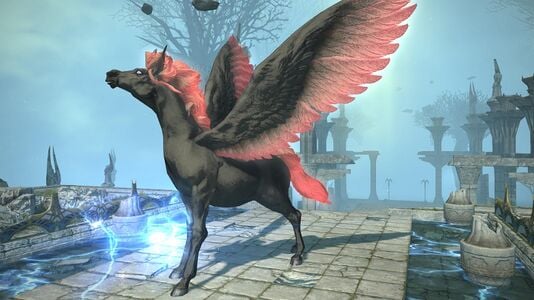
This boss has several unavoidable AoEs, and is both a healer check and a positioning check for all members of the party.
Destructible Environment - the walls on either side of the corridor can be knocked down in chunks by certain attacks Poqhiraj uses. When they fall, they expose an electrified pool behind them. Avoid standing in it as it applies a DOT that deals heavy damage per tick and cannot be dispelled.
Jump - Poqhiraj jumps, becomes untargetable as one might expect, and prepares to land at one end of the corridor using a familiar proximity indicator from earlier encounters. This will deal party-wide damage based on how close you are to the landing spot. Run away from the indicator (to the other end of the platform) to avoid excess damage.
Charge - after landing, Poqhiraj charges down the corridor. This is unavoidable, and has a knockback effect as well. Players will take more damage the closer they are to the center, being knocked into the air if dead center. All players hit on the sides of the platform will be knocked away from the center of the corridor, so make sure to stand by a wall so you don't get knocked into a pool of electric death. If no walls are available, stand in the center -- getting knocked into the air is much less painful than receiving the DoT.
Quasar - unmarked line AoE with a reasonable cast time. This attack is probably the main reason walls fall down; stack directly behind the horse to keep Quasar from going off to the side and hitting walls. Can also be aimed down the center of the platform to avoid hitting any walls.
Cloud Call - one player will receive a purple marker; when the marker disappears, a thundercloud will spawn over their head. This cloud will pulse heavy damage, apply a vulnerability debuff, and destroys walls that are next to it. Fortunately, the radius of the pulse is slightly smaller than the width of the corridor. Tanks should pull away from this, if possible, to avoid stacking vulnerability debuffs on themselves.
A good early placement for my cloud is halfway down the corridor, smooshed up against the wall. Later in the encounter, try to place this near a wall that has already been destroyed. This placement allows enough room to run by (to get away from Touchdown) without getting struck by lightning.
- Stand in the center of the platform unless targeted, to prevent Quasar from hitting any walls.
- Place any Cloud Calls away from the party, near a wall that will or has been destroyed.
- Prefer standing by a wall during Charge. Prefer standing in the center of the corridor if no walls are left or you can't get to one in time.
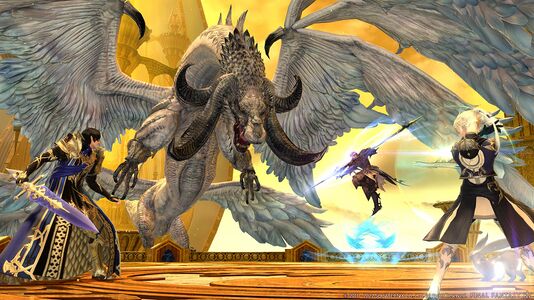
As of Patch 6.3, Hraesvelgr is only fought on one big circular pedestal, making it easier to focus on defeating him.
- Wyrmclaw: Tankbuster
- Hallowed Wings: One of Hraesvelgr's wings will glow to indicate a cleave on either his right or left side. Move to the other side before the cast goes off.
- Holy Storm: Unavoidable party damage
- Hallowed Dive: Hraesvelgr leaves the arena and performs a line AoE across the middle. On the edges, two moving circle AoEs will spawn, so the player must move back to the middle once Hraesvelgr has dived across.
- Akh Morn: Multi-hit stack marker.
- Diamond Storm: Hraesvelgr will freeze the floor, causing any player who moves to start sliding across in the direction they moved in.
- Frigid Dive: While the arena is frozen, Hraesvelgr will perform a line AoE across the middle similar to Hallowed Dive.
- This is accompanied by several red AoE circles on the ground. Only slide if you are on top of an AoE to avoid damage.
- Holy Breath: Hraesvelgr plants purple AoE circles on every player, who should spread out to avoid overlapping.
At this point, the mechanics repeat themselves until Hraesvelgr is defeated.
Loot
| Name | Type | Item Level | Rarity | Quantity |
|---|---|---|---|---|
| IL 215 Feet | ||||
| Berserker's Leg Guards | Feet | 215 | Green | 1 |
| Viking Leg Guards | Feet | 215 | Green | 1 |
| Conqueror's Sandals | Feet | 215 | Green | 1 |
| Subjugator's Sandals | Feet | 215 | Green | 1 |
| Wrangler's Boots | Feet | 215 | Green | 1 |
| Panegyrist's Sandals | Feet | 215 | Green | 1 |
| Prophet's Sandals | Feet | 215 | Green | 1 |
| IL 215 Bracelets | ||||
| Berserker's Bangles | Bracelets | 215 | Green | 1 |
| Viking Bangles | Bracelets | 215 | Green | 1 |
| Wrangler's Bangles | Bracelets | 215 | Green | 1 |
| Panegyrist's Bangles | Bracelets | 215 | Green | 1 |
| Prophet's Bangles | Bracelets | 215 | Green | 1 |
| IL 215 Ring | ||||
| Berserker's Ring | Ring | 215 | Green | 1 |
| Viking Ring | Ring | 215 | Green | 1 |
| Wrangler's Ring | Ring | 215 | Green | 1 |
| Panegyrist's Ring | Ring | 215 | Green | 1 |
| Prophet's Ring | Ring | 215 | Green | 1 |
| Name | Type | Item Level | Rarity | Quantity |
|---|---|---|---|---|
| IL 215 Head | ||||
| Berserker's Helm | Head | 215 | Green | 1 |
| Viking Helm | Head | 215 | Green | 1 |
| Conqueror's Turban | Head | 215 | Green | 1 |
| Subjugator's Turban | Head | 215 | Green | 1 |
| Wrangler's Hat | Head | 215 | Green | 1 |
| Panegyrist's Mask | Head | 215 | Green | 1 |
| Prophet's Mask | Head | 215 | Green | 1 |
| IL 215 Hands | ||||
| Berserker's Armguards | Hands | 215 | Green | 1 |
| Viking Armguards | Hands | 215 | Green | 1 |
| Conqueror's Armguards | Hands | 215 | Green | 1 |
| Subjugator's Armguards | Hands | 215 | Green | 1 |
| Wrangler's Gloves | Hands | 215 | Green | 1 |
| Panegyrist's Armwraps | Hands | 215 | Green | 1 |
| Prophet's Armwraps | Hands | 215 | Green | 1 |
| IL 215 Earrings | ||||
| Berserker's Earrings | Earrings | 215 | Green | 1 |
| Viking Earrings | Earrings | 215 | Green | 1 |
| Wrangler's Earrings | Earrings | 215 | Green | 1 |
| Panegyrist's Earrings | Earrings | 215 | Green | 1 |
| Prophet's Earrings | Earrings | 215 | Green | 1 |
| IL 215 Necklace | ||||
| Berserker's Scarf | Necklace | 215 | Green | 1 |
| Viking Scarf | Necklace | 215 | Green | 1 |
| Wrangler's Scarf | Necklace | 215 | Green | 1 |
| Panegyrist's Scarf | Necklace | 215 | Green | 1 |
| Prophet's Scarf | Necklace | 215 | Green | 1 |
- 25 Allagan Tomestone of Poetics
- Hraesvelgr Card (Drops at a fixed rate)
- 71,200 Experience Points
| Name | Type | Item Level | Rarity | Quantity |
|---|---|---|---|---|
| Apologies Orchestrion Roll | Other | 1 | Basic | 1 |
| IL 215 Body | ||||
| Berserker's Scale Mail | Body | 215 | Green | 1 |
| Viking Scale Mail | Body | 215 | Green | 1 |
| Conqueror's Vest | Body | 215 | Green | 1 |
| Subjugator's Vest | Body | 215 | Green | 1 |
| Wrangler's Jacket | Body | 215 | Green | 1 |
| Panegyrist's Chestwrap | Body | 215 | Green | 1 |
| Prophet's Chestwrap | Body | 215 | Green | 1 |
| IL 215 Legs | ||||
| Berserker's Hose | Legs | 215 | Green | 1 |
| Viking Hose | Legs | 215 | Green | 1 |
| Conqueror's Brais | Legs | 215 | Green | 1 |
| Subjugator's Brais | Legs | 215 | Green | 1 |
| Wrangler's Chaps | Legs | 215 | Green | 1 |
| Panegyrist's Culottes | Legs | 215 | Green | 1 |
| Prophet's Culottes | Legs | 215 | Green | 1 |
Treasure Coffers
 Treasure Coffer 1 (X:11.6, Y:12.8)
| Name | Type | Item Level | Rarity | Quantity |
|---|---|---|---|---|
| IL 215 Feet | ||||
| Berserker's Leg Guards | Feet | 215 | Green | 1 |
| Viking Leg Guards | Feet | 215 | Green | 1 |
| Conqueror's Sandals | Feet | 215 | Green | 1 |
| Subjugator's Sandals | Feet | 215 | Green | 1 |
| Wrangler's Boots | Feet | 215 | Green | 1 |
| Panegyrist's Sandals | Feet | 215 | Green | 1 |
| Prophet's Sandals | Feet | 215 | Green | 1 |
| IL 215 Bracelets | ||||
| Berserker's Bangles | Bracelets | 215 | Green | 1 |
| Viking Bangles | Bracelets | 215 | Green | 1 |
| Wrangler's Bangles | Bracelets | 215 | Green | 1 |
| Panegyrist's Bangles | Bracelets | 215 | Green | 1 |
| Prophet's Bangles | Bracelets | 215 | Green | 1 |
| IL 215 Ring | ||||
| Berserker's Ring | Ring | 215 | Green | 1 |
| Viking Ring | Ring | 215 | Green | 1 |
| Wrangler's Ring | Ring | 215 | Green | 1 |
| Panegyrist's Ring | Ring | 215 | Green | 1 |
| Prophet's Ring | Ring | 215 | Green | 1 |
Treasure Coffer 2 (X:12.0, Y:10.7)
| Name | Type | Item Level | Rarity | Quantity |
|---|---|---|---|---|
| IL 215 Head | ||||
| Berserker's Helm | Head | 215 | Green | 1 |
| Viking Helm | Head | 215 | Green | 1 |
| Conqueror's Turban | Head | 215 | Green | 1 |
| Subjugator's Turban | Head | 215 | Green | 1 |
| Wrangler's Hat | Head | 215 | Green | 1 |
| Panegyrist's Mask | Head | 215 | Green | 1 |
| Prophet's Mask | Head | 215 | Green | 1 |
| IL 215 Hands | ||||
| Berserker's Armguards | Hands | 215 | Green | 1 |
| Viking Armguards | Hands | 215 | Green | 1 |
| Conqueror's Armguards | Hands | 215 | Green | 1 |
| Subjugator's Armguards | Hands | 215 | Green | 1 |
| Wrangler's Gloves | Hands | 215 | Green | 1 |
| Panegyrist's Armwraps | Hands | 215 | Green | 1 |
| Prophet's Armwraps | Hands | 215 | Green | 1 |
| IL 215 Earrings | ||||
| Berserker's Earrings | Earrings | 215 | Green | 1 |
| Viking Earrings | Earrings | 215 | Green | 1 |
| Wrangler's Earrings | Earrings | 215 | Green | 1 |
| Panegyrist's Earrings | Earrings | 215 | Green | 1 |
| Prophet's Earrings | Earrings | 215 | Green | 1 |
| IL 215 Necklace | ||||
| Berserker's Scarf | Necklace | 215 | Green | 1 |
| Viking Scarf | Necklace | 215 | Green | 1 |
| Wrangler's Scarf | Necklace | 215 | Green | 1 |
| Panegyrist's Scarf | Necklace | 215 | Green | 1 |
| Prophet's Scarf | Necklace | 215 | Green | 1 |
Treasure Coffer 3 (X:12.7, Y:12.8)
| Name | Type | Item Level | Rarity | Quantity |
|---|---|---|---|---|
| IL 215 Body | ||||
| Berserker's Scale Mail | Body | 215 | Green | 1 |
| Viking Scale Mail | Body | 215 | Green | 1 |
| Conqueror's Vest | Body | 215 | Green | 1 |
| Subjugator's Vest | Body | 215 | Green | 1 |
| Wrangler's Jacket | Body | 215 | Green | 1 |
| Panegyrist's Chestwrap | Body | 215 | Green | 1 |
| Prophet's Chestwrap | Body | 215 | Green | 1 |
| IL 215 Legs | ||||
| Berserker's Hose | Legs | 215 | Green | 1 |
| Viking Hose | Legs | 215 | Green | 1 |
| Conqueror's Brais | Legs | 215 | Green | 1 |
| Subjugator's Brais | Legs | 215 | Green | 1 |
| Wrangler's Chaps | Legs | 215 | Green | 1 |
| Panegyrist's Culottes | Legs | 215 | Green | 1 |
| Prophet's Culottes | Legs | 215 | Green | 1 |
| IL 215 Bracelets | ||||
| Berserker's Bangles | Bracelets | 215 | Green | 1 |
| Viking Bangles | Bracelets | 215 | Green | 1 |
| Wrangler's Bangles | Bracelets | 215 | Green | 1 |
| Panegyrist's Bangles | Bracelets | 215 | Green | 1 |
| Prophet's Bangles | Bracelets | 215 | Green | 1 |
| IL 215 Ring | ||||
| Berserker's Ring | Ring | 215 | Green | 1 |
| Viking Ring | Ring | 215 | Green | 1 |
| Wrangler's Ring | Ring | 215 | Green | 1 |
| Panegyrist's Ring | Ring | 215 | Green | 1 |
| Prophet's Ring | Ring | 215 | Green | 1 |
Treasure Coffer 4 (X:11.0, Y:13.0)
| Name | Type | Item Level | Rarity | Quantity |
|---|---|---|---|---|
| IL 215 Earrings | ||||
| Berserker's Earrings | Earrings | 215 | Green | 1 |
| Viking Earrings | Earrings | 215 | Green | 1 |
| Wrangler's Earrings | Earrings | 215 | Green | 1 |
| Panegyrist's Earrings | Earrings | 215 | Green | 1 |
| Prophet's Earrings | Earrings | 215 | Green | 1 |
| IL 215 Necklace | ||||
| Berserker's Scarf | Necklace | 215 | Green | 1 |
| Viking Scarf | Necklace | 215 | Green | 1 |
| Wrangler's Scarf | Necklace | 215 | Green | 1 |
| Panegyrist's Scarf | Necklace | 215 | Green | 1 |
| Prophet's Scarf | Necklace | 215 | Green | 1 |
Achievements
This duty is associated with the following achievements:
| Name | Points | Task | Reward | Patch |
|---|---|---|---|---|
| Mapping the Realm: Sohr Khai | 10 | Discover every location in Sohr Khai. | - | 3.3 |
Music
| Condition | Theme |
|---|---|
| Main | Apologies |
| Boss 1 | The Seven Jesters |
| Boss 2 | To the Fore |
| Final Boss | Primogenitor |
Gallery
Gear Images


_gear1.png)
-
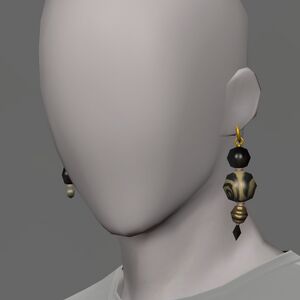 Earrings
 -
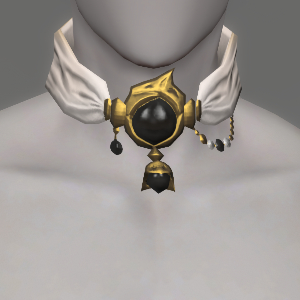 Scarf
Scarf -
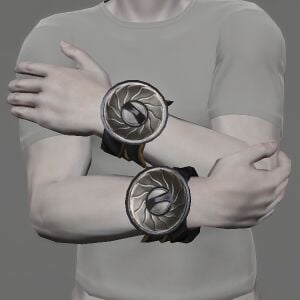 Bangles
 -
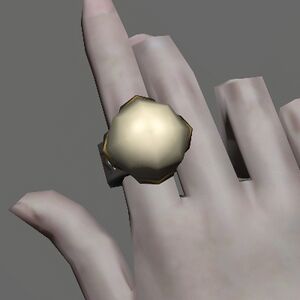 Ring
Ring


Dungeon Images
-
-
-
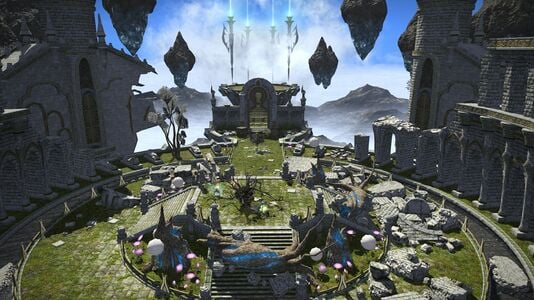
 Hraesvelgr's original arena (removed in patch 6.3)
 -
-
-
-
-


Other Images
-
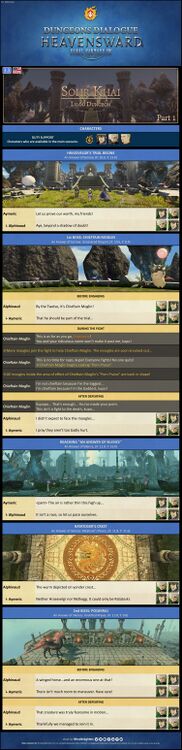 Dungeon Dialogue Infographic Part 1 (credits: TrustInsighters)
 -
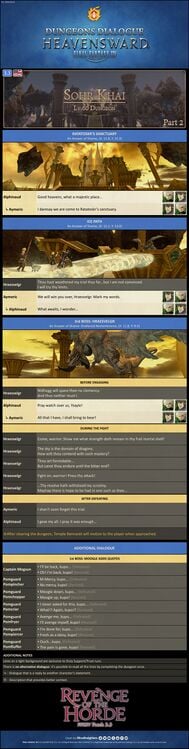 Dungeon Dialogue Infographic Part 2


Lore
An Empty Roost
In the farthest reaches of the Churning Mists, a majestic palace rests atop the clouds. A thousand years ago, this skyborne splendor was home to the great wyrm Ratatoskr, who wove beauteous songs that moved man and dragon alike, until the treachery of mortals forever silenced her voice. Heartbroken, many of Ratatoskr’s progeny ended their own lives, while others scattered to the four winds. What few dragons still remained in Dravania named the palace “Sohr Khai,” a grieving apology for their failure to avert her fate, and seldom ventured near.
It is in this place that Hraesvelgr chose to test the Warrior of Light and his comrades. Through their visceral encounter, the wyrm would come to know not only their strength, but also their determination to see the Dragonsong War brought to an end.
Chieftain Moglin
Leader of the moogles who dwell in the Churning Mists, Chieftain Moglin is readily identifiable by his kingly bulk. At Moghan’s goading, he volunteered to assist in Hracsvelgr’s but his indolent ways had prepared poorly for the Warrior of Light, who seemed to have a demon in him during their encoun-ter. Fortunately, the esteemed chieftain’s injuries were limited to a kinked pair of wings, an aching pom, and bruised pride.
Hraesvelgr
One of the seven great wyrms of the First Brood, Hraesvelgr yielded an eye to Nidhogg in an act that empowered his brood-brother’s revenge, but thereafter he refused to involve himself in the Dragonsong, War. It was not until a millennium later, when Ysayle and the Warrior of Light appeared before him, that he was given cause to reconsider his stance. In the end, he resolved to confront the wrathful shade of his brother, and in testing Eorzea’s champions, it is thought that he sought a semblance of closure.
More
Relief depicting Ratatoskr can be seen throughout Sohr Khai. The work of men’s hands, they are among the few objects that remain to stand testament to a forgotten era of harmony.
Dialogue
Duty Dialogue
Chieftain Moglin: This is as far as you go, [Forename]!
You and your ridiculous name won't make it past me, kupo!
Chieftain Moglin: Kupopo... That's enough... You've made your point.
This isn't a fight to the death, kupo...
Hraesvelgr: Nidhogg will spare thee no clemency.
And thus neither must I.
Hraesvelgr: Come, warrior. Show me what strength doth remain in thy frail mortal shell!
Hraesvelgr: The sky is the domain of dragons.
How wilt thou contend with such mastery?
Hraesvelgr: Thou art formidable...
But canst thou endure until the bitter end?
Hraesvelgr: Fight on, warrior! Press thy attack!
Hraesvelgr: ...Thy resolve hath withstood my scrutiny.
Mayhap there is hope to be had in one such as thee...
Duty Support Dialogue
Aymeric: Let us prove our worth, my friends!
Alphinaud: Aye, beyond a shadow of doubt!
Alphinaud: By the Twelve, it's Chieftain Moglin!
Aymeric: That he should be part of the trial...
Chieftain Moglin: This is as far as you go, [Forename]!
You and your ridiculous name won't make it past me, kupo!
Chieftain Moglin: Kupopo... That's enough... You've made your point.
This isn't a fight to the death, kupo...
Alphinaud: I didn't expect to face the moogles...
Aymeric: I pray they aren't too badly hurt.
Aymeric: <pant> The air is rather thin this high up...
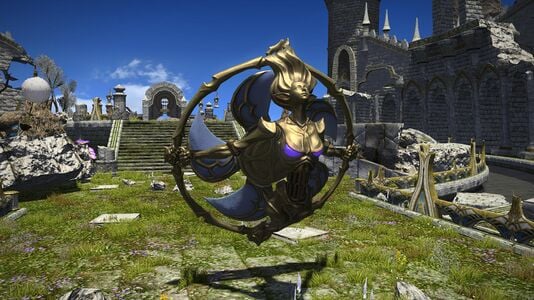
Alphinaud: It isn't a race, so let us pace ourselves.
Alphinaud: The wyrm depicted on yonder crest...
Aymeric: Neither Hraesvelgr nor Nidhogg. It could only be Ratatoskr.
Alphinaud: A winged horse...and an enormous one at that!
Aymeric: There isn't much room to maneuver. Have care!
Alphinaud: That creature was truly fearsome in motion...
Aymeric: Thankfully we managed to rein it in.
Alphinaud: Good heavens, what a majestic place...
Aymeric: I daresay we are come to Ratatoskr's sanctuary.
Hraesvelgr: Thou hast weathered my trial thus far...but I am not convinced.
I will try thy limits.
Aymeric: We will win you over, Hraesvelgr. Mark my words.
Alphinaud: What awaits, I wonder...
Hraesvelgr: Nidhogg will spare thee no clemency.
And thus neither must I.
Alphinaud: Pray watch over us, Ysayle!
Hraesvelgr: Come, warrior. Show me what strength doth remain in thy frail mortal shell!
Aymeric: All that I have, I shall bring to bear!
Hraesvelgr: The sky is the domain of dragons.
How wilt thou contend with such mastery?
Hraesvelgr: Thou art formidable...
But canst thou endure until the bitter end?
Hraesvelgr: Fight on, warrior! Press thy attack!
Hraesvelgr: ...Thy resolve hath withstood my scrutiny.
Mayhap there is hope to be had in one such as thee...
Trivia
- A modified version of the final boss arena of this dungeon is the setting of phase 7 of Dragonsong's Reprise (Ultimate).
| A Realm Reborn (Lv. 15-50) | |||||
|---|---|---|---|---|---|
| Heavensward (Lv. 51-60) | |||||
| Stormblood (Lv. 61-70) | |||||
| Shadowbringers (Lv. 71-80) | |||||
| Endwalker (Lv. 81-90) | |||||
| Dawntrail (Lv. 91-100) | |||||
| Seasonal |
| ||||