The Royal City of Rabanastre
The Royal City of Rabanastre
- Level
- 70 (Sync: 70)
- Item Level
- 305
- Difficulty
- Normal
- Party size
- Alliance
24 man • 3 6
6  15
15 
- Unsyncing
- Allowed
- Time limit
- 120 minutes
- Phoenix Down
- Not Available
- Duty Finder
- Alliance Raids (Stormblood)
- Roulette
- Alliance Raids
- Tomestones
 100
100  80
80  10
10 - Req. quest
- A City Fallen
- Entrance
- The Prima Vista Bridge (X:6.3, Y:6.1)
- Location
- The Royal City of Rabanastre
- Region
- ???
- Patch
- 4.1
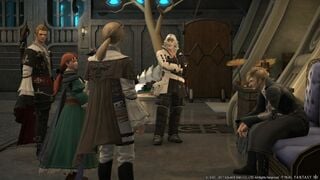
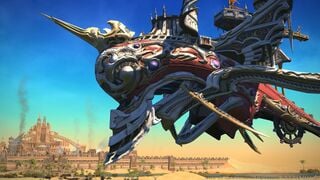
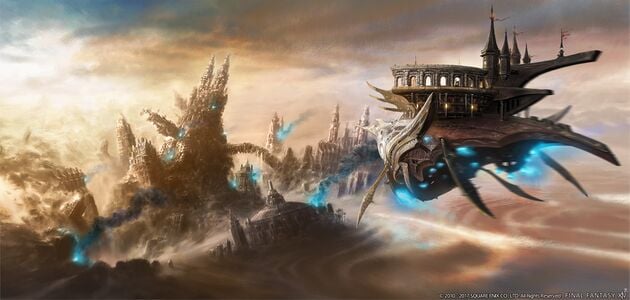
Recently, residents of Kugane woke to find hovering above their city an airship unlike any ever seen. Yet while of Garlean design, the vessel distinctly lacked the bleak outfitting common in the Empire's warmachina. No, this was the Prima Vista, private stage for the Majestic Imperial Theater Company─a troupe having won acclaim across Garlemald for their timeless work, The Zodiac Brave Story. Which begets the question...why are they here? The answer to that question and more lies in the selfsame legend of which they sing. The legend of Ivalice.
— In-game description
The Royal City of Rabanastre is a level 70 raid introduced in patch 4.1 with Stormblood. It is the first part of Return to Ivalice.
Objectives
- Arrive at the Crumbling Bridge
- Defeat Mateus, The Corrupt
- Arrive in the Palace Square
- Defeat Hashmal, Bringer of Order
- Arrive in the Garamsythe Waterway
- Clear the Garamsythe Waterway
- Defeat Rofocale
- Arrive at the Lesalia Temple Ruins
- Slay Argath Thadalfus
Bosses
Owing to it's lack of an ilvl sync, players are often able to skip noteable mechanics on several bosses, such as Mateus' Ultimate Phase.
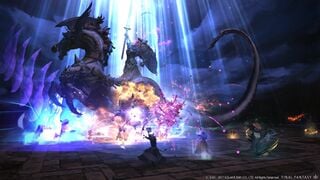
This boss has a number of distinct phases. Once you've memorized the pattern, you'll always know what happens next. Before pulling, mark the arena with gather points for each alliance. One goes due north, one south-west and one south-east.
All phases: When adds are up, they need to be killed. No exceptions. He starts the fight with several Ice Azers already spawned; they need to be taken out or they'll detonate and leave ice puddles that will hurt you later.
Unbind -> White Whisper
- When Mateus casts Unbind, gather up on your alliance's marker.
- Your first priority is the nearest Aqua Sphere. It needs to pop before the ice dancer gets to it, or you'll have trouble later.
- Each player should gather two of the blue orbs that appear during this phase, then stand off of the spiraling ice track to avoid getting frozen.
- The water pillars will turn into Blizzard III pillars if the ice dancer touches them. If three players stand in them, they will disappear.
- Any Blizzard III pillars that form need to be destroyed ASAP, or the players tethered to it will turn into snowmen once Mateus's cast of White Whisper completes.
Rebind -> Dualcast -> Blizzard III + Blizzard IV
- If you did the mechanics correctly, there will be at least one safe spot to stand. Run there during the proximity AoE warnings to avoid dying.
- Healers should prepare large AoE heals to go off after the blizzards land.
Suffocation Phase
- Flume Toads need to die ASAP.
- Arena-wide effect causes everyone to get gradually increasing stacks of Breathless. If the stacks hit 10, you die, no exceptions.
- Each toad drops an air pocket on death, run through those pockets to drop your Breathless stack to 0.
- Several players will be targeted for line AoE attacks, keep those lines from intersecting the air pockets to avoid popping them.
Ultimate Phase
- Several players will be tethered by ice orbs that will slowly drift toward the tethered player.
- Don't let them touch you, or you'll die.
- Keep the tether line pointed away from the raid to avoid hitting people with the narrow cone AoEs the orbs periodically cast.
- As in phase 1, the Ice Azers need to be killed, while avoiding their AoE bursts.
- Three Azure Guards will spawn, tank them away from each other or they'll tether to each other and become stronger.
- Kill the Azure Guards before Mateus's Aether bar fills up or you'll wipe.
He repeats the phases in order from this point until killed or wipe.
Before pull, place gather markers for each alliance: one south, one northwest, one northeast. Stick with your alliance! This fight is far less forgiving than the previous one.
Boss Abilities
- Quake IV - Raid-wide AoE, heal through.
- Jagged Edge - Red circles that target and follow a random player, avoid and keep moving until they stop appearing.
- Falling Rocks - Circle AoE, avoid.
- Rock Cutter - Heavy tankbuster, use mitigation cooldown.
- Extreme Edge - Boss appears on eastern or western edge of arena with one arm on fire and flies across, burning everything on the flaming side. Look to see whether the north or south side is getting burned, and move to avoid. Sprint is strongly recommended.
- Earth Hammer - Proximity AoE, look for where the hammers spawn and move to the opposite side of the arena.
- Control Tower - Towers spawn and then drop when Hashmal cuts them; any players caught underneath die.
- Command Tower - Big tower rises out of the centre of the arena to lift Hashmal; avoid.
- Submission Tower - Drops towers in a Y-shaped pattern that leave behind flames; players running through get a persistent Burns effect.
- Landwaster - Ultimate. If Hashmal's mana bar is full when this casts, it's a guaranteed wipe.
- Summon - Summons two golems that grow over time; kill them ASAP.
- Demolish - Empowers and enlarges golems with each cast.
- To Dust - Spawns three Sand Spheres that will explode for massive damage if not killed in time.
Fight Sequence
- Quake IV + Jagged Edge
- Control Tower, watch for where he cuts them and move to avoid
- Extreme Edge, move towards the centre and be ready to run for safety
- Remember, fire = bad. Run away from the fire!
- Quake IV + Earth Hammer, move to avoid
- Rock Cutter, MT use mitigation
- Command Tower spawns, move out of centre to avoid damage
- Move to your alliance's sector while avoiding AoEs
- To Dust; kill Sand Spheres before cast completes
- Destroy the Command Tower before his Mana bar fills to avoid a wipe
- Landwaster, healers prepare big raid heals
- Two pairs of Control Towers, one after the other. Jagged Edge targets a raid member during this, move to avoid
- Extreme Edge + Jagged Edge; run for safe zone while avoiding AoEs
- 2x Quake IV
- Rock Cutter
- 2x Earth Hammer, move away
- Summon + Rock Cutter, get ready to DPS down adds while Tanks & Healers mitigate
- Burn down Golems ASAP; Caster/Ranged LB3 useful here
- Quake IV
- Submission Tower; move to your sectors!
- To Dust; kill Sand Spheres before cast completes
- Extreme Edge + Falling Rocks; run to safe zone, then spread to minimize damage once he passes
At this point, his abilities become semi-random. He usually uses Extreme Edge after Control Tower, so be ready for that. If you don't kill him before the second set of golems appear, you'll probably wipe.
The Area could be divided into back (point of entrance) -> front (opposite, behind Rofocale's spawn point) and left (seen from the point of entrance) -> right.
Phase 1:
At around 75% HP Rofocale will give a little speech:
I walk the shadows. You will not see me until my lance has transfixed your very soul.
He then will retreat and 5 copies of him will charge the area. Watch where those copies spawn. Safe spots will be at the right side of the first and left of the last copy.
At around 55% - 60% HP Rofocale will do the same move again.
That move is probably rather time-based. But he will likely do it two times in phase 1.
Phase 2:
After the second split (around 55% HP), three Archaeodemons will spawn. The spawn points are at the triangle points around Rofocale's spawn point. That is, 1 behind the spawn and 2 and 3 left/right of the point of entrance, around the two circular floor patterns.
Aetherial Acceleration will be accumulated as long as the three adds are alive.
Each group must kill one of the Archaeodemons. The area around it will be shielded, so the other groups can't help. Think The World of Darkness - Cloud of Darkness: the 3 cloud adds.
Rofocale will circle the area. Getting hit by him will inflict damage and a knockback.
This phase will end if:
- All three Archaeodemons are dead; or
- Aetherial Acceleration has reached 100.
At the end of phase 2, Rofocale will continue to circle the area and slowly ride up into the air. At the highest point he will execute Heavenly Subjugation and inflict damage according to the Aetherial Acceleration meter.
One can avoid most of the damage by running to the sides of the area.
At 100 Aetherial Acceleration, this will be a wipe. Not only will the damage be higher, the charge will also cover a wider area.
Phase 3:
Trample will now be followed by Cry of Victory.
New Abilities: Embrace, Pomp and Circumstance and Dark Geas.
Copies of Rofocale will charge the middle of the area. Safe spots are left/right.
Dark Geas will be followed by 5 copies of Rofocale charging the area. Safe spots are according to the spawn of the first/last copy.
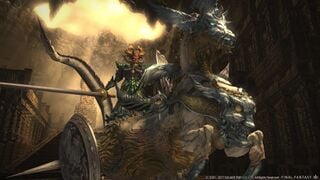
Rofocale Abilities
- Crush Helm: Tank buster.
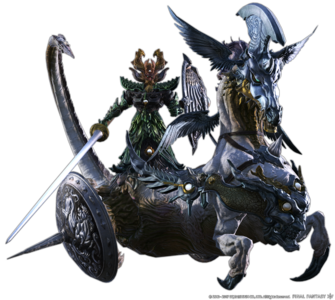
- Chariot: Target a random player and charge toward. Stay close to Rofocale because Cry of Victory will follow.
- Cry of Victory: A large cone shaped AoE, may cover most of the area. Follows Chariot or in phase 3 also Trample. Will deal moderate damage but inflict 1 stack of Vulnerability Up.
- Crush Weapon: Places AoE circles under some random players.
- Trample: Performs a roundtrip in a figure 8 or infinity. Safe zone is in the middle of upper/lower part of the 8 or outside of it. Will inflict serious damage, knockback and 1 stack of Damage Down.
- Pomp and Circumstance: Large proximity AoE, placed under Rofocale. Will deal moderate damage.
- Embrace: Places bluish circular AoE around the area, indicating a tendril-like AoE. Getting hit by this will apply a root for 8s and deal a small amount of damage. Mind that the effective AoE radius will be larger than the initial circle.
- Dark Geas: Rofocale will retreat and place a number of small Dark Circles around the area. Stand close to one and 'activate' it. During this time the raid will be inflicted with a Bleeding debuff. There is a time limit, in which all Dark Circles must be deactivated.
- Heavenly Subjugation: Ultimate ability. Executed based on the Aetherial Acceleration meter. Run to the sides of the area and avoid most of the damage. At 100 points of Aetherial Acceleration it will deal 300,000 point of damage. As it seems, this damage can not be mitigated.
Add
- Archaeodemon:
- Ability- Unholy Darkness: Large circular AoE.
- Ability- Karma: Large cone AoE.
The fight could be separated into 3 main phases:
- Phase 1: Pre-Emptiness
- Phase 2: Emptiness
- Phase 3: Post-Emptiness
Argath Thadalfus gives a little speech:
I am the truth from which you run!
This marks one of the main mechanics of the fight. Argath Thadalfus will either wear the divine or the demon face. The divine face is a white face, the demon face a bluish/black face with red eyes. Argath will also have buff icons according to the face. The important point is to do exactly as the command demands if he is wearing the divine and the opposite if he is wearing the demon face.
Emptiness: Watch the Emptiness meter - if the Shards of Emptiness are not destroyed in time, this will reach 100 and you will wipe.
Do not touch the outer edge of the area, if it is glowing bluish. It would apply aTransfiguration debuff that will kill the player.
In phase 3, the second Gnawing Dread will be followed by Argath retreating and making the area a death zone. There will be a small circular safe area. Mind that you can only run into the direction of the arrow.
Argath will then jump back and use Soulfix.
Abilities
- Crush Weapon: Places AoE circles under players.
- Soulfix: PBAoE around Argath.
- Fire IV: Area wide moderate AoE.
- Crippling Blow: Tank buster, significant damage.
- Trepidation: Places meteor-like circles around the area. Have one (1) player stand in each one (small damage to the player) or suffer moderate area wide AoE damage.
- Unrelenting: Five cone shaped AoEs with safe zones between them. Always face this AoE away from the MT. Getting hit by this will apply a Crave debuff. Think confusion or similar.
- Judgment Blade: Places four square AoE marker around the area (more in phase 3). Do not step in them or suffer a strong Bleeding debuff. Two players will be marked with blueish swords. After a few seconds, those player will drop AoEs, that will fire large line-shaped AoEs crosswise. Suggestion: Drop the marker in the middle. Reason: Argath will drop Coldblood soon after.
- Coldblood: Proximity AoE, dropped by Argath somewhere. Be as far away as possible.
- Royal Blood: Argath will summon Shades. Suggestion: Stack and AoE ASAP.
- Empty Soul: Argath will summon 'Shards of Emptiness'. Suggestion: Stack and AoE ASAP.
- Gnawing Dread: Applies Temporary Misdirection. The player can only move in the direction of the arrow above their head.
Commands
After about 3s the command will be executed and the player will be judged. Be sure to do what is expected, or be punished.
Failure will result in damage and 1 stack of the Unnerved debuff.
- Divine Command: Turn:
- Divine face - Turn away from the boss.
- Demon face - Do not turn away from the boss.
- Divine Command: Flee:
- Divine face - Continue to move.(ie: running, attacking)
- Demon face - Stay near Argath. Do not attack and do not move.
Adds
- Shade: Tethered to one player each. Destroy as fast as possible. If not destroyed in time, will cast Unholy Sacrifice - significant area-wide AoE damage.
- Shard of Emptiness: Summoned for each player at the position of the player. If not destroyed in time - significant area-wide AoE damage or wipe.
Debuffs
- Unnerved: Suffer more damage per stack. Suffer Crave at 3 stacks. Duration 60s, refresh on new stack.
- Crave: Be turned into a chicken and run away from Argath for 7s.
- Transfiguration: Hit the outer purple wall and be turned into a zombie for 10s. Unknown if this one can be removed. Attack other player and explode in AoE damage after the 10s.
Loot
| Name | Type | Item Level | Rarity | Quantity |
|---|---|---|---|---|
| Ivalician Astrologer's Boots | Feet | 330 | Blue | 1 |
| Ivalician Astrologer's Eyeglasses | Head | 330 | Blue | 1 |
| Ivalician Enchanter's Boots | Feet | 330 | Blue | 1 |
| Ivalician Enchanter's Eyeglasses | Head | 330 | Blue | 1 |
| Ivalician Fusilier's Boots | Feet | 330 | Blue | 1 |
| Ivalician Fusilier's Mask | Head | 330 | Blue | 1 |
| Ivalician Lancer's Headgear | Head | 330 | Blue | 1 |
| Ivalician Lancer's Thighboots | Feet | 330 | Blue | 1 |
| Ivalician Martialist's Hachimaki | Head | 330 | Blue | 1 |
| Ivalician Martialist's Kyahan | Feet | 330 | Blue | 1 |
| Ivalician Samurai's Hachimaki | Head | 330 | Blue | 1 |
| Ivalician Samurai's Kyahan | Feet | 330 | Blue | 1 |
| Ivalician Squire's Headgear | Head | 330 | Blue | 1 |
| Ivalician Squire's Thighboots | Feet | 330 | Blue | 1 |
| Name | Type | Item Level | Rarity | Quantity |
|---|---|---|---|---|
| Ivalician Astrologer's Gloves | Hands | 330 | Blue | 1 |
| Ivalician Astrologer's Slops | Legs | 330 | Blue | 1 |
| Ivalician Enchanter's Gloves | Hands | 330 | Blue | 1 |
| Ivalician Enchanter's Slops | Legs | 330 | Blue | 1 |
| Ivalician Fusilier's Gloves | Hands | 330 | Blue | 1 |
| Ivalician Fusilier's Slops | Legs | 330 | Blue | 1 |
| Ivalician Lancer's Gauntlets | Hands | 330 | Blue | 1 |
| Ivalician Lancer's Trousers | Legs | 330 | Blue | 1 |
| Ivalician Martialist's Kote | Hands | 330 | Blue | 1 |
| Ivalician Martialist's Tsutsu-hakama | Legs | 330 | Blue | 1 |
| Ivalician Samurai's Kote | Hands | 330 | Blue | 1 |
| Ivalician Samurai's Tsutsu-hakama | Legs | 330 | Blue | 1 |
| Ivalician Squire's Gauntlets | Hands | 330 | Blue | 1 |
| Ivalician Squire's Trousers | Legs | 330 | Blue | 1 |
| Name | Type | Item Level | Rarity | Quantity |
|---|---|---|---|---|
| Ivalician Astrologer's Boots | Feet | 330 | Blue | 1 |
| Ivalician Astrologer's Tunic | Body | 330 | Blue | 1 |
| Ivalician Enchanter's Boots | Feet | 330 | Blue | 1 |
| Ivalician Enchanter's Tunic | Body | 330 | Blue | 1 |
| Ivalician Fusilier's Boots | Feet | 330 | Blue | 1 |
| Ivalician Fusilier's Jacket | Body | 330 | Blue | 1 |
| Ivalician Lancer's Thighboots | Feet | 330 | Blue | 1 |
| Ivalician Lancer's Tunic | Body | 330 | Blue | 1 |
| Ivalician Martialist's Dogi | Body | 330 | Blue | 1 |
| Ivalician Martialist's Kyahan | Feet | 330 | Blue | 1 |
| Ivalician Samurai's Dogi | Body | 330 | Blue | 1 |
| Ivalician Samurai's Kyahan | Feet | 330 | Blue | 1 |
| Ivalician Squire's Thighboots | Feet | 330 | Blue | 1 |
| Ivalician Squire's Tunic | Body | 330 | Blue | 1 |
| Rofocale Card | Triple Triad Card | N/A | 1 |
| Name | Type | Item Level | Rarity | Quantity |
|---|---|---|---|---|
| Trisection Orchestrion Roll | Other | N/A | Basic | 1 |
| Precipitous Combat Orchestrion Roll | Other | N/A | Basic | 1 |
| Ultima's Transformation Orchestrion Roll | Other | N/A | Basic | 1 |
| Legends of Ivalice | Other | N/A | Basic | 1 |
Rewards
When originally released, players could receive only one reward item per week for completing duties in the Royal City of Rabanastre. Weekly limits were lifted in patch 4.2.
Each party in the alliance will receive its own treasure chest, the contents of which will be identical regardless of the route taken.
- Players cannot open a treasure chest belonging to another party.
Achievements
This duty is associated with the following achievements:
| Name | Points | Task | Reward | Patch |
|---|---|---|---|---|
| Zodiac Thriller | 5 | Complete the Royal City of Rabanastre. | - | 4.1 |
| Mapping the Realm: Rabanastre | 10 | Discover every location within the Royal City of Rabanastre. | - | 4.1 |
Music
| Section | Theme |
|---|---|
| Main | Trisection |
| Bosses 1-3 | Precipitous Combat |
| Boss 4 | Ultima's Transformation |
| Victory | Victory Theme (Final Fantasy Tactics) |
Images
Gear Images
Dungeon Images
Concept Art
Lore
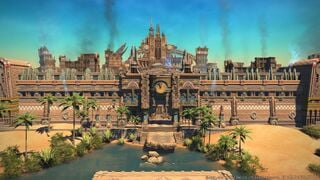
After a failed uprising against its imperial rulers, the Dalamscan capital of Rabanastre suffered a violenty destructive reprisal. In a fateful twist, the attack intended to leave the city in ruins served to reveal the ancient remnants heretofore concealed below.
— Game Description
Crumbling Bridge
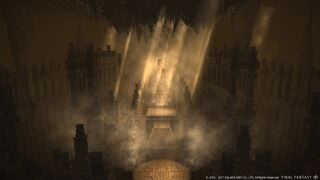
A stone thoroughfare leading to the city's main gate, this structure was built to bear the weight of several dozen carriages crossing at the same time. Its sturdiness, however, was no protection against the explosive firepower of the Empire's gunships, and the loss of this escape route resulted in substantial casualties amongst the capital's residents.
Muthru Bazaar
This market Square inside the entrance to Rabanastre was once filled with bustling stalls. Caravans arriving in the royal capital would conduct their initial business here, unloading crates and other heavy cargo, as merchants set to depart the city packed their carts and wagons with goods for the road ahead.
Palace Square
An expansive plaza stretching out before the palace, this site was reserved for royal weddings, military parades, and other such public events. When the palace chambers were commandeered by the imperial viceroy, however, the square become home to a contingent of watchful Garlean soldiers.
North End
Rabanastre's residential district. Once awash with the colorful awnings of street-side shops selling inexpensive goods or tavern fare, the Garlean occupation saw the ward emptied and renovated for the exclusive use of imperial citizens.
Garamsythe Waterway
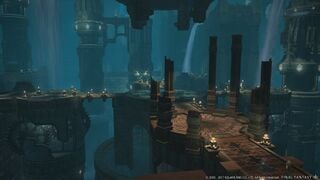
Stretching far below the streets of Rabanastre, this channel was constructed to carry in water from its source in the Skatay Range to the north. The lattice-like architecture of the waterway is confusing to navigate, and those who lose their sense of direction find it all but impossible to find their way out again.
Lesalia Garden Ruins
These ruins of an ancient civilization were discovered deep beneath the earth. Jenomis cen Lexentale, the man who discovered them, insists they are the remnants of the legendary Lesalia, the royal capital of Ivalice, but thorough archeological surveys have yet to be conducted to substantiate his claims.
Lesalia Temple Ruins
Thought to be a monument to the gods of eld, the true nature of this timeworn but impressive edifice-and the religion once practiced within-remains an enigma. Academics eagerly await for calm to prevail in Dalmasca that they might attempt a more accurate appraisal.
Additional Information
The Royal City of Rabanastre was once the capital city of Dalmasca, referred to as the Jewel of the Desert or the Desert Sapphire. The city acted as a hub for trade, and was known for its hordes of luxurious treasures from different lands all over. The city has been referred to as antediluvian meaning it most likely stood since at least before the Calamity of Water over fifteen hundred years ago. Due to the city being so old, it is implied that the B'nargin royal line were not the first rulers of Dalmasca.
After the Garlean Empire invaded and conquered Dalmasca, it was ruled by Noah van Gabranth for over thirty years. Following the liberation of both Ala Mhigo and Doma, many nations under the Empire's heel were roused to action, one of them being Rabanastre. However, as a show of force to dissuade other kingdoms and nations from continuing their uprising, the Garlean Empire obliterated the city, completely wiping it out, even though it acted as a major fuel source for their army. This action ended up causing a historic revelation, as it was revealed that Rabanastre was built upon the Lesalia Ruins, confirming that Ivalice was in fact a real kingdom long ago.
Trivia
- The story for this raid was written by guest creator Yasumi Matsuno, director and writer of titles such as FINAL FANTASY TACTICS and FINAL FANTASY XII. The boss designs are courtesy of guest creator Keita Amemiya, creator and director of the GARO series.
- This location is directly based on the city of Rabanastre from Final Fantasy XII.
- The first scratched message in the waterway is one of the possible results from an Errand in Final Fantasy Tactics.
- The second scratched message is a quote said by Agrias when checking her in the party screen in Final Fantasy Tactics.
Dialogue
Duty Dialogue
Ramza bas Lexentale: Before us lies the Royal City. My father is somewhere inside. I can feel it.
Ramza bas Lexentale: These are no ordinary birds!
Ramza bas Lexentale: Something foul prevents our crossing. Ware its numbing breath!
Mateus the Corrupt: You do not fear me!? You will!
Mateus the Corrupt: Rise dark water, and grant me stregnth!
Mateus the Corrupt: Goddess of ice, be my blade!
Mateus the Corrupt: Living shield, protect me from evil!
Mateus the Corrupt: Freeze, dark waters! Steel my body! Steel my resolve!
Mateus the Corrupt: Let the ichor flow. Let it birth the mire that will drown mine enemies!
Mateus the Corrupt: Fools! You have not...yet seen...the limit of my reach...
Ramza bas Lexentale: Cid was not mistaken in his assessment of your skill in battle. Still, I worry that something even more sinister awaits us ahead.
Ramza bas Lexentale: Seeq bandits! It appears the deplorable creatures are here to raid abandoned homes.
Ramza bas Lexentale: My father mentioned the Empire using their might to put down rebellions within the city, but this destruction is too widespread. What if that creature we fought earlier...
Ramza bas Lexentale: Another of the twisted "others"! This is not the work of the Empire. Something is wrong here.
Hashmal, Bringer of Order: Without order, creation is doomed to descend into chaos. I bring that order. You will kneel.
Hashmal, Bringer of Order: To maintain order, one must first have control.
Hashmal, Bringer of Order: Come! the cleansing flame will seal all wounds!
Hashmal, Bringer of Order: The land seeks order. It will not suffer the chaos you peddle. Nor will I!
Hashmal, Bringer of Order: Why do you resist!?
Hashmal, Bringer of Order: Resistance will be met with retribution! The landy shall bury your screams!
Hashmal, Bringer of Order: To defy order is to defy creation itself!
Hashmal, Bringer of Order: Come! The cleansing flame will seal all wounds!
Hashmal, Bringer of Order: Even the laws of life itself are mine to bend! Rise sand! Rise stone! Heed my bidding!
Hashmal, Bringer of Order: Your order...is a lie...
Ramza bas Lexentale: Again, you have proven your worth to this expedition. Let us see what lies beneath the city.
Ramza bas Lexentale: More bandits...despite all the creatures we've encountered? I know not whether they are brave or foolish.
Ramza bas Lexentale: Welcome to the Garamsythe Waterway. These tunnels are said to have existed since before even the Kingdom of Dalmasca was born. As the city grows, channels are widened, and new outlets dug. I would venture that some of the pools are so deep, no one alive has ever seen their bottoms.
Ramza bas Lexentale: These ruins... We are no longer in Rabanastre, my friends. This is Lesalia. The Lesalia of Ivalician legend!
Ramza bas Lexentale: The creatures here are not mere beasts of voidsent. the secrets that lie beyond must be ones worth keeping.
Rofocale: Hark! What army marches on Rofocale's demesne?
Rofocale: Ill fortune befall all who dare gaze upon me!
Rofocale: An inescapable hell awaits you all!
Rofocale: I walk the shadows. You will not see me until my lance has transfixed you very soul!
Rofocale: Sound the battle horns! Soldiers, to me!
Rofocale: The heavens tremble in my wake!
Rofocale: The auracite! Gaze upon its undying brilliance and know true fear!
Rofocale: Hah hah hah hah! Even a hound knows when to turn tail! Would you have us think you less than chattel!?
Rofocale: Writhe in the land's embrace!
Rofocale: Without light, there can be only darkness!
Rofocale: Born of darkness, born of night. Come forth, my children!
Rofocale: The tip of my lance is already at your necks. Submit, or die.
Rofocale: The light! It blinds!
Rofocale: Ah... To die a good death...
Ramza bas Lexentale: Any doubts I had of your participation in this rescue I have no longer. I was wrong to place mistrust in Cid and my sister's judgment. Now let us continue on. I sense we are close to our goal.
Ramza bas Lexentale: The air here feels... wrong. Can't you sense it? Death awaits us in yon chamber.
Cutscene
Argath Thadalfus: Why dares disturb the slumber of Argath Thadalfus, rightful king of Ivalice?
Argath Thadalfus: Descendants of House Beoulve? Then by my sword shall I banish your souls to the deepest hell!
Duty Dialogue
Argath Thadalfus: It is to be a fight, then? I am only too happy to oblige!
Argath Thadalfus: Like sheep before the wolf!
Argath Thadalfus: You will be judged!
Argath Thadalfus: Kneel and repent!
Argath Thadalfus: Crawl forth from the shadows, my pet!
Argath Thadalfus: You are but blood to stain the circle!
Argath Thadalfus: Does it grieve you to see the depths of your own weakness laid bare? Maggots...
Argath Thadalfus: You do not belong in my world. Step into Nothing!
Argath Thadalfus: Pah! You have yet to witness the auracite's true might!
Argath Thadalfus: I am the lies upon which you sup!
Argath Thadalfus: You will be judged!
Argath Thadalfus: The world has no place for such wretches. Your claim to life is forfeit!
Argath Thadalfus: You are but blood to stain the circle!
Argath Thadalfus: I am Revelation!
Argath Thadalfus: The gods have no eyes for chattle!
Argath Thadalfus: Fool is the dog who bares his teeth before his master!
Argath Thadalfus: Like sheep before the wolf!
Post—battle Cutscene
???: Where...Where am I? This body...it is not my own. Oh gods, what have I done? Save me Ramza! Save me!
Scratched Lettering
These messages appear in the underwater section, accessible to Alliance B.
Scratched Lettering: We departed Lesalia in high spirits, yet it was not long before our mirth turned to misgiving. We found ourselves struggling from the start and sadly obtained nothing of note. We have failed ourselves and you, and I pray our next errand meets with greater success.
Scratched Lettering: Our lives are as fleeting as a dream. What a somber thought.
Scratched Lettering: Using the crude wooden spoon I was provided, I sip at the thin broth, wondering if it is lentils I taste. It is, of course. Lentil soup is all that I have eaten since arriving in this village more than a month ago (soup being a generous term for the pathetic puddle trying its best to cover the bottom of my equally crude bowl). Would that my hosts had even salt to flavor the lukewarm fare, but war erased any hope of trade caravans making it this far...not that these forsaken villagers have aught to trade. Soon their lot will succumb to hunger, and the desert will reclaim them and any memory of their existence. Such is life in times of peril.
Sky Pirate's Scrawlings
This message appears in the waterway, in the area accessible to Alliance C.
Sky Pirate's Scrawlings: “Only in a leap will he prove his worth.”


