San d'Oria: The Second Walk
San d'Oria: The Second Walk
- Level
- 100 (Sync: 100)
- Item Level
- 725
- Difficulty
- Normal
- Party size
- Alliance
24 man • 3 6
6  15
15 
- Unsyncing
- Not Allowed
- Time limit
- 120 minutes
- Phoenix Down
- Not Available
- Duty Finder
- Alliance Raids (Dawntrail)
- Roulette
- Alliance Raids
- Tomestones
 150
150  20
20 - Req. quest
- Dreams of Paradise
- Entrance
- Lower Jeuno (X:6.3, Y:7.2)
- Region
- ???
- Patch
- 7.3
Sareel Ja remains determined to fashion a figure he believes worthy of ruling Tural. Confident he has found a champion that proves your match, he has extended you an invitation to return to Jeuno. There, you come face to face with none other than Kam'lanaut─Archduke of Jeuno, and one of the last survivors of an ancient race known as the Zilart. Kam'lanaut soon departs for the battlefield, eager to meet you in combat. Refuse Sareel Ja's hospitality, and he has promised to unleash a horde of echoes upon the people of Yak T'el. With little choice but to accept, you steel yourself for another journey down the Walk of Echoes.
— In-game description
San d'Oria: The Second Walk is a level 100 raid introduced in patch 7.3 with Dawntrail. It is the second part of Echoes of Vana'diel.
Objectives
- Clear Ronfaure.
- Clear Horlais Peak.
- Clear armada airship.
- Clear Qufim.
- Clear the Stellar Fulcrum.
- Clear the Celestial Nexus.
Enemies
San d'Oria
Ronfaure
- Forest Funguar
- Goblin Fisher
- Scarab Beetle
- Goblin Thug
- Jaggedy-eared Jack
- Orcish Grappler
- Forest Hare
Armada Airship J-II
Qufim
Bosses
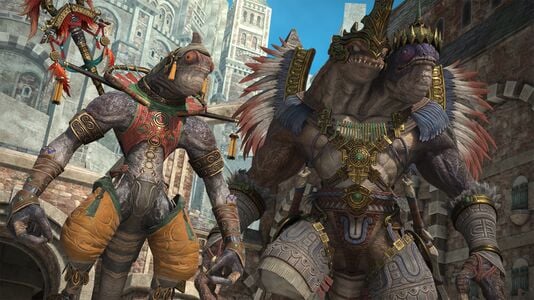
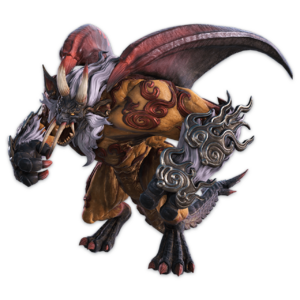
During this battle, the boss will occasionally summon Vana'diel's versions of the Four Lords (i.e. Shijin) for mechanic sequences. Two different Shijin may be spawned per battle, so players will need to experience this battle multiple times to see all four.
- Stonega IV: Raid-wide magical damage.
- Wrought Arms: The kirin summons two untargetable Sculpted Arm adds, one west and one east.
- Synchronized Strike: The kirin tethers both arms and spawns two line AoE telegraphs that run north to south. After these initial AoEs resolve, they will be transferred over to the arms, who will use much wider north-south late telegraphed line AoEs that will hit the sides of the arena.
- The kirin will then face east and repeat this attack, but the follow up AoEs will be north-south even though the initial ones are east-west.
- Crimson Riddle:
- The boss's tail will begin glowing red, denoting a 180 degree rear cleave with no ground telegraph.
- The boss will gather flames in its mouth, denoting a 180 degree frontal cleave with no ground telegraph.
- The boss will then go north and cast Summon Shijin, spawning one of four possible creatures.
- If Moonbound Genbu is summoned:
- Genbu will use Shattering Stomp, dealing raid-wide physical damage and spawning two blue bent line cracks on the floor. One crack will emit geysers, followed by the other crack, which denotes late telegraphed point-blank AoEs on each geyser.
- Genbu will then use Midwinter March, a telegraphed circle AoE, followed by Northern Current, a late telegraphed donut AoE hitting the area outside the circle.
- If Duskbound Byakko is summoned:
- A persistent AoE will spawn around the arena, along with 8 panels.
- Byakko will jump to one panel and use a late telegraphed line AoE charge (Gloaming Gleam) in front of it. When it reaches the opposite panel, it will use a large, late telegraphed point-blank AoE.
- Byakko will use Gloaming Gleam three more times. However, this will be combined with Quake from the kirin, placing three sets of circle AoE telegraphs at random players' locations.
- If Sunbound Suzaku is summoned:
- A persistent AoE will spawn around the arena, compressing it to a square.
- Two fireballs will spawn on one side of the arena and emit a point-blank AoE telegraph that expands. Suzaku itself will spawn on the same side and use a late telegraphed line AoE divebomb (Vermilion Flight) at the same time the orbs explode.
- Several more fireballs will spawn that will cover two sides and one corner. At the same time, Suzaku will divebomb through the middle of the arena, leaving only one area empty. Multiple players will also be given spread AoE markers (Stonega III) that resolve a few seconds after the divebombs/fireball explosions.
- If Dawnbound Seiryu is summoned:
- Seiryu will fly to one corner of the arena and spawn a line AoE (Eastwind Wheel) with a rotation indicator. Move to the area opposite from where it is rotating to.
- This attack is repeated. The kirin will also use Double Cast, spawning both baited circle AoEs and spread markers on random players.
- The kirin will summon two untargetable arms again with Wrought Arms, then use Wringer, a telegraphed point-blank AoE while tethering both arms. The arms will then follow up with a late telegraphed donut AoE leaving the initial circle area safe.
- Striking Left/Right: The kirin will tether an arm and spawn a circle AoE telegraph to its left or right, based on the cast. This is followed with a late telegraphed massive point-blank AoE from the arm.
- Synchronized Sequence / Double Wringer / Smiting (Left/Right) Sequence: The boss will display two AoE telegraphs originating from it (lines, centered point-blank, off-center circle) and transmit those attacks to the arms. The order of events is: First boss AoE > Second boss AoE + first arm AoE > second arm AoE.
- Synchronized Sequence: If the AoE sequence is lines then point-blank, players would first dodge to the sides, then north or south away from the boss, then in.
- Double Wringer:
- If the AoE sequence is point-blank then lines, players would first move away from the boss, then go east-west in max melee range, and finally the middle column.
- If the AoE sequence is point-blank AoE then offset circle AoE, players would first move away from the boss, then close to the boss away from the offset circle AoE, then away from the single tethered arm.
- Smiting (Left/Right) Sequence: The AoE sequence is an offset circle AoE followed by a point-blank AoE. Dodge circle, then be away from both the boss and the first tethered, arm, then move in.
- Mighty Grip: Summons a persistent AoE around the arena, transforming it to a much smaller rectangle.
- Two targetable Chiseled Arm adds will spawn which must be defeated.
- Deadly Hold: Four tankbuster towers will spawn. Alxaal will take one, meaning that the remaining 3 tanks will each need to take one. Each tank will receive the Standing Firm debuff. causing them to block a strong cinematic attack.
- Kirin Captivator: Both hand adds become targetable, while raid-wide damage (Shockwave) periodically pulses. Both Chiseled Arms must be destroyed before this cast finishes, or the raid will wipe.
- Mechanics than repeat until the boss is defeated. The boss will summon another Shijin if DPS is low.
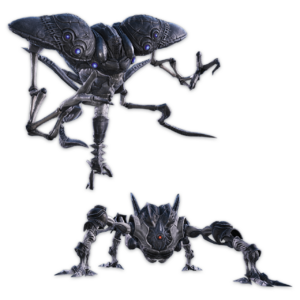
This double boss encounter takes place on the deck of an airship. Players may fall off the east and west edges of the arena to their deaths. Ultima is an off-arena enemy at the east that cannot be freely positioned, while Omega is a mobile enemy. The bosses will periodically equalize their health if the difference becomes too large.
- Ion Efflux: Omega uses a magical raid-wide attack.
- Antimatter: Ultima targets all three tanks with telegraphed magical tankbusters.
- Energy Orb: Ultima spawns three portals next to each other at the side of the arena. These will do a late telegraphed line AoE (Energy Ray).
- Aft-to-fore Fire / Fore-to-aft Fire: Omega will flash two 180 degree cleave telegraphs in the direction of the cast name, then execute those attacks.
- Tractor Beam: Ultima will use a telegraphed draw-in attack. Players should go to the opposite side of the arena to avoid being pushed off or use knockback immune. An airship will also appear on the side where the arrows originate, indicating a late telegraphed half-room cleave.
- Immediately after the draw-in, random players will be marked with spread AoE telegraphs that deal magical damage (Anti-personnel Missile).
- Surface Missile: Omega will flash three sets of red rectangular regions on the arena, indicating the location of AoEs, then execute the attacks. Immediately followed up with Energy Orb and Anti-personnel Missile, so players should be mindful of the portal locations while spreading.
- Mana Screen: Ultima will spawn a mirror panel on the arena at a 45 degree angle. It will then use an Energy Orb that hits the mirror, resulting in a follow-up line AoE that is deflected 90 degrees from the original AoE.
- Trajectory Projection: Omega will give random players a 9-second Projection Locus debuff. These players will flash a red circle AoE telegraph that is slightly offset from their character. When the debuff timer expires (which will also be indicated with a 5-second overhead timer), the target players will drop a late telegraphed circle AoE near the direction of their telegraph, so should dodge by moving opposite it.
- Tractor Field: Jump from the airship before it's reduced to ash! Ultima will forcibly pull all players towards it, briefly stun then, and both bosses will become untargetable. The party needs to move to the opposite side of the arena containing the green line to safely jump off to a lower airship, while dodging numerous circle AoE telegraphs (Multi-missile) and being aware of the line AoEs creeping from the back of the platform. The line AoEs will leave behind a persistent fire, killing anyone left behind.
- Citadel Buster: Ultima will use a heavy-hitting magical raid-wide attack that should be mitigated.
- Hyper Pulse: Omega will spawn a magical proximity AoE in the middle of the arena, indicating where it will jump to.
- Mana Screen: Ultima will now spawn three mirrors and follow up with Energy Orb to hit one. The line AoE will be deflected twice, with one mirror being untouched. Immediately foollowed with Anti-personnel Missile spread.
- Chemical Bomb: Ultima will sequentially spawn four proximity AoE telegraphs, one near each corner of the arena, in a clockwise or counterclockwise fashion. Rotate with the spawn order to mitigate damage.
- Energy Orb + Aft-to-fore / Fore-to-aft Fire: Ultima will make the sides of the arena unsafe with Energy Orb portals, while Omega will face north and use two cleaves, which can be readily dodged near the midline of the room.
- Mechanics then repeat until both bosses are defeated.
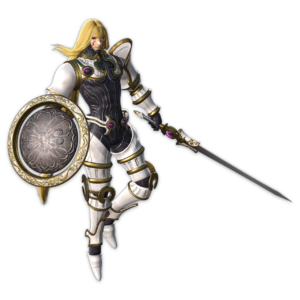
Phase 1
- Enspirited Swordplay: Raid-wide magical damage.
- Proving Ground: Kam'lanaut will spawn a small point-blank AoE under him that will leave behind a persistent puddle, inflicting Bleeding to anyone who steps in it.
- Elemental Blade: Kam'lanaut will sequentially imbue himself with two elements (fire, water, earth, air, ice, lightning), which will empower his next attack.
- Sublime Elements: Spawns one of two patterns of elemental AoEs. The telegraphs matching the elements from previous Elemental Blade attack will enlarge significantly, so players will need to move far away from them.
- Pattern 1: 6 cones
- Pattern 2: 6 intersecting perpendicular lines
- Sublime Elements will be used twice and show both patterns as a tutorial.
- Princely Blow: Line AoE physical tankbusters on all 3 tanks that will also knock them back. The knockback can be prevented with knockback immune.
- Light Blade: Telegraphed line AoE through Kam'lanaut and spawns numerous Sublime Estoc (sword) adds in it, pointing in one of two directions. Each sword will use a late telegraphed line AoE (Sublime Estoc) aimed at where it is pointing, so get behind any sword.
- Great Wheel: Telegraphed point-blank AoE. Kam'lanaut will rotate to face a new direction and immediately follow with a late telegraphed 180 degree frontal cleave, so get behind.
- Esoteric Scrivening: Stuns players for several seconds and transitions the arena to a slightly smaller circle with three evenly spaced prongs.
Phase 2
Players may now fall off the arena to their death.
- After the arena changes and players regain control, Kam'lanaut will open with an instant magical raid-wide attack (Shockwave) followed by Transcendent Union, dealing five hits of magical damage followed by a final, much stronger raid-wide magical attack. Heal and mitigate through.
- Esoteric Palisade: Spawns a dangerous persistent AoE on the three prongs and summons three crystals (e.g. earth, water, ice).
- Crystalline Resonance: Kam'lanaut will spawn three sets of expanding elemental circles originating from him. When the circle touches a crystal matching its element, the crystal will emit a large, late-telegraphed point-blank AoE. The two other crystals will be safe. Prior to the third crystal resolving, random players will receive spread AoE markers (Empyreal Banish III). At the end of this mechanic, the persistent AoE covering most of the prongs will disappear, although there is still a small persistent AoE at the ends.
- Illumed Facet: Kam'lanaut will spawn three untargetable clones of himself, each of which will use a late telegraphed line AoE (Illumed Estoc) roughly through where they are facing, leaving six triangular regions at the edge of the arena safe.
- Shield Bash: Telegraphed radial knockback from the center, dealing physical damage. All players should either use knockback immune or position to be knocked back towards a prong.
- Empyreal Banish IV: Stack marker AoE on a random player, dealing magical damage.
- Princely Blow will be used again and functions identically as before, but tanks should be mindful to be knocked back to a prong if they do not use knockback immune. Each tank should take a different prong due to the size of the tankbuster cleave.
- Proving Ground + Elemental Blade: Similar to before, but Kam'lanaut now imbues three instead of two elements, causing three AoE telegraphs to enlarge. For the cones pattern, only one slice will be safe. For the lines pattern, only two small corners will be safe.
- Light Blade + Empyreal Banish III
- Great Wheel + Empyreal Banish IV
- Esoteric Palisade + Crystalline Resonance: Now spawns six crystals. Kam'lanaut will also send out two different elemental rings at once, causing two crystals to detonate at a given time.
- Illumed Facet + Shield Bash: Will spawn only two clones, but their line AoEs will both intersect his hitbox and cover two of the three prongs, so be out of it and position for the knockback in the remaining safe prong.
- Mechanics then repeat until the boss is defeated.
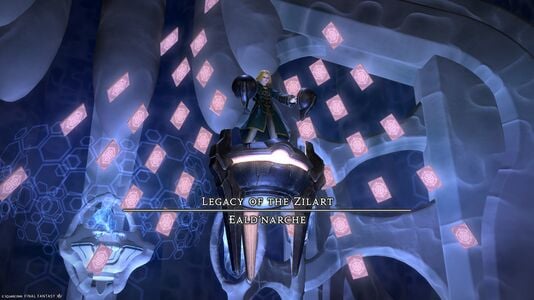
 Legacy of the Zilart: Eald'narche
Players may fall off the arena to their death in both phases of this fight.
Phase 1
- Uranos Cascade: Telegraphed AoE magical tankbuster on all three tanks.
- Cronos Sling: One of two attacks based on the positions of the Eald'narche's card-like implements (exoplates), followed by a half-room cleave.
- If the exoplates swirl in a messy oblong formation (similar to an egg or potato), it denotes a late telegraphed point-blank AoE. (Max melee range is safe.)
- If the exoplates swirl in an orderly cylindrical formation, it denotes a late telegraphed donut AoE.
- After the point-blank or donut AoE, the exoplates will gather to one side of the boss, denoting a half-room cleave in that direction.
- Empyreal Vortex: Five hits of magical raid-wide damage, places down red circle AoE telegraphs at various locations, and gives random players spread marker AoE telegraphs.
- Warp: Two red circles will spawn on the ground, one directly below the boss, and one on a random corner, indicating where Eald'narche will teleport to. After teleporting, he will use Sleepga, a late telegraphed frontal cleave that damages and inflicts a 15-second cleansable sleep debuff. Get behind.
- Gaea Stream: Spawns four moving line AoE telegraphs in a "windmill" formation. Dodge into the first telegraph when it goes off to be safe from the rest.
- Omega Javelin: Spread marker AoEs on random players dealing magical damage and leaving behind crystal puddles that will detonate as late-telegraphed follow up AoEs of the same size.
- Duplicate: Spawns a large glowing tile on the arena with diffuse telegraphs at the edges, indicating a plus-shaped AoE.
- Duplicate is used again but now spawns two glowing tiles, causing a smaller safe spot.
- Excelsior: Spawns an square AoE telegraph at the north of the arena. Stuns the party and changes the arena after a cutscene.
Phase 2
The arena is now a clearly delineated 3x3 grid of tiles, with the north tile initially empty. The boss will have a Paradise Found debuff as flavor.
- Duplicate + Visions of Paradise: Spawns two plus telegraph tiles. However, one of the tiles will also be linked with the hole in the arena. The plus telegraph and the tile it is on will switch places with the hole, then the plus AoEs will resolve.
- Stellar Burst: Eald'narche will forcibly draw one player towards them and imprison them in a crystal, making them the target of a stack marker AoE dealing magical damage.
- Ancient Triad: Spawns several AoE telegraphs—multiple circle AoEs and a line AoE covering three tiles. In addition, either a proximity AoE in the middle or a draw-in AoE with a circle AoE telegraph will spawn.
- The line AoE tiles will either:
- Become quicksand and give anyone who steps in them a short Six Fulms Under, killing them if it expires naturally.
- Become icy.
- The circle AoEs will either:
- Become fire orbs with two smaller flames rotating vertically, denoting late telegraphed line AoEs based on where they are facing.
- Become thunder orbs that will tether to random players and should be kited to avoid them catching up.
- The proximity AoE, if it appears, will become a late telegraphed point-blank water AoE, followed by telegraphed concentric donut AoEs.
- The draw-in AoE, if it appears, will turn into multiple tornadoes that move around the arena and should be avoided.
- The line AoE tiles will either:
- Gaea Stream: Now spawns another set of cascading line AoEs in the same pattern after the first set has begun traveling.
- The boss's mechanics will repeat until he is defeated. He will also use mechanics from phase 1 again but at a faster pace.
Loot
| Name | Type | Item Level | Rarity | Quantity |
|---|---|---|---|---|
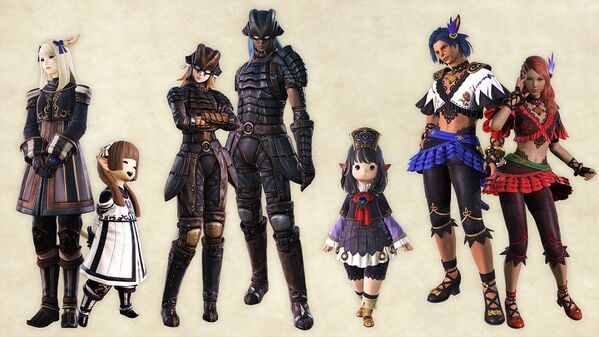
| Mayakov Hairpin of Aiming | Head | 750 | Blue | 1 |
| Mayakov Hairpin of Scouting | Head | 750 | Blue | 1 |
| Mayakov Shoes of Aiming | Feet | 750 | Blue | 1 |
| Mayakov Shoes of Scouting | Feet | 750 | Blue | 1 |
| Orastery Pigaches of Casting | Feet | 750 | Blue | 1 |
| Orastery Pigaches of Healing | Feet | 750 | Blue | 1 |
| Orastery Ribbons of Casting | Head | 750 | Blue | 1 |
| Orastery Ribbons of Healing | Head | 750 | Blue | 1 |
| Prishe's Boots of Striking | Feet | 750 | Blue | 1 |
| Prishe's Tiara of Striking | Head | 750 | Blue | 1 |
| War Cloud's Boots of Fending | Feet | 750 | Blue | 1 |
| War Cloud's Boots of Maiming | Feet | 750 | Blue | 1 |
| War Cloud's Helm of Fending | Head | 750 | Blue | 1 |
| War Cloud's Helm of Maiming | Head | 750 | Blue | 1 |
| Name | Type | Item Level | Rarity | Quantity |
|---|---|---|---|---|
| Mayakov Ringbands of Aiming | Hands | 750 | Blue | 1 |
| Mayakov Ringbands of Scouting | Hands | 750 | Blue | 1 |
| Mayakov Tights of Aiming | Legs | 750 | Blue | 1 |
| Mayakov Tights of Scouting | Legs | 750 | Blue | 1 |
| Orastery Gloves of Casting | Hands | 750 | Blue | 1 |
| Orastery Gloves of Healing | Hands | 750 | Blue | 1 |
| Orastery Slops of Casting | Legs | 750 | Blue | 1 |
| Orastery Slops of Healing | Legs | 750 | Blue | 1 |
| Prishe's Bottoms of Striking | Legs | 750 | Blue | 1 |
| Prishe's Ring of Striking | Hands | 750 | Blue | 1 |
| Tattered Second Movement Score |
Other | N/A | Basic | 3 |
| War Cloud's Brais of Fending | Legs | 750 | Blue | 1 |
| War Cloud's Breeches of Maiming | Legs | 750 | Blue | 1 |
| War Cloud's Gauntlets of Fending | Hands | 750 | Blue | 1 |
| War Cloud's Gauntlets of Maiming | Hands | 750 | Blue | 1 |
| Name | Type | Item Level | Rarity | Quantity |
|---|---|---|---|---|
| Mayakov Casaque of Aiming | Body | 750 | Blue | 1 |
| Mayakov Casaque of Scouting | Body | 750 | Blue | 1 |
| Mayakov Shoes of Aiming | Feet | 750 | Blue | 1 |
| Mayakov Shoes of Scouting | Feet | 750 | Blue | 1 |
| Orastery Pigaches of Casting | Feet | 750 | Blue | 1 |
| Orastery Pigaches of Healing | Feet | 750 | Blue | 1 |
| Orastery Robe of Casting | Body | 750 | Blue | 1 |
| Orastery Robe of Healing | Body | 750 | Blue | 1 |
| Prishe's Bolero of Striking | Body | 750 | Blue | 1 |
| Prishe's Boots of Striking | Feet | 750 | Blue | 1 |
| Tattered Second Movement Score |
Other | N/A | Basic | 3 |
| War Cloud's Boots of Fending | Feet | 750 | Blue | 1 |
| War Cloud's Boots of Maiming | Feet | 750 | Blue | 1 |
| War Cloud's Mail of Fending | Body | 750 | Blue | 1 |
| War Cloud's Mail of Maiming | Body | 750 | Blue | 1 |
| Name | Type | Item Level | Rarity | Quantity |
|---|---|---|---|---|
| Wind-up Eald'narche |
Minion | N/A | Basic | 1 |
| Eald'narche Card |
Triple Triad Card | N/A | 3 |
Rewards
When originally released, you could receive only one reward item per week for defeating bosses in San d'Oria: The Second Walk. This restriction was removed in patch 7.4.
Each party in the alliance will receive its own treasure chest. Players cannot open a treasure chest belonging to another party.
Completion Reward
Upon completing San d'Oria: The Second Walk, players can also earn a separate reward: two Cracked Novaclusters and one Montiont Coin. The Montiont Coin can be exchanged with Uah'shepya in Solution Nine (X:8.6 Y:13.5) for items used to enhance equipment purchased with ![]() Allagan Tomestones of Mathematics.
Allagan Tomestones of Mathematics.
The Cracked Novaclusters are still weekly locked. Reward eligibility for them is reset every Tuesday at 1:00 a.m. (PDT)
Orchestrion Rolls
Tattered Second Movement Scores can be found in each party's treasure coffer that appears after each boss. These items can be exchanged with the peculiar goblin in Lower Jeuno (X:6.5 Y:5.2) for special orchestrion rolls relating to Echoes of Vana'diel.
Achievements
This duty is associated with the following achievements:
| Name | Points | Task | Reward | Patch |
|---|---|---|---|---|
| O Brother, Where Zilart Thou | 5 | Complete San d'Oria: The Second Walk. | - | 7.3 |
| Mapping the Realm: San d'Oria: The Second Walk | 10 | Discover every location within San d'Oria: The Second Walk. | - | 7.3 |
Music
| Section | Theme |
|---|---|
| Area 1: San d'Oria and Ronfaure | Ronfaure |
| Area 1 Battle | Battle Theme from FINAL FANTASY XI |
| Boss 1: Faithbound Kirin | Tough Battle |
| Area 2: Armada Airships | Onslaught |
| Boss 2: Ultima and Omega | Turmoil |
| Area 3: Qufim | Hidden Truths |
| Boss 3: Kam'lanaut | Tough Battle 2 |
| Boss 4: Eald'narche (Phase 1) | Eald'narche |
| Boss 4: Eald'narche (Phase 2) | Belief |
| Victory | Vana'diel March |
Images
Gear Images
Raid Images
Concept Art
Dialogue
Alxaal: Chateau d'Oraguille...? Is this meant to be San d'Oria?
Alxaal: More echoes!?
Alxaal: Let's keep moving!
Sareel Ja has to be here somewhere.
Alxaal: Ronfaure is supposed to be a quiet place that sees its fair share of new adventurers...
Alxaal: We must fight our way through.
Alxaal: A burning circle, here? It would appear the land has been altered...
Alxaal: This is Horlais Peak... We must be ready for anything.
Faithbound Kirin: You, who have risen above your mortal status... I am Kirin.
Alxaal: Kirin could never be summoned here. More meddling from that fiend Sareel Ja, no doubt.
Faithbound Kirin: This surging power, I bring to bear!
Alxaal: This is no power I've seen before... But I won't be daunted!
Alxaal: A comrade is in trouble! Someone heal them!
Alxaal: Hah, nary a scratch! Well done!
Faithbound Kirin: O guardians divine, lend me now your might!
Faithbound Kirin: O Genbu, entomb in rock and earth!
Faithbound Kirin: O Byakko, rend with fang and claw!
Faithbound Kirin: O Suzaku, conjure your infernal flames!
Faithbound Kirin: O Seiryu, scatter blood upon the wind!
Alxaal: The divine beasts? Have care!
Alxaal: A comrade is down! Someone revive them!
Faithbound Kirin: Will you overcome my trial?
Faithbound Kirin: You shall reap the rewards for daring to contend with the gods!
Alxaal: I fear I cannot shield against this assault alone. Shields, with me!
Alxaal: I will hold here!
Faithbound Kirin: There is no escape!
Faithbound Kirin: Very good...
Alxaal: We'll not be bested here!
Faithbound Kirin: Know your place.
Alxaal: A truly mighty blow! The adventurers of your world are extraordinary indeed! (DPS limit break 3)
Alxaal: Such potent healing! My thanks! (Healer limit break 3)
Alxaal: Such adamant defense... Our unbreakable resolve made manifest! (Tank limit break 3)
Faithbound Kirin: I must thank you, mortals...
Alxaal: It seems we've impressed Kirin! Let us keep up the good work!
Alxaal: The Jeuno Armada. But what is there to gain from recreating this battle?
Alxaal: What is that light...?
Alxaal: Careful!
Alxaal: Ungh...
Alxaal: It's Ultima and Omega! And they're attacking those airships!
Alxaal: The currents will carry us. Come!
Airship Engineer: Ultima and Omega are on a rampage... Who unleashed them?
Airship Crewman: At this rate, everything will be laid to waste...
Alxaal: The airships are taking heavy damage. We must do something!
Alxaal: I'm glas you're safe. Come, let's keep moving.
Alxaal: Hurry!
Alxaal: Gah!
Alxaal: That was close...
Alxaal: ...But it would appear I've landed on the wrong airship.
Alxaal: I do not see an easy way back... But I'm sure you can handle things without me!
System: Jump from the airship before it's reduced to ash!
Kam'lanaut: An impressive show. Hurry, now—do not keep me waiting.
Kam'lanaut: I do so hope you'll live up to my expectations.
Kam'lanaut: You shall find me at the summit.
Kam'lanaut: Come, then. Show me what your kind can do.
Kam'lanaut: O Sublime Estoc, drink deep of the elements!
Kam'lanaut: Once more, shall we?
Kam'lanaut: Behold the glory of the Zilart.
Kam'lanaut: You are naught but insects to be crushed.
Kam'lanaut: Kneel before Zilartian wisdom and die.
Kam'lanaut: This is the power of crystals. Transcendent. Sublime!
Kam'lanaut: By their might, I pave the path to Paradise!
Kam'lanaut: I am the will of the crystal!
Kam'lanaut: That you should still stand... Very well, then!
Kam'lanaut: Careful, now. The face of war is ever-changing!
Kam'lanaut: I thank you for this amusement!
Kam'lanaut: Wh-Why? I am the will...of the crystal... How could I be defeated by mere mortals...?
???: Farewell, my little brother. Return to the crystal from which you were born.
???: As for the rest of you, I invite you to the Gate of the Gods.
???: You have the privilege of walking within the heart of Tu'Lia. Do not disappoint me.
Eald'narche: After ten long millennia, the dreams of the Zilart will become reality. Your time ends now!
Eald'narche: This world shall belong to the Zilart.
Eald'narche: Can you escape this, I wonder.
Eald'narche: Begone!
Eald'narche: Round and round they go!
Eald'narche: Let's try this.
Eald'narche: My javelin pierces all!
Eald'narche: Allow me to show you a trick I've learned!
Eald'narche: Have you the strength to find the answers you seek?
Eald'narche: This is not Vana'diel. I'm well aware of that.
Eald'narche: I also understand the true nature of my existence. So come, let us finish this!
Eald'narche: I will eliminate you and make this world ours!
Eald'narche: The time for games is over. Behold my true power!
Eald'narche: I shall forge a more fitting stage for our battle.
Eald'narche: All pales before our brilliance!
Eald'narche: Perhaps some magic in the mix.
Eald'narche: You fought well, but it's time to say good-bye.
Eald'narche: My javelin pierces all!
Eald'narche: Even in this false flesh, I will not lose to you!
Optional Memos
Leather-bound Memo 1
You come across all sorts of head-scratchers walking the streets of San d'Oria, but none more puzzling than the so-called rivalry between Gallijaux and his brother Joulet.
They're said to be locked in a contest to see who can catch the most carp, yet every day without fail, adventurers show up hauling in barrels of carp on their behalf. Doesn't sound like much of a fishing competition to me, yet no one seems to question it.
Stranger still is the poor compensation offered for these deliveries. You'd fetch a far better price at the auction house, and yet the stream of adventurers to the pier never dries up. Maybe they know something the rest of us don't. Maybe they know something the rest of us don't. Maybe there's a greater prize waiting at the end of it all.
— Leather-bound Memo
Leather-bound Memo 2
It feels like little more than an old wives' tale now, but rumor has it a strange, giant creature is known to appear in these parts. There are written reports of sightings in the area, but they're all so wildly different, it's difficult to separate fact from fiction. Some say adventurers swarm the beast and fell it in a flash. Others claim there's no great beast at all—only a grand culling of the local fauna.
The only common thread in every account is that those in attendance have a grand time. A tale more jovial than cautionary, if you ask me.
— Leather-bound Memo
Leather-bound Memo 3
Another day, another failed attempt... Would that it didn't cost so many seals.
Still, I suppose “failed” isn't the right word. We did win, after all.
I'll get what I'm after eventually. For now, it's time to head home and clear my head.
— Leather-bound Memo
Leather-bound Memo 4
Worms today, crabs tomorrow, and the day after that? Leeches, maybe?
Ugh, but those kisses, and that strength-sapping mist... I really can't stand that one.
Maybe it's time for a change of scenery. Rolanberry Fields could be worth a look. Demand on the market's always changing, after all. No reason why our choice of hunting grounds shouldn't either.
Takes a lot of planning, but that's half the fun of being a linkshell master.
— Leather-bound Memo
Leather-bound Memo 5
Long, long ago, there was once a great civilization that flourished in the firmament. But their leaders, in pursuit of paradise eternal, dared to trespass upon the forbidden.
This would bring ruin to their civilization, its leaders falling into slumber that would last an age.
Yet we must not forget, their spirits are undying. Even now, they refuse to abandon their dreams of paradise.
— Leather-bound Memo
Trivia
Multiple references to FFXI and FFXI culture are present throughout this raid.
San d'Oria
- The contents of Leather-bound Memo 1 refer to the FFXI quest The Rivalry/The Competition, in which players select a brother to give moat carp, a common fish, to. Upon trading 10,000 carp, players are awarded one of the best fishing rods in that game and a Key Item admonishing the player to "spend time in a manner more beneficial to society".
Ronfaure
- The contents of Leather-bound Memo 3 refer to the mechanics of Burning Circle Notorious Monster (BCNM) battlefields. Most EXP-bearing monsters in FFXI drop one of five types of seals once every five minutes. Players can collect these seals and trade them to an NPC for an orb; upon taking the orb to a specific location (in this case Horlais Peak), they can fight monsters for rare loot.
Armada Airship J-II
- The boss battle, as well as the titles of Ultima and Omega, are based on the Chains of Promathia mission One to be Feared. Upon its release on October 7, 2004, the fight gained notoriety for its high level of difficulty and grueling endurance requirements.
- Players were expected to defeat a few trash mobs, Omega, and then Ultima within a time limit of 45 minutes. While wiping would not instantly reset the fight, the time spent raising party members and resting to full HP/MP would run the real danger of timing out and having to start over.
- Players were expected to bring top-tier equipment, medicines, enhancement items, and reraise items. The level cap for the fight was 60 (well below the maximum level of 75), meaning many powerful job abilities were unavailable. With Level Sync not introduced until September 9, 2008, players also had to farm said top-tier gear usable at Level 60.
- Omega and Ultima possessed many dangerous abilities. In particular, Ultima could and did spam the highly-damaging move Antimatter over and over again when his HP was low. Omega possessed Pile Pitch which reduced a target's HP to 5% and reset enmity.
- The use of these abilities could temporarily be blocked with a special item, but each player in the party could only carry one, and the effort to obtain it was not trivial.
- Period-accurate video showing the battle
Qufim
- The contents of Leather-bound Memo 4 reference common leveling patterns in FFXI. Players typically formed parties in Qufim between levels 18-25 to farm worms and crabs, which were reliable EXP due to their low defenses or lack of dangerous abilities. Some groups tried farming leeches, but quickly discovered why they were unpopular targets: their mist inflicted a debilitating and long-lasting AoE Attack Down (-50%), and their "kisses" drained HP, MP, or TP from players.
Delkfutt's Tower
- The Kam'lanaut fight is based on the Rise of the Zilart mission Return to Delkfutt's Tower, first released in early-to-mid 2003. This fight was relatively mundane, though his AoE Silence, Slow, and Dispel spells could catch unprepared players off-guard.
- (Relatively) Period-accurate video showing the battle
The Shrine of Ru'Avitau
- In FFXIV, the in-game map labels this area as the Shrine of Ru'Avitau. In FFXI, however, players would recognize the same location as the Celestial Nexus which is a distinct battlefield zone connected to, but separate from, the main explorable Shrine of Ru'Avitau.
- For context, the large central structure seen in Tu'Lia in
 Jeuno: The First Walk is the Shrine of Ru'Avitau.
The Celestial Nexus
- The Eald'narche fight is based on the Rise of the Zilart Mission The Celestial Nexus, released on October 21, 2003. This fight was also fairly straightforward, with only a few adds and dangerous abilities to watch for.
- (Relatively) Period-accurate video showing the battle

