Alexander - The Breath of the Creator (Savage)
Alexander - The Breath of the Creator (Savage)
.png)
- Level
- 60 (Sync: 60)
- Item Level
- 250
- Difficulty
- Normal
- Party size
- Full Party
8 man • 2 2
2  4
4 
- Unsyncing
- Allowed
- Time limit
- 90 minutes
- Phoenix Down
- Not Available
- Duty Finder
- Savage Raids (Heavensward)
- Tomestones
 30
30 - Req. quest
- Who Lives, Who Dies, Who Retells Your Story
- Location
- The Excruciationator, Breath of the Creator
- Region
- Dravania
- S/S/S
- Available
- Patch
- 3.4
 The Echo
- Permanent +20%
- Links
- EDB GT TC
None can deny the wandering minstrel's inimitable way with words, nor the manner in which his penchant for embellishment and exaggeration has rendered your triumph over the primal Alexander all the more triumphant─and the insurmountable odds over which you did prevail all the more insurmountable. Reach back into your memory and relive your adventure inside the steel giant as it will live on in the hearts and minds of all who hear the tale!
— In-game description
Alexander - The Breath of the Creator (Savage) is a level 60 raid introduced in patch 3.4 with Heavensward. The raid is also known as A10S.
Strategy
The east and west edges of the arena are covered by an electric field that will apply a ![]() Stun,
Stun, ![]() Paralysis and heavy-hitting
Paralysis and heavy-hitting ![]() Electrocution debuff that will kill players within a few ticks.
Electrocution debuff that will kill players within a few ticks.
Additionally there are three buttons through the center of the arena; one in the north, the center and the south. These buttons are activated when stepped by either a player or an enemy.
Phase 1: 100% - 60%
| Name | Description |
|---|---|
| Discharge | A line of Static circle AoEs created either along the edges or across the center of the arena. Deals high magic damage. |
| Goblin Rush | An instant three-hit attack on the highest enmity player, dealing moderate damage. Cast frequently and untied to attack rotation. |
| Gobrush Rushgob | A stronger casted version of Goblin Rush, hitting the highest enmity player twice as hard—functioning as a tankbuster. |
| Gobsway Rumblerocks | An instant attack dealing unavoidable party-wide damage. Sometimes cast twice in succession. |
| Gobslash Slicetops | The highest enmity player is marked with
|
| Gobsnick Leghops | A red light attack indicated by the |
| Lameprix Strikedocks | A mirage copy of Lamebrix. Will tether and buff Lamebrix with
|
| Trap | Three trap buttons in the middle of the arena that can be pressed by players or enemies, activating corresponding traps a few seconds later. Lamebrix will occasionally jump on a button intentionally.
|
| Charge | Lamebrix will do a Single, Double, or Triple Charge, indicating a series of attacks that will happen in sequence. Which attacks and the order are shown overhead.
|
- Trap and Charge Visuals
-
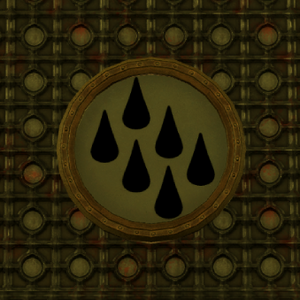 Spike Trap (South)
 -
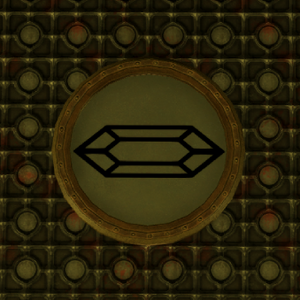
 Weight Trap (Center)
 -
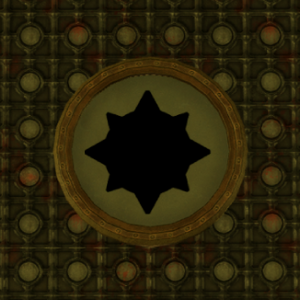
 Arrow Trap (North)
 -
 Bomb Toss (Stack)
 -
 Critical Wrath (Spread)
 -
 Gobswipe Conklops (in)
 -
 Gobspin Wooshdrops (Out)


The first phase of the fight is a fairly simple introduction to mechanics that will occur regularly throughout. Players should familiarize themselves with the Trap and Charge visuals and effects.
Players are given 10 seconds at the start of the fight to freely position before trap buttons become active. All players should avoid stepping on trap buttons unnecessarily, and tanks should avoid moving Lamebrix across them once active.
Lamebrix should be tanked between the Weight and Arrow trap to give tanks space to run north for Gobslash Slicetops; the attack aimed at the ![]() Prey target will hit and kill any players in standing between.
Prey target will hit and kill any players in standing between.
The first two Single Charges will always be one Bomb Toss and one Critical Wrath, but in a random order. Which ever happens first, the second will always be the opposite combined with a Spike Trap at the same time—forcing players to pre-position.
While there are two types of combinations for Discharge + Trap, both are simply resolved by standing on the east/west edge of the arena to dodge the first attack, then moving to the center to dodge the second.
Lastly, every summon of Lameprix Strikedocks will be followed immediately by a Gobswipe Conklops donut AoE. The off-tank should grab Lameprix (without Provoke, as it may be needed for a tank swap after), move towards Lamebrix to dodge the AoE, then separate the two enemies to prevent them from tethering.
At 60% HP or the end of their attack rotation, Phase 2 will begin.
| Attack | Strategy |
|---|---|
| Gobsway Rumblerocks x2 | Simply heal the party. |
| Single Charge | Will be a stack or a spread marker. Remember which is chosen, as the next attack will be the opposite. |
| Trap (Spikes) + Single Charge | Once Lamebrix begins casting Trap, start positioning to do the opposite of what the previous Charge was. Players will not be able to move once the Charge begins casting. |
| Gobslash Slicetops | Tank swap while the |
| Gobrush Rushgob | Mitigate the tankbuster. |
| Discharge + Trap (Arrows) | Avoid the Discharge in the center by standing at the edge, then move to the center to avoid the arrows. |
| Gobsway Rumblerocks | |
| Gobsnick Leghops | All players should sheathe their weapons and stop moving until |
| Single Charge (in) + Lameprix | Run towards Lamebrix to dodge Gobswipe. The off-tank should use normal attacks to pick up enmity on Lameprix. Once Single Charge ends, the off-tank should distance the two enemies and point Lameprix away from the group. |
| Gobsway Rumblerocks | All DPS should focus on killing Lameprix. |
| Gobrush Rushgob | If Lameprix is still alive, both tanks will be hit with tankbusters simultaneously. |
| Trap (Weights) + Discharge | Don't be fooled by the Discharge placements. Wait for Weight of the World to drop on the buttons first, then move into the safe spot around the buttons, being careful not to accidentally press them. |
| Gobslash Slicetops | Tank swap and clear a path for the |
| Gobsway Rumblerocks x2 | Heal the party. |
| Double Charge | Will be Gobswipe Conklops (in) and Gobspin Wooshdrops (out) in a random order. |
| Gobsnick Leghops | Sheathe weapons and stop moving as before. |
| Gobsway Rumblerocks | |
| Gobrush Rushgob | Mitigate. |
| Phase 2 Start | |
Phase 2: Gobpress R-VI
Lamebrix becomes ![]() Invincible and summons the Gobpress R-VI on the opposite side of the arena.. Players must destroy the Gobpress before they are crushed against the opposite spike wall.
Invincible and summons the Gobpress R-VI on the opposite side of the arena.. Players must destroy the Gobpress before they are crushed against the opposite spike wall.
| Name | Description |
|---|---|
| Brighteyes | Both healers are marked with
|
| Illuminati Hand Cannon | A large Static line AoE aimed at a random player. |
| Steam Roller | The Gobpress R-VI slams the ground and moves forward, knocking all nearby players back and dealing lethal amount of damage to those adjacent. |
A DPS check, all players must attack the Gobpress R-VI and destroy it before its fifth cast of Steam Roller.
The most dangerous attack of this phase is Brighteyes. Due to the ![]() Magic Vulnerability Up, players can not survive two hits of this attack in a row. As healers are always forced to take the first hit, they should stand separate in the corners next to Lamebrix to place the fire puddles safely away from the group. The followup cast of Brighteyes should then be transferred to nearby ranged or magical DPS waiting just outside the edge of the first puddles while healers then run to safety.
Magic Vulnerability Up, players can not survive two hits of this attack in a row. As healers are always forced to take the first hit, they should stand separate in the corners next to Lamebrix to place the fire puddles safely away from the group. The followup cast of Brighteyes should then be transferred to nearby ranged or magical DPS waiting just outside the edge of the first puddles while healers then run to safety.
Tanks and melee DPS must distance themselves from the Gobpress R-VI when the cast of Steam Roller nears completion to avoid being crushed. Be careful not to get knocked back into fire puddles or ![]() Prey targets.
Prey targets.
Between Brighteyes, Lamebrix will use repeated casts of Gobsway Rumblerocks, requiring repeated party heals.
Once the Gobpress R-VI is destroyed, Phase 3 will begin.
| Attack | Strategy |
|---|---|
| Brighteyes + Hand Cannon | Healers should stand next to Lamebrix in opposite corners. Dodge the Hand Cannon if necessary. |
| Brighteyes | Ranged/Magical DPS should take the |
| Steam Roller | Move back prior to the cast to avoid death. |
| Illuminati Hand Cannon | |
| Gobsway Rumblerocks x2 | Move closer to the melee group to keep the party healthy. |
| Steam Roller | Move back prior to the cast to avoid death. |
| Brighteyes + Hand Cannon | Healers should stand next to Lamebrix in opposite corners. Dodge the Hand Cannon if necessary. |
| Brighteyes | Ranged/Magical DPS should ensure puddles are placed on the edges to leave the center safe. |
| Steam Roller | Move back and stay centered to avoid being knocked back into the puddles on the edges. |
| Illuminati Hand Cannon | |
| Gobsway Rumblerocks x2 | Keep the party healthy. |
| Steam Roller | |
| Gobsway Rumblerocks x4 | Keep the party healthy; this is the groups last chance to destroy the Gobpress R-VI. |
| Steam Roller (Death) | |
Phase 3: 60% - 0%
Lamebrix will become vulnerable again, but has a few new tricks up their sleeves.
| Name | Description |
|---|---|
| Gobspin Zoomdrops | Lamebrix gains Lamebrix attaches a transferable tether to a random player and slowly moves towards them.
|
| Gobslice Mooncrops | Lamebrix starts a long 10 second cast, then does an extremely strong line knockback down the center, pushing players into the electrified walls of the arena. Additionally deals high damage to the entire party. |
| Buzzsaws | Three pairs of giant buzzsaws appear on the east and west sides of the arena. These buzzsaws repeatedly slash the space above the Trap Buttons, dealing high damage and knockback to those hit. |
| Summon Goblins | Two Goblins of Fortune and one Hedge Gobknight appear with
|
Lamebrix will now cast Triple Charge, which has two potential patterns:
- Out, Spread, In or In, Out, Stack. Players will need to watch the indicators to know how to move.
After another cast of Single Charge (in) and a Lameprix creation, Lamebrix will use Gobspin Zoomdrops. All players should move away and towards the Arrow Trap button. While one player intentionally activates the Arrow Trap, another should attempt to move Lamebrix towards the edge of the arena and into the path of the Arrow Trap. Lamebrix moves very slowly during the spin, so the timing is generous.
After interrupting Lamebrix's spin, they should be moved towards the Spike Trap button in preparation for Gobslice Mooncrops. Once Lamebrix jumps away and begins casting, one player should press the Spike Trap button. This trap takes a long time to activate, thus must be pressed sometime between the start of the cast and prior to the halfway point.
Next, Lamebrix will summon a series of Buzzsaws and begin another two casts of Brighteyes. Healers should move the first cast to the corners, avoiding standing in line with the buzzsaws and the buttons. Ranged/Magical DPS should then move towards the healers to take the second ![]() Prey debuff.
Prey debuff.
Lastly, Lamebrix will summon two Goblins of Fortune and one Hedge Gobknight. These enemies must immediately be brought under a button, hit by a Weight of the World, and DPS should kill the Goblins of Fortune before they have a chance to use Gobbieboom. The off-tank should focus on the Hedge Gobknight to interrupt the cast of Gobskin.
These attacks will repeat until 11 minutes and 20 seconds have passed, after which Lamebrix will begin a long cast of Gobsway Rumblerocks that will wipe the group.
| Attack | Strategy |
|---|---|
| Gobrush Rushgob | Mitigate and heal. |
| Triple Charge | Watch the pattern, the attacks will always follow the same order they are shown in. |
| Gobsway Rumblerocks | |
| Single Charge (in) + Lameprix | Dodge the Single Charge, then move and face Lameprix away from the party. Kill Lameprix as fast as possible. |
| Gobspin Zoomdrops | Run from Lamebrix and move him towards the edge. Hit him with the Arrow Trap to stop his spinning. Healers must keep the party alive through the unavoidable damage. |
| Gobsway Rumblerocks | |
| Gobrush Rushgob | |
| Gobslice Mooncrops | Once this cast begins, immediately hit the Spike Trap button. It takes roughly six seconds to activate. |
| Gobsnick Leghops / Single Charge (in) | Will randomly be Gobsnick or Single Charge (in). Respond appropriately. |
| Gobsway Rumblerocks x2 | |
| Brighteyes, Buzzsaws, & Hand Cannon | Healers should move to corners while players avoid standing by the edge next to buttons. Ranged and Magical DPS should prepare to run to the healers. |
| Brighteyes & Single Charge (out) | Ranged and Magical DPS should take the |
| Gobslash Slicetops | Tank swap and clear a space for the |
| Gobrush Rushgob | |
| Discharge + Trap (Blizzard Arrow) | Stay by the edge, then move into the center once the AoEs disappear. |
| Trap (Weights) + Discharge | Move back to the edge again until Weight of the World drops, then move into a safe spot by the buttons. |
| Gobsway Rumblerocks x2 | |
| Summon Goblins | The off-tank should drag the goblins onto the Weight Trap. DPS should then kill the Goblins of Fortune ASAP while the off-tank focuses on interrupting the Hedge Gobknight. |
| Gobsnick Leghops | Sheathe weapons and stand still. |
| Buzzsaws | |
| Repeat | |
Loot
 Treasure Coffer 1
| Name | Type | Item Level | Rarity | Quantity |
|---|---|---|---|---|
| Alexandrian Head Gear Coffer (IL 270) | Other | 1 | Basic | 1 |
| Alexandrian Hand Gear Coffer (IL 270) | Other | 1 | Basic | 1 |
| Alexandrian Foot Gear Coffer (IL 270) | Other | 1 | Basic | 1 |
Treasure Coffer 2
| Name | Type | Item Level | Rarity | Quantity |
|---|---|---|---|---|
| Alexandrian Head Gear Coffer (IL 270) | Other | 1 | Basic | 1 |
| Alexandrian Hand Gear Coffer (IL 270) | Other | 1 | Basic | 1 |
| Alexandrian Foot Gear Coffer (IL 270) | Other | 1 | Basic | 1 |
Music
| Section | Theme |
|---|---|
| Main | Locus |