The Puppets' Bunker
The Puppets' Bunker
- Level
- 80 (Sync: 80)
- Item Level
- 465
- Difficulty
- Normal
- Party size
- Alliance
24 man • 3 6
6  15
15 
- Unsyncing
- Allowed
- Time limit
- 120 minutes
- Phoenix Down
- Not Available
- Duty Finder
- Alliance Raids (Shadowbringers)
- Roulette
- Alliance Raids
- Tomestones
 100
100  100
100  12
12 - Req. quest
- Everything You Know Is Wrong
- Entrance
- Kholusia (X:35.3, Y:18.2, Z:2.9)
- Location
- The Puppets' Bunker
- Region
- Norvrandt
- Patch
- 5.3
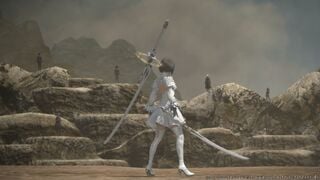
Having put an unceremonious end to Komra's carnival with their incomprehensibly advanced weaponry, 2P's cohort of white-garbed androids retreats into the crater from whence they came. Though they are certain to have the tactical advantage should you pursue them into the installation, such a threat cannot go unchecked, and you and your newfound ally 2B are quick to give chase─Anogg and Konogg hot on your heels.
— In-game description
The Puppets' Bunker is a level 80 raid introduced in patch 5.3 with Shadowbringers. It is the second part of YoRHa: Dark Apocalypse.
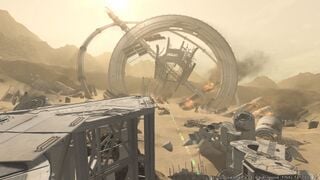
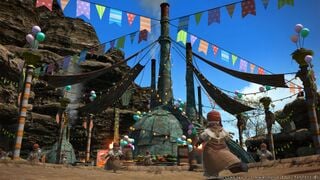
Once the duty is completed, players may freely explore the location as an instanced zone, which can be entered from Kholusia (X: 35.5, Y: 18.2, Z: 2.9). By finding chests in the explorable zone, they can unlock more of the Portable Archive.
Objectives
- Clear the elevated detritus 0/1
- Clear the sunken detritus 0/1
- Clear the launch deck 0/1
- Clear core command 0/1
- Clear the passage 0/1
- Clear the bridge 0/1
Bosses
Note: It is possible to fall off the edge of the arena, resulting in instant death.
- Firing Order: Anti-personnel Laser: AoE tankbuster indicated by a red-and-black "hazard stripe" indicator.
- Maneuver: Beam Cannons: Several overlapping cone attacks that cover the entire arena, but slowly "focus", reducing their area of effect. The cones that focus faster will leave safe zones at their edges. Getting hit by the attack deals high damage and strong knockback, though it is possible to avoid being knocked off the platform by standing in melee range of the boss.
- Maneuver: Collider Cannons: Six evenly-spaced red cone AoEs that rotate around the boss before slowing down and stopping, at which point they fire off attacks that deals high damage.
- Firing Order: Surface Laser: One random player in each party is marked with a red arrow. Eventually, a stationary lingering AoE will appear where the targeted player is standing, dealing high damage rapidly.
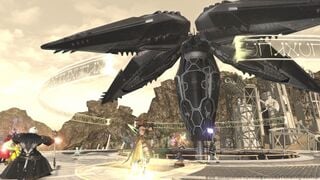
- Aerial Support: Swoop: Three untargetable Flight Units will appear and Swoop across the arena, dealing damage and knockback. The Flight Units target completely random players to mark their flight path, potentially resulting in one or two of the parties simply not having to deal with the attack at all.
- Maneuver: Refraction Cannons: The "wings" of the Aegis Unit will reveal cannons and lean either to the left or right. The cannons will blast in an untelegraphed cone AoE, but can be avoided by standing on the opposite side of a "wing" to its respective cannon.
- Maneuver: Diffusion Cannon: Moderate raidwide damage.
- Aerial Support: Bombardment: Three targetable Flight Units will appear and begin to slowly cast Maneuver: Saturation Bombing. Each alliance must destroy their respective unit before the cast goes off. Letting a Saturation Bombing to cast results in high damage to the entire alliance.
- High-Powered Laser: Stack marker on a random player in each party.
- Program: Life's Last Song: Golden rings with alien glyphs emit from the Aegis Unit, expanding toward the edge of the arena, with three empty spaces. When a ring reaches the edge, the unit launches cone attacks with the empty spaces in the glyphs corresponding to safe areas. The first cast will send out three rings, while subsequent casts sends six, with each ring being sent just before the damaging part of the previous.
 724P-operated Superior Flight Unit (A-lpha), 767P-operated Superior Flight Unit (B-eta), and 772P-operated Superior Flight Unit (C-hi)
- Apply Shield Protocol: The three Flight Units will tether to all players in their respective party (A for A-lpha, B for B-eta, and C for C-hi), resulting in every player being inflicted with an indefinite Shield Protocol A/B/C debuff, and each Flight Unit with a corresponding Process of Elimination buff, resulting in each Flight Unit taking drastically reduced damage from players without the matching debuff. Once a party destroys their respective Flight Unit, their Shield Protocol debuff will wear off, allowing them to deal full damage to the remaining Units.
- Maneuver: Missile Command: Raidwide AoE. Each Flight Unit launches an attack, resulting in the attack hitting three times in a row when all three are alive, and less when some are dead.
- Maneuver: Incendiary Bombing: Marks two random players in each party with a red arrow and drops a lingering fire puddle beneath them. Standing in the puddle inflicts a strong Burns debuff that persists even after leaving. Two more random players in each party will have smaller AoEs appear beneath them that inflict high damage.
- Maneuver: High-powered Laser: Line stack on a random player in each party. The attack inflicts a short Magic Vulnerability Up debuff, resulting in death if a player takes more than one hit. Be sure to aim your stacks away from the other parties.
- Maneuver: Precision Guided Missile: Tankbuster.
- Formation: Sharp Turn: Each pilot tethers to one another, draws a sword and charges. All pilots hold their blades the same way. If they hold in the right hand, stand in the middle of the arena. If in the left hand, stand outside along the edges.
- Formation: Air Raid: Transitions for Lethal Revolution. Units dash toward middle of their area and trigger large circular AoEs before Lethal Revolution.
- Lethal Revolution: Each Flight Unit begins an AoE circle attack around the edge of the arena. The direction and beginning is indicated by an arrow circle on the floor.
- Formation: Sliding Swipe: Two of the Flight Units drop massive AoE circles and cover 2/3 of the arena. Follow the Flight Units to the side of the arena in the safe zone. Note on which side each pilot is holding their sword in a downward angle, as that's the side they'll strafe.
- Maneuver: High-order Explosive Blast: Starburst AoE below two random players in each party that leave behind bombs that explode into short column AoEs where the starburst's points pointed.
- Maneuver: Volt Array: Powerful raidwide AoE.
- Operation: Activate Laser Turret: 905P interfaces with the device in the center of the room, causing laser cannons to appear. Each set will charge either the top or bottom cannons. The bottom cannons fire a lingering cone, while the top cannons fire a staggered cone that hits close range first, then mid-range, then far range. Stand at the far range of the top cannons and wait for the bottom cannons' attack to end.
- Maneuver: High-powered Laser: Line tankbusters on the two off-tanks, indicated by square yellow-and-black hazard stripe indicators.
- Maneuver: Unconventional Voltage: Four random players are targeted with a large red cone AoE. Spread out and do not overlap.
- Energy Bombardment: 905P launches a cluster of pink energy orbs that gradually strike as circle AoEs beneath random players in three sets of five.
- Maneuver: Impact Crusher: Three jumps and ground smashes. Last jump immediately triggers "Revolving Laser"
- Maneuver: Revolving Laser: Roomwide ring AoE. The only safe spot is in melee range of the boss.
- Operation: Access Self-consciousness Data: Boss interfaces with the central console again, the monitors flicker on the walls.
- Operation: Activate Suppressive Unit: A set of cannons appear on the outer wall and randomly fire slow pink energy orbs toward the center of the room.
- Support: Pod: Pods appear and Pod Program initiates. There are varying versions of either all the same or a mix of pods:
- Operation: Pod Program: Several monitors will appear on the outer wall of the arena and display either R010 or R030. The screens will then tether to a Pod, uploading the combat data to that unit. Do note that while the first cast will always have the screens tether to the Pod directly in front of them, subsequent casts may have the screens tether to adjacent Pods in a uniform clockwise or counterclockwise manner, effectively shifting the attacks.
- R010 Pods: Line AoEs fired toward the center of the room.
- R030 Pods: Large circle AoEs centered on the pods.
- If all the numbers are the same, dodging is as simple as standing near the wall of the room directly between any two Pods.
- If there are a mix of numbers, look at the screens and determine where two R010 Pods are directly next to each other and stand between them.
- Operation: Pod Program: Several monitors will appear on the outer wall of the arena and display either R010 or R030. The screens will then tether to a Pod, uploading the combat data to that unit. Do note that while the first cast will always have the screens tether to the Pod directly in front of them, subsequent casts may have the screens tether to adjacent Pods in a uniform clockwise or counterclockwise manner, effectively shifting the attacks.
- Operation: Synthesize Compound: Screens tether to yellow tower soak circles that appear in the arena. Each circle must have at least three players inside to properly soak the damage, or the entire alliance will take damage. The circles will turn blue when three or more players are inside.
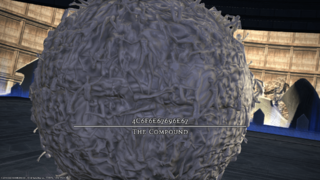
 4C6F6E67696E67: The Compound
- Mechanical Laceration: Raid-wide damage
- Mechanical Dissection: Line attack through the Compound, indicated by a vertically-rotating red laser.
- Mechanical Decapitation: Ring AoE that leaves only the Compound's hitbox safe.
- Mechanical Contusion: Player-targeted circle AoEs on six random players alongside ground-targeted circle AoEs appearing below six other random players.
- (unknown): The Compound leaves the arena and two copies of it appear on the edges of the arena. These copies are split in two and emit lasers from either side, leaving their inside safe. The two will then rush across the arena, damaging everything not in its blind spots.
- After defeating the Compound, it will cast a final Mechanical Laceration that inflicts Down for the Count as a cutscene plays to transition into the second phase.
- Centrifugal Slice: High raidwide damage.
- Prime Blade: One of three different attacks depending on how 2P holds her sword.
- If 2P stabs her sword into the ground, the attack is an arena-wide ring AoE that leaves her hitbox safe.
- If 2P holds her sword above her head, the attack is a cone in the direction she's facing.
- If 2P holds her sword to the side, the attack is a large circle AoE centered on 2P.
- Relentless Spiral: Two sets of three large circle AoEs appearing beneath random players.
- Forced Transport: Golden circles appear in the arena, tethering to the boss or certain attacks she uses. After a short time, the tethered target will be teleported to a golden circle.
- If the tether has sparks traveling from the target to the circle, that is where target will be teleported.
- If the tether does not have sparks, the circle will leave behind a Relentless Spiral attack instead.
- Three Parts Disdain: Stack marker on a random player that hits three times in a row, knocking those hit back a short distance.
- Four Parts Resolve: Four random players will be marked with a number 1-4. 2P will attack each player in order, jumping at target 1/3 to deal very high damage in a circle around them, then fires a line at target 2/4.
- Reproduce: Clones of 2P will appear in the corners of the arena and tether to 2P as she casts a random Prime Blade. Once the attack completes, the clones will mimic the attack. The clones may be teleported via Forced Transport. At first there are four clones, but the number drops as the fight goes on.
- Energy Compression: Several meteor soak circles appear in the room, each requiring one player to stand in them. Later in the fight, the circles can be teleported by Forced Transport.
- Compound Pod: R011: Six Pods will appear on the edge of the arena and fire lasers in a line in front of them. These Pods can be teleported by Forced Transport.
- Compound Pod: R012: Four Pods will appear inside the arena and mimic Mechanical Contusion from phase 1, in addition to tankbusters on all three alliance tanks. All attacks inflict Magic Vulnerability up briefly and should not be overlapped at all.
Loot
| Name | Type | Item Level | Rarity | Quantity |
|---|---|---|---|---|
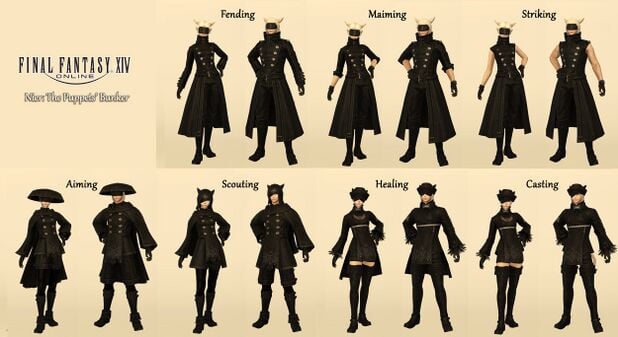
| YoRHa Type-53 Boots of Aiming | Feet | 490 | Blue | 1 |
| YoRHa Type-53 Boots of Fending | Feet | 490 | Blue | 1 |
| YoRHa Type-53 Boots of Maiming | Feet | 490 | Blue | 1 |
| YoRHa Type-53 Boots of Scouting | Feet | 490 | Blue | 1 |
| YoRHa Type-53 Boots of Striking | Feet | 490 | Blue | 1 |
| YoRHa Type-53 Hat of Aiming | Head | 490 | Blue | 1 |
| YoRHa Type-53 Hat of Casting | Head | 490 | Blue | 1 |
| YoRHa Type-53 Hat of Healing | Head | 490 | Blue | 1 |
| YoRHa Type-53 Headband of Fending | Head | 490 | Blue | 1 |
| YoRHa Type-53 Headband of Maiming | Head | 490 | Blue | 1 |
| YoRHa Type-53 Headband of Striking | Head | 490 | Blue | 1 |
| YoRHa Type-53 Hood of Scouting | Head | 490 | Blue | 1 |
| YoRHa Type-53 Thighboots of Casting | Feet | 490 | Blue | 1 |
| YoRHa Type-53 Thighboots of Healing | Feet | 490 | Blue | 1 |
 724P-operated Superior Flight Unit (A-lpha) 767P-operated Superior Flight Unit (B-eta) 772P-operated Superior Flight Unit (C-hi)
| Name | Type | Item Level | Rarity | Quantity |
|---|---|---|---|---|
| YoRHa Type-53 Bottoms of Casting | Legs | 490 | Blue | 1 |
| YoRHa Type-53 Bottoms of Healing | Legs | 490 | Blue | 1 |
| YoRHa Type-53 Breeches of Fending | Legs | 490 | Blue | 1 |
| YoRHa Type-53 Breeches of Maiming | Legs | 490 | Blue | 1 |
| YoRHa Type-53 Breeches of Striking | Legs | 490 | Blue | 1 |
| YoRHa Type-53 Gloves of Aiming | Hands | 490 | Blue | 1 |
| YoRHa Type-53 Gloves of Casting | Hands | 490 | Blue | 1 |
| YoRHa Type-53 Gloves of Fending | Hands | 490 | Blue | 1 |
| YoRHa Type-53 Gloves of Healing | Hands | 490 | Blue | 1 |
| YoRHa Type-53 Gloves of Maiming | Hands | 490 | Blue | 1 |
| YoRHa Type-53 Gloves of Scouting | Hands | 490 | Blue | 1 |
| YoRHa Type-53 Gloves of Striking | Hands | 490 | Blue | 1 |
| YoRHa Type-53 Halfslops of Aiming | Legs | 490 | Blue | 1 |
| YoRHa Type-53 Halfslops of Scouting | Legs | 490 | Blue | 1 |
| Name | Type | Item Level | Rarity | Quantity |
|---|---|---|---|---|
| YoRHa Type-53 Boots of Aiming | Feet | 490 | Blue | 1 |
| YoRHa Type-53 Boots of Fending | Feet | 490 | Blue | 1 |
| YoRHa Type-53 Boots of Maiming | Feet | 490 | Blue | 1 |
| YoRHa Type-53 Boots of Scouting | Feet | 490 | Blue | 1 |
| YoRHa Type-53 Boots of Striking | Feet | 490 | Blue | 1 |
| YoRHa Type-53 Cloak of Aiming | Body | 490 | Blue | 1 |
| YoRHa Type-53 Cloak of Scouting | Body | 490 | Blue | 1 |
| YoRHa Type-53 Coat of Fending | Body | 490 | Blue | 1 |
| YoRHa Type-53 Coat of Maiming | Body | 490 | Blue | 1 |
| YoRHa Type-53 Cyclas of Striking | Body | 490 | Blue | 1 |
| YoRHa Type-53 Halfrobe of Casting | Body | 490 | Blue | 1 |
| YoRHa Type-53 Halfrobe of Healing | Body | 490 | Blue | 1 |
| YoRHa Type-53 Thighboots of Casting | Feet | 490 | Blue | 1 |
| YoRHa Type-53 Thighboots of Healing | Feet | 490 | Blue | 1 |
Rewards
When originally released, you could receive only one reward item per week for completing duties in the Puppets' Bunker. This restriction was removed in Patch 5.4
Each party in the alliance will receive its own treasure chest, the contents of which will be identical regardless of the route taken.
- Players cannot open a treasure chest belonging to another party.
Achievements
This duty is associated with the following achievements:
| Name | Points | Task | Reward | Patch |
|---|---|---|---|---|
| Uncanny Valley | 5 | Complete the Puppets' Bunker. | - | 5.3 |
| Mapping the Realm: The Puppets' Bunker | 10 | Discover every location within the Puppets' Bunker. | - | 5.45 |
Music
| Section | Theme |
|---|---|
| Main | Fortress of Lies |
| Boss 1 and Boss 4 Phase 1: 813P and the Compound | Grandma - Destruction |
| Boss 2: 767P | Bipolar Nightmare |
| Boss 3: 905P | End of the Unknown |
| Boss 4 Phase 2: Compound 2P | Torn from the Heavens The Dark Colossus Destroys All (Medley Version) |
Images
Gear Images
Dungeon Images
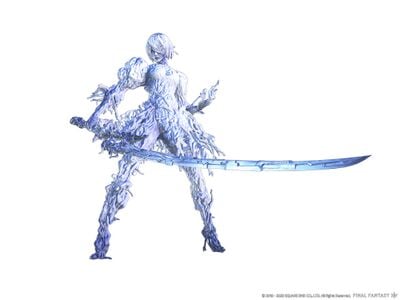
Concept Art
Notes
- The symbols on the ring during "Program: Life's Last Song" are Angelic script from the NieR games. Only the letters A, C, T, and G appear, which together indicate DNA sequences.
- The Compound's boss title, "4C6F6E67696E67", is hexadecimal code for "Longing".
- The Superior Flight units each have unique dialogue for when they are the last one alive[1]:
- If A-lpha is the last one alive
724P-operated Superior Flight Unit (A-lpha): Kill...ene-You killed 767P and 772P! I'll kill you!
724P-operated Superior Flight Unit (A-lpha): We are not... so different...
- If B-eta is the last one alive
767P-operated Superior Flight Unit (B-eta): Allied units unresponsive. However, retreat is not an option. Kill...or...die...
767P-operated Superior Flight Unit (B-eta): Killing...Is it "fun" for you too?
- If C-hi is the last one alive
772P-operated Superior Flight Unit (C-hi): Die... Die... They're all dead! You should all be dead!
772P-operated Superior Flight Unit (C-hi): Fun...funny, if that's the way of the world...
Dialogue
Duty Dialogue
2B: This is my fight! Don't follow me!
Anogg: Wait! Let us try your flight machine!
Anogg: More pods...
Konogg: My kingdom for a proper bridge.
Anogg: Odds on not having to fight that giant thing...?
Konogg: Considering that's one of the androids that attack us, low.
813P: Multiple hostile lifeforms confirmed. Activating the aegis unit. You go no further!

813P-operated Aegis Unit: Defense systems active. Commencing elimination of intruders!
813P-operated Aegis Unit: Engaging overhead drones. Relevant combat protocol:anti-personnel lasers.
813P-operated Aegis Unit: Preparing to fire beam cannon. Condensing energy...
813P-operated Aegis Unit: Preparing to fire collider cannon. Initializing centrifuge...
813P-operated Aegis Unit: Requesting air support. All nearby units, target the intruders.
813P-operated Aegis Unit: Maneuvering wings for optimal refraction...
813P-operated Aegis Unit: Requesting air support. Fire missiles at will.
813P-operated Aegis Unit: Initializing program: Life's Last Song. Prepare to regret your choices.
813P-operated Aegis Unit: Damage to unit compromising FFCS, NFCS, and overall functionality. Message to Command: destroy...hostile lifeforms...
Anogg:Pulverized! Noe that's what we like to see!
Anogg: Look at them all! I bet if we took one, they wouldn't even miss it...
Konogg: Careful!
Konogg: This is odd...er than usual.
Anogg: Did you see that blast radius!?
Anogg: Three androids this time...
Konogg: But still no 2P.
767P: Intruders' presence confirmed. Activate superior flight units and fire at will!
724P-operated Superior Flight Unit (A-lpha): Targets successfully confirmed. Equipment F23 is authorized for 724P, 767P, and 772P units.
724P-operated Superior Flight Unit (A-lpha): Attention 767P and 772P: please begin synchronous assault.
767P-operated Superior Flight Unit (B-eta): Multiple hostiles remaining. Firepower...incre-crea-crea-se...recommended.
772P-operated Superior Flight Unit (C-hi): Enemy units must be dispa-a-a─ Cut...enemy...
(If A-lpha is the last one alive)
724P-operated Superior Flight Unit (A-lpha): Kill...ene-You killed 767P and 772P! I'll kill you!
724P-operated Superior Flight Unit (A-lpha): We are not... so different...
(If B-eta is the last one alive)
767P-operated Superior Flight Unit (B-eta): Allied units unresponsive. However, retreat is not an option. Kill...or...die...
767P-operated Superior Flight Unit (B-eta): Killing...Is it "fun" for you too?
(If C-hi is the last one alive)
772P-operated Superior Flight Unit (C-hi): Die... Die... They're all dead! You should all be dead!
772P-operated Superior Flight Unit (C-hi): Fun...funny, if that's the way of the world...
(All)
Anogg: I enjoy explosions less when they're directed at us...
Konogg: Excellent work on not dying!
Anogg: This must be the way.
Konogg: More falling!?
Anogg: Whee!
Konogg: Eurgh...
Anogg: Look at all of this technology!
Anogg: Intrigue upon intrigue!
Konogg: Now this definitely seems like a trap.
905P: So the advance units are dead... We will not tolerate this interference.
905P-operated Heavy Artillery Unit: Installing Operator 21O self-consciousness data and overriding core systems!
905P-operated Heavy Artillery Unit: Do you remember this place?
21O Self-consciousness Data: Security systems online. Culling hostile lifeforms with laser turret.
905P-operated Heavy Artillery Unit: Target acquired.
905P-operated Heavy Artillery Unit: You won't escape!
21O Self-consciousness Data: Unusually high threat level confirmed. Converting to emergency protocols.
21O Self-consciousness Data: Artillery system activated. Culling hostile lifeforms.
21O Self-consciousness Data: Activating suppressive units.
21O Self-consciousness Data: Please eliminate the remaining hostiles!
905P-operated Heavy Artillery Unit: Requesting pod support.
21O Self-consciousness Data: Initializing pod program.
21O Self-consciousness Data: Reinitializing pod program...
21O Self-consciousness Data: Synthesizing explosive compound.
905P-operated Heavy Artillery Unit: Fine... If you insist...
21O Self-consciousness Data: Reinitializing pod program...
21O Self-consciousness Data: Culling hostile lifeforms with laser turret.
905P-operated Heavy Artillery Unit: This is...the end...
Anogg: I've never been more glad to have your help!
Konogg: Down we go...
Anogg: But how far down?
Konogg: Is it just me...or does this seem...different?
Anogg: What in the world...?
Konogg: Dangerous, certainly.
Anogg: Aaand there are more.
Konogg: If you could clear the path...?
Anogg: Broken machines...
Konogg: 2B must have gotten here first.
Cutscene
2B: Unit 2P process termination confirmed.
Duty Dialogue
The Compound: We......
                         ...are
The Compound: ...scour...the...earth...
The Compound: Burn...
Post-duty pop-up
Anogg: 2P....
Kanogg: Now what?
2B: There should be no further danger here.


