The Royal Menagerie
The Royal Menagerie
- Level
- 70 (Sync: 70)
- Item Level
- 280
- Difficulty
- Normal
- Party size
- Full Party
8 man • 2 2
2  4
4 
- Unsyncing
- Allowed
- Time limit
- 60 minutes
- Phoenix Down
- Not Available
- Duty Finder
- Trials (Stormblood)
- Roulette
- Trials
- Tomestones
 12
12 - Req. quest
- Stormblood
- Entrance
- The Lochs
- Location
- The Royal Airship Landing
- Region
- Gyr Abania
- Stone, Sky, Sea
- Available
- Patch
- 4.0
 The Echo
- On wipe: +10% (max +50%)
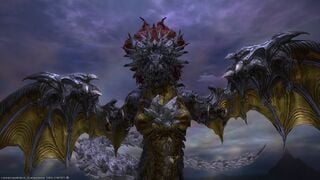
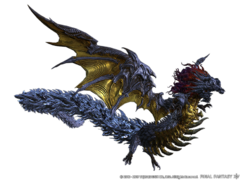
Shinryu, Ilberd's draconic god of vengeance, has been claimed by none other than Zenos yae Galvus, who has used his power as a Resonant to merge with the primal and bind it to his will. Transformed into a towering being of pure violence, his very existence poses a threat not only to Ala Mhigo, but to the entire world. All now falls to you and your comrades, for if you do not stop Zenos yae Galvus, no one will...
— In-game description
The Royal Menagerie is a level 70 trial introduced in patch 4.0 with Stormblood.
Strategy
The battle with Shinryu consists of a battle atop large platforms in three stages, with a short Active Time Event between the second and third stages, and the main mechanic of this fight is Shinryu's Corrupted Aether bar.
Falling off the platforms is instantly fatal, but players are dropped back onto the field after a short delay and can be resurrected.
Attacks
Corrupted Aether
Whenever Shinryu's Corrupted Aether bar reaches 100%, it will begin charging an elemental attack. Each attack is similar to the signature attack used by Leviathan, Garuda, Ifrit, Ramuh, Titan, and Shiva.
- Water (Tidal Wave): Phase 1 & 3. When Shinryu uses Water, a large waterspout will appear at one end of the arena. You must immediately run over and stand at the edge next to it, as you'll be pushed to the far side of the platform when the cast completes. This always is the first attack he uses, and spawns several large puddles. The knockback can be prevented with Arm's Length or Surecast.
- Wind (Aerial Blast): Phase 3 only. When Shinryu uses Wind, a large whirlwind will spawn in the center of the platform and begin pulsing knockback effects. Concentrate on staying close to the center of the platform whilst this occurs, as it will pulse another powerful knockback when it ends. The knockback can be prevented with Arm's Length or Surecast.
- Fire (Hellfire): When Shinryu uses Fire, it will use an attack that deals party-wide damage. The boss will only use this attack if are no water pools from either its Water or Ice attacks. Players should stand in the puddles to reduce damage taken.
- Lightning (Judgment Bolt): When Shinryu uses Lightning, it will use an attack that deals party-wide damage. Unlike with Fire, make sure not to stand in any water puddles or you will take increased damage.
- Earth (Earthen Fury): Phase 3 only. When Shinryu uses Earth, it will cause moderate damage to everyone while also targeting one of the platforms specifically, and damage (or shatter) that as well.
- Ice (Diamond Dust): Phase 3 only. When Shinryu uses Ice, it will freeze the entire platform and make it slippery. Don't move or you'll go flying around the platform and probably fall to your death. This also spawns large puddles as with Tidal Wave.
Wings
Shinryu has two untargetable wing entities that perform additional attacks throughout the encounter. Normally, they simply attack the tanks with green energy bolts, but will occasionally unleash additional attacks.
- Right Wing: When the right wing starts glowing, several players will be marked with a purple indicator, and shortly after hit by lightning bolts. Spread out to minimize the damage taken by the party.
- Left Wing: When the left wing starts glowing, Shinryu performs one of two ice attacks, either summoning a series of icicles that charge across the platform, or a low-damage attack across the entire platform. Do not mistake the latter for his Corrupted Ice Aether attack!
Other Attacks
Shinryu will occasionally use Earth Breath, which marks two players. When the cast finishes, he'll lay down a pair of AoE cones aimed at those players and blast everyone caught in them. Both targets should either stack up and run to one side, or split to opposite sides, so that there's a safe zone on one side and/or the center.
Shinryu also has a purple version of Ahk Morn. Stack up to reduce damage taken. During Phase 3, a secondary blue beam will spawn on top of a random party member and pulse several times. Unlike the primary Ahk Morn, the secondary beam doesn't track, so just get out of the way and you'll be fine.
In Phase 3, he also gains several new attacks;
- Tail Slam: A large, powerful attack with some phase-specific effects. See Phase 3 section.
- Line Charge: A very wide line charge that covers the entire platform and has modest knockback. Either get clear entirely (Sprint if you need to) or soak the hit.
- Ground Pound: When Shinryu's Corrupted Aether reaches around 80%, he'll target the center platform with a large circular AoE. Get clear or you'll get smacked for a lot of damage.
- Burning Chains: Shinryu will mark and chain two players together, dealing damage over time for as long as they remain chained. Break it by moving as far apart as possible.
During Phase 3, he may also occasionally mark a player with an odd green marker. This seems to influence where his next Tail Slam is targeted, but otherwise has no effect.
Phases
Phase 1
When the gauge reaches 100 for the first time, run to the edge with the pillar of water falling from the sky to avoid being pushed off. Healers: use Rescue to save people by pulling them to the edge.
After Shinryu has used two Corrupted Aether attacks, the battle transitions to phase 2.
Phase 2
Shinryu will depart the platform briefly.
Several large AoEs are laid down; move as far away as possible to minimize damage taken. These blasts have no knockback, so you can safely stand at the corners or edge of the platform (and will probably need to).
Shinryu will summon three waves of Hakkinryu and Ginryu adds. These immediately spawn from the Massive Cocoons and Cocoons that drop on the arena as proximity AoEs, so move away from them to reduce damage.
Wave 1 is 2 Ginryu and 1 Hakkinryu; Wave 2 is 3 Ginryu and 1 Hakkinryu, and Wave 3 is 5 Ginryu.
Kill all of the adds as quickly as possible and prepare for phase transition. The large Hakkinryu adds will use Death Sentence, an untelegraphed tankbuster, so tanks should establish aggro.
Shinryu will Fetter everyone and commence an Active Time Maneuver. Mash the button so that the bar fills before the time runs out or else you'll start Phase 3 on the floor with 0 HP.
Phase 3
This phase opens with the party landing on a three-by-three grid of large platforms, with Shinryu using his new line charge attack almost immediately. This has a short knockback, so either get clear of it entirely (corners) or stand as far away from the edges as possible and soak the damage.
The inner grey platform is unbreakable, but the outer blue platforms can be broken by Shinryu's Tail Slam and Corrupted Earth Aether attacks. The former marks two platforms, whilst the latter marks one. After using the Tail Slam, Shinryu's tail is vulnerable and should be attacked immediately. Reducing it to 0% transfers the damage to Shinryu and can take a decent chunk (around 5-6%) out of his health in the process, making the fight go faster.
Every two Corrupted Aether attacks, Shinryu will use his line charge and switch which side of the platform he's attacking from, but otherwise his attacks are mostly on shuffle now, and nothing new will come up.
Loot
 12 Allagan Tomestone of Poetics
- Shinryu Card (Drops at a fixed rate.)
Music
| Section | Theme |
|---|---|
| Phase 1 | The Worm's Head |
| Phase 2 | The Worm's Tail |
Images
Dialogue
Duty Dialogue
Zenos yae Galvus: The powers of the gods are mine to command!
Zenos yae Galvus: The heavens are too small a field for our dance.
Let us transcend this mortal coil!
Zenos yae Galvus: This day we shall write a new legend, my friend!
This battle shall echo in eternity!
Trivia
- The spell circles that form around Shinryu's wings use the Eorzean Alphabet. When translated, they read as follows[1]:
Left wing (used for ice attacks): FEROCITY BRUTALITY SEVERITY
Right wing (used for lightning or fire attacks): RETRIBUTION REVENGEANCE


