The Great Hunt (Extreme)
The Great Hunt (Extreme)
- Level
- 70 (Sync: 70)
- Item Level
- 350
- Difficulty
- Extreme
- Party size
- Light Party
4 man • 1 1
1  2
2 
- Unsyncing
- Allowed
- Time limit
- 60 minutes
- Phoenix Down
- Not Available
- Duty Finder
- High-end Trials (Stormblood)
- Roulette
- Mentor
- Tomestones
 15
15 - Req. quest
- The Newer King on the Block
- Entrance
- The Azim Steppe (X:11.3, Y:11.1, Z:0.7)
- Location
- The Great Hunt
- Region
- Othard
- Patch
- 4.36
 The Echo
- On wipe: +5% (max +25%)
You believed the day won with the Rathalos brought low, but a recently made friend -- and alleged hunting rival -- brings news to the contrary. There yet exist Rathalos of an older, more powerful brood -- a higher rank, if you will. The Hunt beckons you back to the Azim Steppe for greater trials and the chance for still greater bounties.
— In-game description
The Great Hunt (Extreme) is a level 70 trial introduced in patch 4.36 with Stormblood.
Strategy
With current player power levels, it is preferable to complete and farm this duty using an Unrestricted Party instead of solo queuing in Duty Finder. See Loot for more information.
The Great Hunt (Extreme) is noticeably similar to the Normal version of the fight (with some exceptions). For starters, the battle will now involve a light party (4 players) rather than a full party (8 players), and if there are a total of three player deaths (KO's) at any point during the battle, this will prematurely reset the fight via a Mission Failed animation. Players who die will be given the option to respawn with full health, and should utilize this instead of waiting to be resurrected, as this will not inflict the Weakness debuff.
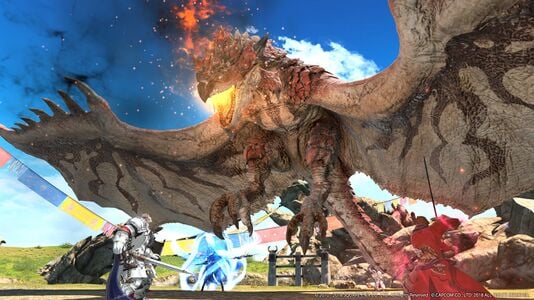
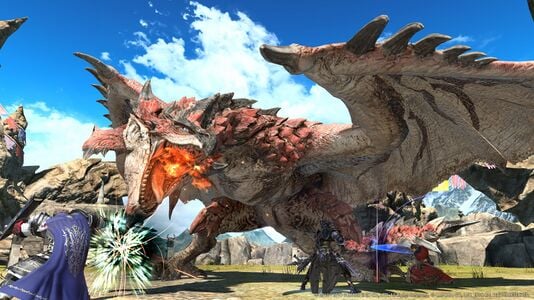
During the fight itself, Rathalos will occasionally use an arena-wide roar to inflict moderate damage on the entire party at regular intervals throughout phase 1 & 2 (usually once per minute or so). Rathalos' overall damage is also higher compared to his normal variant and he also occasionally targets the same player at least two times in a row. This can potentially lead to victims being KO'd through vicious combos if they are not careful. Just like in Normal mode, the battle is composed of three phases - a grounded phase, an add phase and a flying phase - with only a few minor differences.
- Rathalos has no auto-attacks and is unaffected by enmity, meaning he cannot be tanked at any point during the encounter. Instead, players must continuously avoid Rathalos' attacks by paying attention to his wind-up animations and reacting accordingly. Seeing as targets are random per attack, a good rule of thumb is to keep an eye on the direction Rathalos is facing. If he turns in your direction, it is always best to move out of his path to avoid a potential rush-attack. Melee also needs to keep an eye out for his 360-degree tail-swipe during the first two phases (which will always be counterclockwise) as well as a short-ranged bite/swipe attack which will hit all players directly in front and behind Rathalos. Due to this, anyone close to Rathalos should try to stick to his left-flank. As ranged, it is best to maintain distance from Rathalos as much as possible.
Due to the unavoidable and high-damage nature of Rathalos' roar mechanic, non-tanks must be cautious if on medium or low health when Rathalos hasn't roared for quite some time. As such, it is wise to remain above 40% health while Rathalos is grounded, just-in-case.
Phase 1: Grounded
Unlike Normal Mode, Rathalos will immediately begin every battle with his signature roar, inflicting unavoidable damage to the entire party. The roar has a hidden cooldown of about 1-minute or so and remains a constant threat for as long as Rathalos is grounded. After the initial roar, Rathalos will begin rotating between a set of attacks against randomly chosen players. All players must keep an eye on where Rathalos is facing and what animation he is performing if they wish to avoid any unnecessary damage. Considering that the fight will reset if the team carts three times, it is also best to save as many Mega Potions as possible for the final phase.
- Whipping Bite is indicated by Rathalos staring slightly to its left while opening his mouth and raising his tail. After a short delay, he will snap at players immediately in front of him while simultaneously swiping behind him with his tail. You can safely avoid this short-ranged attack by moving to either of Rathalos' flanks or by backing away.
- Tail Swipe is a two-part attack indicated by Rathalos looking to his right side and menacingly raising his tail. After a brief delay, Rathalos will swing his tail in a 180-degree counterclockwise motion. Immediately after this, Rathalos will perform another 180-degree sweep after a short delay in the same counterclockwise motion. Anyone caught in the path of a Tail Swipe will receive moderate damage and a massive knockback, with a possibility of being stunned. To avoid this, players should either move to Rathalos' left flank or run out of range during the wind-up animation.
- Charging Bite is a rush-attack indicated by Rathalos turning towards a player (regardless of distance) and performing a brief roar-like animation. After a short delay, Rathalos will then lunge directly at that player with a vicious bite, be they near or far. All players caught in the path of his charge will be inflicted with moderate damage and knockback, as well as a chance of being stunned. To avoid it, players should watch out for the brief wind-up animation and side-step out of its path as soon as possible.
- Fireball is indicated by an overhead marker on the target player and is one of the few telegraphed attacks Rathalos uses. After rearing up for a few seconds, Rathalos will expel an unavoidable fireball at the marked player, inflicting moderate splash damage as well as a dispellable burns debuff. Players with the marker should move away from the party to avoid inflicting unnecessary damage to others.
- Evasive Breath is indicated by Rathalos turning towards a target player and lowering its head and body. After a short delay, Rathalos will blast the area directly in front of him with fire during a backward leap, damaging, burning and knocking away anyone directly in front of him. This particular attack is one of the most dangerous as the telegraph is very short.
Rathalos will continuously target random players and use these abilities in no particular order until the third and final phase. Once Rathalos has been reduced to around 80% health, the add phase will begin.
Phase 2: Adds
Just like Normal mode, the party must once again contend with numerous wildlife (adds) that enter the arena and (initially) attack Rathalos. Unlike Rathalos, these adds are effected by enmity, meaning they can be aggro'd by players or gathered by tanks. Just like before, Rathalos' attacks will also damage these adds (and vice-versa). Grabbing all stray adds and tanking them close to Rathalos so that they damage each other is a sound strategy. The Coeurl add is the most problematic as it will occasionally use a massive conal AoE that can cover a large portion of the arena, thus it is wise to focus on this add first whenever possible, or at least turn it away from the party.
After being reduced to around 70% health, Rathalos will head towards the centre of the arena and inflict a roaring stun on the party. Simultaneously, a large Garula will enter the arena from the east side and charge into Rathalos after a short wind-up animation, knocking him down and damaging any players caught in the path. From here, the Garula will begin attacking the party and must be picked up by a tank as soon as possible. At the same time, Rathalos will become mountable, prompting a player to leap onto his back and repeatedly stab him via an active time event.
This chain of events serves as a DPS check. If the party fails to kill the Garula fast enough, or if a player mounts Rathalos and fails the active time event for any reason, Rathalos will escape the arena and wipe the raid with a massive flaming attack, King of the Skies. Due to being a light-party of 4 players rather than a full-party of 8 players (and the need for one DPS to mount Rathalos), it is unwise to try and kill the Garula without mounting Rathalos.
- Bear in mind that the player who mounts Rathalos will take continuous damage-over-time and may require healing. If the player who has mounted Rathalos is reduced to 0 HP, they will be knocked off Rathalos, and the party will wipe to King of the Skies. Also, the Garula's auto-attacks are incredibly vicious, even against tanks, and it will frequently perform a frontal AoE cleave for massive damage to anyone caught in its path. This cleave can also hit the player who has mounted Rathalos and easily lead to a raid wipe. It is best to face the Garula away from the party as soon as possible.
Assuming the Garula has been defeated in time and a party member has successfully mounted Rathalos without being KO'd, Rathalos will leave the arena and prepare to unleash King of the Skies. After standing behind the Garula's corpse to avoid this attack, the final phase of the encounter will begin.
Phase 3: Flying
After Rathalos has bathed the arena in flames, the background music will change, and the outer-arena will receive a flaming makeover. All players will now receive a debuff – Scalebound – which will reduce all healing received by players to 0 (except Mega Potions). As a result, each player should consider drinking a Mega Potion if their HP reaches medium or low levels. Party shielding, however, is unaffected by this debuff and can be very useful for mitigating burns, poison, or even some direct attacks from Rathalos himself.
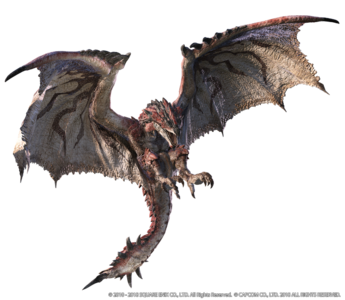
From here on, Rathalos will assault players from the air, and a "Down Counter" will be displayed in the form of a Duty Gauge. This gauge will gradually fill up any time an action on the global cooldown (GCD) is used against Rathalos - but off-GCD actions will not count. Once filled, Rathalos will immediately be knocked down to the ground and remain prone for 20 seconds, allowing players to attack (and eventually break) his tail, which will instantly chunk 30% of Rathalos's max HP. Conversely, Rathalos' overall defence will be much higher while in the air, but not when downed; hence players must try to knock Rathalos down and perform as much damage as possible while he is vulnerable. If a player wishes to use a damaging Limit Break, they should consider doing so when Rathalos is knocked down - using it while he is in the air will be dramatically less effective.
Also, note that the downed phase will end immediately upon the tail being broken. This is not a problem if the tail is broken during the first downed phase - but if it survives at low HP, then the second downed phase may be cut short if Rathalos wasn't already at 30% HP or below. This may then prolong the fight into a third downed phase. In such a case, it may be faster to intentionally drag out the second phase by attacking the body instead of the tail, and breaking the tail near the end of the phase.
Much like the previous phases, Rathalos will continuously attack random players with various abilities in no particular order and with limited visual indicators for as long as he is active.
- Claw Swipe is another rush attack similar to Charging Bite. After turning towards a random player (regardless of distance) and elevating slightly, Rathalos will swoop at that player with his claws after a brief delay. Players slashed by Rathalos' claws will be inflicted with a dispellable poison, a brief stun, moderate damage and a knockback. Just like Charging Bite, players can avoid this attack by quickly side-stepping out of his way before he charges.
- Mangle and Sweeping Flames are frontal-cone AoE's, indicated by Rathalos rearing its head and displaying its flaming mouth for a brief moment. To avoid these, players can either move behind Rathalos, move to his flanks, or move out of range entirely.
- Fireball, unlike phase 1, is now a sharable stack marker. After a brief delay, Rathalos will spit a fireball at the stack-marked player, leaving behind a persistent puddle of flame on the ground that will inflict burns on everyone sharing the damage and anyone who passes through puddles afterwards. This mechanic will repeat an additional two times for a total of three fireballs.
Players must consider grouping together to share the damage and will very likely need to drink a Max Potion to heal up during this mechanic. However, if this ability targets a tank instead of a healer or damage-dealer, the tank may choose to mitigate all three fireballs by themselves using defensive cooldowns and a Max Potion. Despite healers being unable to heal other players during this final phase, they can still use Esuna to remove the resulting burns, or use non-healing shield actions to help mitigate incoming damage.
- At this point, Rathalos will continue to cycle through these abilities until he is defeated. Eventually, he will become untargetable and enrage with an unavoidable King of the Skies, wiping the party, so it must be defeated before then.
Loot
The Rathalos Scale and Rathalos Scale+ must be "carved" from the corpse of the boss after defeating it by interacting with the body.
| Name | Type | Item Level | Rarity | Quantity |
|---|---|---|---|---|
| Rathalos Scale |
Material | N/A | Basic | 4 |
| Rathalos Scale+ |
Material | N/A | Basic | 1 |
 Treasure Coffer
| Name | Type | Item Level | Rarity | Quantity |
|---|---|---|---|---|
| Poogie | Minion | N/A | Basic | 1 |
| Rathalos Whistle | Other | N/A | Basic | 1 |
| Proof of a Hero - Monster Hunter: World Version Orchestrion Roll | Other | N/A | Basic | 1 |
Farming
For easy loot farming, it is strongly recommended that players form a pre-made party and use an Unrestricted Party (level sync disabled), as this will not affect loot drop rates. Solo queuing through Duty Finder is not advised. A party of 4 DPS jobs is ideal, but not strictly necessary (tanks and healers are not required, as the boss does not obey enmity rules, and healing actions do not work in the second phase anyway). Any composition, including fewer than 4 players, works at level 90. The boss can also easily be defeated solo at level 100.
The Rathalos Scale+ is only guaranteed if the party cuts off the boss's tail, so players should be careful not to kill the boss too quickly. The "down" gauge progresses only upon using an attack that is on the global cooldown (GCD), and the boss's tail only becomes vulnerable once the gauge is completely filled.
Unsynced strategy
For phase 1:
- Deal moderate damage to the boss (do not burst too hard yet).
- Kill the adds quickly when they appear.
- If playing solo, ignore the mounting prompt when the large add appears.
- Kill the large add quickly, then hide behind its corpse to survive the phase shift.
For phase 2:
- Do not stack for stack markers. Try to place them near the edge of the arena, so the lava puddles are out of the way.
- Damage the boss with only GCD attacks, aiming to get its HP to around 30%.
- Once the down gauge is filled, destroy the tail with burst damage. This will deal 30% of the boss's HP as a result, ending the fight instantly if its HP was was low enough.
- Remember to use potions when needed (around half health or below), especially if farming solo.
Achievements
This duty is associated with the following achievements:
| Name | Points | Task | Reward | Patch |
|---|---|---|---|---|
| Extreme Rathalos Hunter | 10 | Defeat the Rathalos in the Great Hunt (Extreme). | - | 4.36 |
Music
| Section | Theme |
|---|---|
| Phases 1-2 | Savage of the Ancient Forest |
| Phase 3 | Proof of a Hero - Monster Hunter: World Version |
| Victory | Quest Complete! - Proof of a Hero Version |
| Duty Failure | Quest Failed (Monster Hunter: World) |


