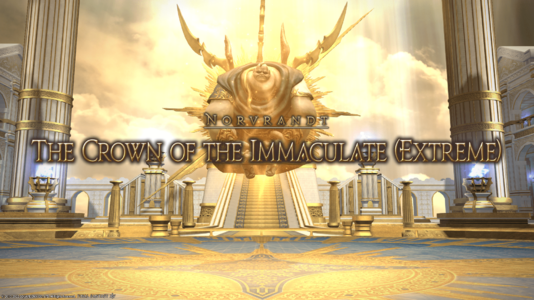
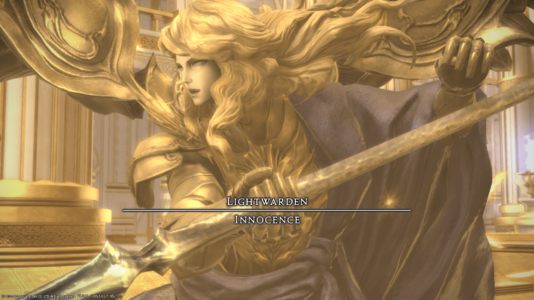
The Crown of the Immaculate (Extreme)
The Crown of the Immaculate (Extreme)
- Level
- 80 (Sync: 80)
- Item Level
- 430
- Difficulty
- Extreme
- Party size
- Full Party
8 man • 2 2
2  4
4 
- Unsyncing
- Allowed
- Time limit
- 60 minutes
- Phoenix Down
- Not Available
- Duty Finder
- High-end Trials (Shadowbringers)
- Roulette
- Mentor
- Tomestones
 15
15 - Req. quest
- Minstrel from Another Mother
- Location
- The Crown of the Immaculate
- Region
- Norvrandt
- Stone, Sky, Sea
- Available
- Patch
- 5.0
 The Echo
- On wipe: +5% (max +25%)
The esteemed Lord Vauthry believed himself to be without flaw or sin─the embodiment of glorious perfection in Innocence. Needless to say, he was not, but he nevertheless made for a tremendous opponent. Upon hearing of how you and your comrades claimed victory atop Mt. Gulg, the minstreling wanderer was immediately driven into a fit of inspired creativity, and the result is yet another composition that will send even the most unimaginative Warrior of Darkness hurtling into the depths of memory that they might once more do battle with Eulmore's fallen tyrant.
— In-game description
The Crown of the Immaculate (Extreme) is a level 80 trial introduced in patch 5.0 with Shadowbringers.
Overview
Phases & Abilities
There are three phases within this battle. The first and last phase contains massive mechanical overlaps and copious amounts of AoE that will test the positioning and reactions of all participants. The second phase serves as a simple DPS check versus three adds while Innocence himself remains inactive and invulnerable. Players should be mindful of the below-listed abilities as they will be cast at various intervals throughout the first and last phase, usually between (or sometimes during) other mechanical overlaps.
- Shadowreaver - an unavoidable raid-wide AoE. Healers should be ready to top-up the entire group whenever necessary, as this will often be used as a finisher after (or during) other overlapped mechanics.
- Righteous Bolt - a vicious and frequently used tankbuster which applies a lightning-based debuff to the primary target. Righteous Bolt will be used often throughout the encounter, requiring tanks to pay attention to each other and perform tank-swaps as soon as possible.
Phase 1
- Winged Reprobation - a mechanic that summons resplendent swords into the arena that will tether to random party members. Tethered players should move away from the party to the far sides of the arena. After a brief delay, marked players will drop the tethers at their current location in the form of a circle AoE which must be avoided. Shortly after, the sword they were tethered to will fire a beam directly at the marked location. This beam will damage anyone caught in the path and also split at the marked area, firing three more line-AoEs to the East, North and West side of the target location (indicated by small arrows where the tether was dropped). By placing markers at a diagonal-edge of the arena, most of these beams will shoot across the top and sides, leaving the centre as a safe-zone.
- Rightful Reprobation - a frequently used two-part mechanic, indicated by blue AoE-markers that are aimed from the centre of the arena to the outer edges. After a short delay, spears will be fired through these markers to the outer-arena, slicing through anyone caught in their path. After a moderate delay, the weapons outside of the arena will then shoot across the entire arena in the opposite direction after a very limited telegraph. As a rule of thumb; whenever you see blue line-AoEs, always be mindful that these will re-enter the arena after a moderate delay and give very little time for players to react if they have not pre-positioned themselves to avoid it.
- Rotating Swords - after falling from the sky, a large resplendent sword will carve the arena in a fan-like AoE that will slowly rotate around the arena, forcing players to remain on the move to stay within the three visible safe-zones. At this point in the battle, Rotating Swords will overlap with Drop of Light (see below). Bear in mind that later versions of this mechanic may involve a single rotating blade rather than a double-rotating blade, and may also come with small gaps in the blade, allowing players to traverse between the available safe-spots without taking damage.
- Drop of Light marks two random players with large AoE markers that will detonate after a moderate delay, forcing them to move away from the party (and each other) to avoid causing unnecessary damage to the group.
- Winged + Rightful Reprobation - players must avoid a succession of orange line-AoEs from summoned swords, and a large number of blue-marked spear AoEs from Innocence in a more star-like pattern rather than the hourglass-pattern from earlier. Despite the volume of AoE's fired in all directions, safe-spots will be noticeable throughout the arena. As always, players must be wary of where the blue-markers have fired seeing as, just like before, the launched spears will once again fire back into the arena after a moderate delay with little warning. Furthermore, this combo of mechanics will be loosely overlapped by Light Pillar (see below).
- Light Pillar - a line-directed stack-mark AoE that will target a random healer. Players must stack along the line to share damage.
- Winged Reprobation + Rotating Sword - players must deal with an overlap between the summoned sword tether mechanic and the rotating AoE. Unlike before, this Rotating sword will cast a single line across the arena (instead of two in a fan-shape) and there will also be two gaps so that players can move from one safe spot to the other if necessary. While the blade rotates around the arena, tethered players must avoid the rest of the party, and everyone must be cautious of any beams fired from the swords towards marked players.
Phase 2
This phase begins with Innocence rendering himself invulnerable and summoning two Forgiven Venerys (which will appear at the east and west of the arena and must be picked up by tanks), along with one Forgiven Shame in the middle of the arena which must be focused down by damage dealers. The Forgiven Shame will unleash raid-wide damage, whereas the Forgiven Venerys will use tank-busters against their current target.
This phase serves as a DPS check. If the group does not kill all adds before Innocence is fully charged, the group will be wiped. If the group is successful, the group will be blasted by raid-wide damage and should heal up before the next phase begins.
Phase 3
With the three adds slain, the final phase immediately begins. From here on, players will need to deal with a cycle of mechanical combos from the first phase along with a new Starbirth mechanic.
- Starbirth - this creates three shining orbs in a set pattern around the arena which will explode if they collide with any mechanics from Innocence. Despite the size and appearance of these orbs, the resulting explosions are much larger than you may expect. At this point in the battle, the group must make an effort to pull Innocence to whichever part of the arena is furthest away from all orbs as soon as possible. After the first Starbirth, Innocence will eventually use Shadowreaver, the unavoidable raid-wide AoE. On casting Shadowreaver, all three orbs will explode simultaneously, blasting a large portion of the arena with massive damage.
- After this introduction to Starbirth, players must contend with another overlap between Rotating Swords (fan-shaped) and Winged Reprobation (star pattern).
- Beautific Vision will be cast shortly afterwards. Innocence will fly to the edge of the arena and, after a brief wind-up, fly through the centre of the arena in a straight line, carving all players along the way. The group should immediately run to the arena's edge and stand as far from the centre as possible.
- Starbirth will then be cast alongside Drop of Light, spawning two orbs at opposite ends of the arena, and marking two random players with large AoE markers. If the resulting explosions from Drop of Light hit either of the Starburst orbs, they will explode, blasting a hefty portion of the arena with massive damage. As a result, marked players must be wary of their positioning to prevent this from happening, as well as avoid damaging the party with their AoE marker. As soon as Drop of Light explodes, two more players will be marked for another Drop of Light immediately afterwards. Assuming the group survives the ordeal, they will then have to deal with Light Pillar. Seeing as this can also explode Starbirth orbs, players must make an effort to aim the stack-line so that it does not shoot an orb.
- Beautific Vision will be used once more, except now it will explode both Starbirth Orbs. As a result, players must move as far away as possible from the orbs while also being mindful of Innocence's charge-path.
- God Ray is a tri-directional AoE that fires from the arena centre in a pizza-slice formation. When used, there will be three thin safe-spots that players can stand in while the AoE fans out across the arena. However, this attack will be overlapped with Rightful Reprobation (hourglass pattern). Due to the noticeable delay with God Ray, players must resist the urge to dodge it too early. Be sure to wait until Rightful Reprobation has completed its two-part attack before ducking into a God Ray safe-spot.
- Starbirth will now be overlapped by Winged Reprobation and Light Pillar. After spawning four orbs, Winged Reprobation will cover the arena in a set pattern of line-AoEs (twice in quick succession). During this, a player will be marked by the stack-line AoE of Light Pillar. Due to the presence of four orbs around the entire arena, players must work towards creating a safe-spot before Innocence can detonate them. To do so, players must first dodge the line-AoE's from Winged Reprobation, then move as a group towards an orb, bringing Innocence along with them. After doing so, the target of Light Pillar should aim the beam towards the opposite orb. If done correctly, this will explode the orb with no damage to the group, giving players a safe-spot they can use before Innocence inevitably casts Shadowreaver, detonating all remaining orbs.
- From this point onward, Innocence will rotate through various mechanical combinations involving Starbirth, Drop of Light, Winged Reprobation, Rightful Reprobation and Rotating Swords.
- The hard enrage is a long cast of Beatific Vision, which will wipe the party if the boss is not defeated in time.
For a visual representation of these mechanics and combos, be sure to check out MTQ's excellent video guide.
Loot
- Each player will receive 1 Immaculate Totem per kill. Collect 5 totems to exchange for accessories or 99 for a Innocent Gwiber Trumpet at Fathard in Eulmore (X:10.3 Y:11.8).
 15 Allagan Tomestone of Poetics
- Innocence Card (Drops at a fixed rate.)
 Treasure Coffer
Achievements
This duty is associated with the following achievements:
| Name | Points | Task | Reward | Patch |
|---|---|---|---|---|
| Proven Guilty | 10 | Defeat Innocence in the Crown of the Immaculate (Extreme). | - | 5.0 |
| Mightier than Perfection | 5 | Complete the Crown of the Immaculate (Extreme) with a party of only blue mages, Silence Echo turned on, and Unrestricted Party turned off. | - | 6.45 |
Music
| Section | Theme |
|---|---|
| Main | Insanity |


