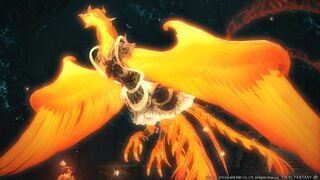
Hells' Kier
Hells' Kier
- Level
- 70 (Sync: 70)
- Item Level
- 355
- Difficulty
- Normal
- Party size
- Full Party
8 man • 2 2
2  4
4 
- Unsyncing
- Allowed
- Time limit
- 60 minutes
- Phoenix Down
- Not Available
- Duty Finder
- Trials (Stormblood)
- Roulette
- Trials
- Tomestones
 15
15 - Req. quest
- The Fire-bird Down Below
- Entrance
- Reisen Temple (X:6.3, Y:6.8)
- Location
- Hells' Kier
- Region
- Othard
- Patch
- 4.4
 The Echo
- On wipe: +10% (max +50%)
As the return of the mad auspice Koryu draws ever closer, Genbu of the Four Lords seeks to marshal his comrades' strength. But while the white tiger, Byakko, has been restored to his senses, the radiant Suzaku is on the verge of succumbing to the aramitama. As before, there is but one way Suzaku can be brought back from the brink of madness─for the sake of the Ruby Sea and those who call her home, you and your comrades must quell the rage within the auspice's soul.
— In-game description
Hells' Kier is a level 70 trial introduced in patch 4.4 with Stormblood.
Strategy
Cremate - Telegraphed tankbuster
Eternal Flame - Revives all the Scarlet Lady (phoenix) corpses
These will tether to a damage dealer and must be killed ASAP. If not killed after a certain amount of time they will cast
Ashes to Ashes - high damage and debuff (will likely result in a wipe)
Best strategy is to stack them in the middle and AoE them down together
Endless Summer - Massive frontal cone AoE directed at one player - move out of the way to avoid damage and debuffs
Screams of the Damned - raid wide AoE damage
Phoenix Down - large Scarlet Plumes cover the platform and slowly begin to cast an explosion (A Wing and a Prayer)
If above strategy was followed and all 4 phoenix were killed in the middle - then middle plume should be destroyed to create a safe zone before the explosion happens. Any phoenix corpse caught in the explosion will be revived with HP buffs.
If any phoenix are raised then be sure to focus them down so they do not explode and wipe the party.
The boss will then return to the centre and cast Eternal Flame again. The phoenix will fly away this time and the platform will begin to change forming 8 circles around the centre.
Players must face the way of the arrow to absorb the orbs and not let them reach the boss so she does not power her special. There are 7 waves of orbs.
Scarlet Melody - raid-wide damage based on strength of gauge from the orbs
--
At this point the platform will have changed drastically and there will be a hole in the middle which you can fall through - so be careful. You can also fall off the edge as well.
--
Southron Star - raid-wide damage
Ruthless Refrain - knockback from centre of platform
Phantom Flurry - multi-hit tankbuster, followed by huge frontal AoE knockback
Well of Flame - large column AoE attack on a player, dodge this
Phoenix Says - when the phoenix hits a rune the corresponding platform explodes dealing high damage and debuffs
See which direction the phoenix is flying and position yourself next to (but not in) that section about to explode and then move into it after the explosion
Another Well of Flame and Ruthless Refrain will occur during this part. Once all four sections have exploded the platform will return to normal.
Incandescent Interlude - four meteor circles spawn around the boss - ensure at least 1 player is in each
Rekindle - all players are targeted by circle AoEs, spread out to avoid any overlap (will happen at same times as Incandescent Interlude)
Another tankbuster and knockback will happen.
Phoenix Rush - phoenix on edge will appear and rush across platform - dodge them
Phoenix Says 2.0 - platform will change colour again but this time 2 sequences of 4 runes on each side, same principle as before but faster movement required.
After this you have seen all mechanic and these will repeat until the boss is dead.
Loot
 15 Allagan Tomestone of Poetics
- Suzaku Card (Drops at a fixed rate.)
Dialogue
Cutscene
Suzaku: Mine aramitama is unbound... AAAAAAHHHH!
Duty Dialogue
Suzaku: Tenzen? Tenzen, 'tis I! Sheathe your sword, I beg of you!
Suzaku: You gave me the strength to rise from the ashes!
System: Suzaku rises from the ashes!
System: Suzaku's minions revel in their newfound strength!
Suzaku: Let there be no more secrets between us...
System: The aramitama has begun to disrupt the Lifestream.
Suzaku: I could not bear to lose you again!
System: Stand upon the correct arrow or face the consequences!
Suzaku: I never showed you my true form, did I...?
Suzaku: Trust in me, my love! I will protect you─I promise!
Suzaku: Please, my love─ If only you would listen...
Suzaku: Why do you do this!?
Suzaku: All I ever wanted was for you and I to...to...
Suzaku: Hearken to my melody...
Suzaku: All I ever wanted was for you and I to...to...
Suzaku: Tenzen, please!
Suzaku: You never did make it easy, did you?
Suzaku: We will wake you from this madness!
Suzaku: Hearken to my melody...
Suzaku: If it must be thus, then I'm glad...it is you...
Music
| Section | Theme |
|---|---|
| Phase 1 | Answer on High |
| Intermission | Sunset |
| Phase 2 | Sunrise |

