The Dying Gasp
The Dying Gasp
- Level
- 80 (Sync: 80)
- Item Level
- 410
- Difficulty
- Normal
- Party size
- Full Party
8 man • 2 2
2  4
4 
- Unsyncing
- Allowed
- Time limit
- 60 minutes
- Phoenix Down
- Not Available
- Duty Finder
- Trials (Shadowbringers)
- Roulette
- Trials
- Tomestones
 10
10 - Req. quest
- Shadowbringers
- Location
- The Dying Gasp
- Region
- Norvrandt
- Stone, Sky, Sea
- Available
- Patch
- 5.0
 The Echo
- On wipe: +10% (max +50%)
By Emet-Selch's own words, you are no one─nothing─your life a ghastly mockery of past perfection, utterly devoid of meaning. Yet despite his endless refutations of your worth, mankind has dreamed and struggled and survived. Even now, you fight to preserve your future, and spare two worlds from unimaginable destruction.
The moment has come to make your stand, to call upon every last reserve of strength. Fight for those who shared your journey, and for those you met along the way. Fight for those who awaited your coming across the boundaries of time and space.
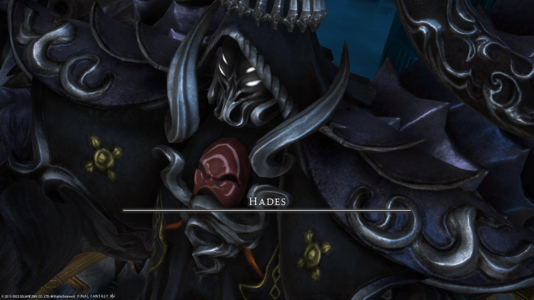
From distant stars yet undimmed, you are joined by seven summoned champions, for only together can you hope to prevail against the staggering might of this ancient Ascian─the immortal and implacable Hades!
— In-game description
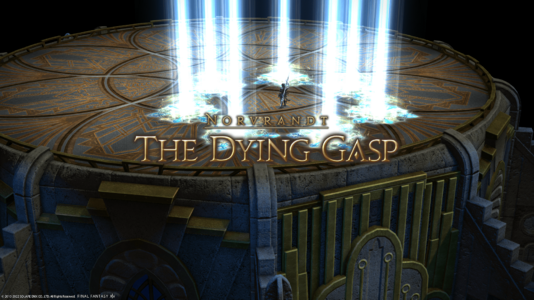
The Dying Gasp is a level 80 trial introduced in patch 5.0 with Shadowbringers.
Strategy
Your encounter with Emet-Selch (Hades) takes place within a circular arena overlooking the ruins of Amaurot, deep within the Tempest. Thanks to a small outer railing during the opening phase, players will be incapable of falling over the edge. However, the railing will eventually be destroyed as the fight progresses, meaning players can plummet to their doom if they stray too far. However, there are no notable knockback or movement-based attacks to consider at the time.
Below is a list of all Hades' abilities and phases.
Phase 1
- Ravenous Assault - Hades slashes at his primary target with a vicious tank-buster.
- Bad Faith - creates a large wall through the centre of the arena that reaches from one end of the platform to the other, with each half of the wall having spikes (arrows) protruding out in different directions. After a brief delay, the spikes will shoot across the platform in the direction they are pointing - one half firing north while the other fires south. To avoid being blasted, players should position themselves behind either side so that the spikes on that side are not pointing in their direction.
- Double - a buff that causes Hades next Dark Eruption (see below) or Shadowspread to be double-cast.
- Dark Eruption - targets 5 random players with purple AoE markers which will eventually explode, forcing them to spread apart to avoid overlap. Simultaneously, AoE (circle) telegraphs will also be dropped under the marked players feet, forcing them to move out of the way. Bear in mind that Dark Eruption can be Doubled - causing marked players to spawn a second circle beneath their feet after the first one they dropped has exploded.
- Shadowspread - causes Hades to emit AoE cones in multiple direction, indicated by telegraphs of the floor. Simply dodge the highlighted areas to avoid taking damage. However, if Shadowspread is Doubled, Hades will follow-up the initial attack by emiting cones in the previously undetonated areas, forcing all players to side-step.
- Broken Faith - causes a random pattern of aetheric (glowing blue) circles to slowly transcend from the sky into the arena. Once a circle touches the ground, it will detonate, searing anyone caught in their wake for moderate damage and also apply a stackable debuff. Keep in mind that the explosions are wider than the circles themselves. For reference, players can check the circular patterns on the arena floor to see how big the detonation will actually be. To avoid, simply avoid the first few circles until they detonate, then move into a previously detonated area away from other upcoming circle explosions.
From here on, Hades will begin to cycle the previously utilized abilities (possibly with overlapped combinations) until his health has been reduced to 10%. Once sufficiently damaged, Hades will become untargetable while an add-phase begins.
Add Phase
Whilst invulnerable, five waves of Shadow of the Ancients (adds) will be summoned into the arena. Simultaneously, a Fervor of the Ancients (Duty Gauge) will slowly begin to fill-up, indicating Hades's growing power. If the adds are not defeated before Fervor of the Ancients reaches 100 (max), the raid will be wiped.
Throughout the add phase, players will also contend with multiple AoE markers at the same time as a stack-mechanic. As such, AoE marked players should spread out to avoid the raid, whereas unmarked players should stack with the stack-marked victim to help soak the damage. Assuming the raid successfully defeat all Ancients before the Duty Gauge reaches maximum, Hades will unleash Ancient Dark IV - an unavoidable raid-wide AoE. So long as the Duty Gauge is below <100, the raid can survive via mitigation and healing.
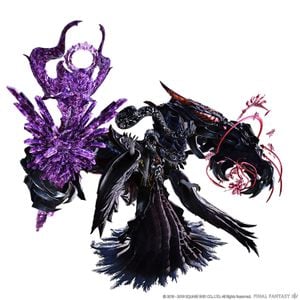
Hades will lament his flesh-bound form and morph into something far more threatening. By successfully reaching this point, a checkpoint is created, ensuring that any future wipes will reset the fight back to the second phase rather than the very beginning.
Phase 2
With Hades now in full form, the fight resumes with the arena shrouded in darkness and lacking the outer railing, meaning players can accidentally walk over the edge to their doom if not careful. Throughout the rest of the encounter, Hades will no longer be moveable, remaining rooted to the north of the arena with a much larger non-directional hit-box. Whilst in this form, the target with highest enmity (typically the tank) will be constantly peppered by ranged auto-attacks in-between all other mechanics, so beware.
- Titanomachy - a frequently used raid-wide blast of darkness, keeping healers on their toes.
- Shadowstream - casts an untelegraphed attack that will blast through the centre of the arena in a column shape, indicated by a large ball of dark energy swirling in front of Hades' face whilst casting. If you notice the animation, simply move to the east or west side of the platform to avoid the upcoming blast.
- Dual Strike #1 - creates AoE circle markers on two players, forcing them to move away from the raid to avoid unnecessary overlap.
- Echoes of the Lost - causes Hades to noticeably lift one of his two arms and stretch it across the arena with an audible voice cue, such as "Meddlesome pests". After a brief delay, he will use that arm to swipe across the arena, damaging and debuffing anyone who does not stand directly behind the out-stretched arm. Players will have a small amount of time to identify the raised arm and run behind it as soon as possible.
- Polydegmon's Predation - an inverted version of Shadowstream (see above). Hades will visibly raise both his arms and prepare to smash the east and west sides of the arena, leaving only a column through the centre (a straight line directly in front of him) as a safe spot.
- Hellborn Yawp - targets both tanks (two highest enmity targets) with earthshaker markers, indicating that a cone-AoE will be aimed from Hades in the direction of each marker. Marked players can bait the attack in various ways, such as both tanks moving to the far sides so that a safe-spot is created in the centre, or stacking in the centre so that the sides of the arena remain safe, etcetera.
- Captivity - marks two random players with AoE circles. After a brief delay, both players (and anyone overlapped by the circles) will be forcibly sucked into the centre of the arena and entrapped within an Aetherial Gaol. While entrapped, players will be raised into the air and unable to move or act in any way, surrounded by a (targetable) glowing orb of darkness. All untrapped players will need to quickly destroy the Aetherial Goal to free their comrades. If this is not done before Hades casts Chorus of the Lost, all trapped players will be executed, regardless of their HP.
- Dual Strike #2 - targets the majority of the raid with a combination of plain AoE circles (yellow) and tethered AoE circles (purple) at the same time. To avoid, simply spread apart from other raid-members so that markers do not overlap other teammates.
- Doom - causes five bright circles to appear within the arena. Simultaneously, the platform itself will visibly turn black, and all members of the raid will acquire an unavoidable Doom debuff. To cleanse the debuff, all circles will need to be occupied by at least one player. Once done, the raid will be cleansed of all Doom debuffs.
- Wall of the Lost - inflicts a telegraphed knockback from the centre of the arena after a brief delay. The knockback itself is relatively mild, though it still enough to punt players into the void if they remain too close to the arena edge.
At this point, Hades will begin to loop the above mechanics with increased overlap until he has been brought to around 20% health.
The Finale
Once Hades has been sufficiently damaged, he will eventually chain all players via Life In Captivity, rendering them unable to move or act. After beseeching aid from his fallen brethren and calling upon the darkness once more, an Active Time Maneuver will commence. Much like most other active time maneuvers, players must continuously press buttons to fill up a meter before a timer runs out. If successful, the player will break free of their chains in a blaze of overflowing light, much to the chagrin of Hades, who curses Hydaelyn before his last-ditch effort to thwart the raid. However, should any player fail to fill the gauge during the active time maneuver, they will be instantly KO'd instead.
With the platform now shrouded in light, Hades will continuously cast The Dark Devours, dealing tremendous AoE damage and causing the platform to slowly be consumed by darkness with each cast. If Hades has not been defeated before the entire platform has been shrouded in darkness, all participants will begin to suffer from a continuous bleed debuff, and Hades himself will start to long-cast Black Cauldron - causing a full raid-wipe if the cast goes off.
Loot
 10 Allagan Tomestone of Poetics
- Hades Card (Drops at a fixed rate.)
Dialogue
Cutscene
Hades: Show me your “vaunted” strength. And I shall expose the lie of your fragmented existence! (voice acted)
Duty Dialogue
Hades: You are destined for naught else but oblivion!
Hades: By Darkness be purged! (voice acted)
Hades: Darkness reigns! (voice acted)
Hades: Flee, you fools! (voice acted)
Hades: You are unworthy! (voice acted)
Hades: The arcane is mine to command! (voice acted)
Hades: Scurry and scatter! (voice acted)
Hades: Give voice to your anguish, my brethren!
Shadow of the Ancients: To rekindle our future!
Shadow of the Ancients: To restore our brethren!
Hades: Give substance to our hopes, our dreams, our prayers...
Shadow of the Ancients: To revive our hope!
Shadow of the Ancients: To realize our salvation!
Hades: And by their undeniable grace, may our perfect world rise anew!
Shadow of the Ancients: To remake our star!
Shadow of the Ancients: To reclaim our world!
Hades: Yawn wide, the ever-hungering void!
Hades: Devour the Light, and return all to Darkness!
Hades: Impressive resilience... But it matters little. I have all eternity to break your stubborn wills!
Hades: I am stifled by this vessel of flesh... (voice acted)
System: The limit gauge resets!
Hades: Unburden your sleeping souls, my brethren...
Hades: I shall bear every hope, every dream, every prayer!
Hades: The future of this star shall be shaped by my hands! (voice acted)
Hades: I shall be raised up by the prayers of my fallen brethren! (voice acted)
Hades: Behold, a sorcerer of eld! Tremble before my glory! (voice acted)
Hades: Darkness, flow through me! (voice acted)
System: Hades is gathering aetherial energy...
System: Hades is gathering aetherial energy...
Hades: Bothersome pests! (voice acted)
Hades: I am unbound by perfect law! (voice acted)
System: Hades is gathering aetherial energy...
Hades: Lottery of life! (voice acted)
System: Hades is gathering aetherial energy...
Hades: Hearken to the word of ruin! (voice acted)
Hades: This place will be your tomb! (voice acted)
Hades: Begone! (voice acted)
System: Hades is gathering aetherial energy...
Hades: Drown in despair! (voice acted)
Hades: My dormant brethren, dream now of a dark tomorrow... (voice acted)
Hades: By our gathered might must we reclaim these vain reflections. (voice acted)
Hades: In Zodiark's name, I beseech you! (voice acted)
System: The Light within Her champions grows faint...
Hades: Has the Wardens' Light won free!? No... (voice acted)
Hades: Damn you... Damn your wretched blessing! (voice acted)
Hades: I will extinguish the spark of your miserable lives!
System: The Darkness grows deeper...
Hades: That Light split the world, and every life upon it! (voice acted)
System: The Darkness grows deeper still...
Hades: Our tragedy must never again come to pass! (voice acted)
Hades: By His grace will Darkness reign over all! (voice acted)
System: The Darkness becomes an impenetrable shroud, encompassing all...
Hades: Death comes for Her servants... (voice acted)
Hades: I shall rebuild our kingdom upon your bones. (voice acted)
Hades: Abomination! You seek to shatter my soul?
Post-Battle Cutscene
Hades: You...you have no power over me! (voice acted)
Music
| Section | Theme |
|---|---|
| Phase 1 and Adds | Shadowbringers |
| Phases 2-3 | Invincible |


