Endwalker content

Containment Bay Z1T9 (Unreal)

From Final Fantasy XIV Online Wiki
Jump to navigation Jump to search
Disambig icon.png This article is about the level 90 Faux Hollows trial. For the level 60 challenge-mode trial, see Containment Bay Z1T9 (Extreme).

Trial.png

Containment Bay Z1T9 (Unreal)

Containment Bay Z1T9 (Unreal).png
Level
90 (Sync: 90)
Item Level
560 (Sync: 565)
Difficulty
Unreal
Party size
Full Party
8 man 2 Tank role.png 2 Healer role.png 4 DPS role.png
Unsyncing
Not Allowed
Time limit
60 minutes
Duty Finder
Raid Finder (Trials)
Tomestones
Allagan Tomestone of Causality 20 Allagan Tomestone of Comedy 10 
Req. quest
Feature quest Fantastic Mr. Faux
Location
Containment Bay Z1T9
Region
Abalathia's Spine
Patch
6.4

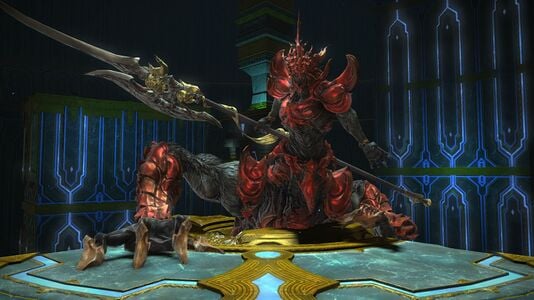
The faux commander would hear a story of victory over injustice, and you immediately envision the nightmarish aspect of Zurvan, the Demon. This pillar of the Warring Triad was called forth to triumph over the wicked, but your memory of the eikon's incarnation runs thick with only fury and malevolence...

— In-game description

Containment Bay Z1T9 (Unreal) is a level 90 trial introduced in patch 6.4 with Endwalker.

Guide

Animated guide by Hector Hectorson

Aggressive difficulty r6.png The Demon: Zurvan

Phase 1

  • (boss does auto attack cleaves all the time. Should always be facing away from party members)
  • East Platform falls + Red Circle AoE's: Bait melee fire circles together at right side of South platform and then move away.
  • North Platform falls
  • West Platform falls + Red Circle AoE's: Bait again.

Phase 2

  • Soar (skipped at 75%): see below
  • Ice pad Spawns under the boss. You can't move through the boss.
  • Biting Halberd: needs to be directly behind the boss (Edit: Biting Halberd is used right after THIRD Cleave attacks. Like, Ice pad spawns -> cleave x3 -> Biting Halberd)
  • Southern Cross: Stack at the butt to bait and then move out.
  • Biting Halberd/Ciclicle/Tail End: Randomly selected (skipped at 59%)

Phase 3 (Adds)

ADDS:

Execrated Will = Should be tanked by a tank. Does high damage, which will always crit, on its target and gain Damage up icon1.png Damage Up buff every 10 sec.

Execrated Thew = Small add. Should also be tanked by a tank. Nothing special.

Execrated Wile = doesn't need to be tanked. Should face away from it when Meracydian Fear is cast.

Execrated Wit = Doesn't need to be tanked. Should kill it before Meracydian Meteor casting is done.

  • Will x1 (North) + Thew (North): just AoE down
  • Will x2 (West) + Wile x1 (South) + Wit x1 (East): Each tank grab 1 Will at West. All DPS classes kill Wile first. Should face away from South to avoid Fear. Bring two Wills to South and AoE them down once Wit is dead.
  • Will x1 (South) + Thew x3 (East) + Wit (West) + Wile (North): One tank grabs Will and the other tank grabs 3 Thews while DPS classes burn Wit. Should face away from North to avoid as well. Bring all the adds to North and AoE them down once Wit is dead.
  • Zurvan's Ult

Phase 4 Part 1

  • Tethers appear: 2 pairs of Infinite Fire and 2 pairs of Infinite Ice come out. Tethered pair should be close enough to each other to avoid DoT damage (about 10k dmg each tick). (similar to T11 tethers)
  • Wave Cannon: Randomly selects a non-MT player and does damage with Bleed icon1.png Bleeding debuff. Everyone else should be away from its target, but make sure target's partner is in safe distance of tether.
  • Tyrfing: Attacks Main Tank 5 times with spear and does fire damage at the end. High damage and cooldowns are needed as necessary.
  • Southern Cross: Stack under the boss and move out. Make sure tethered partner is going to the same direction or it's going to kill both players. Call out where you're going to!
  • Broken Seal: Spawns 4 fire meteors and 4 ice meteors. 4 players with Infinite Ice go into 4 Ice meteor circles while 4 Infinite Fire goes into 4 Fire meteor circles. (Match your color) Since players are tethered, tethered pair should always be close to each other. Call out! There are three patterns that randomly spawn: please check here.
  • Biting Halberd/Ciclicle/Tail End:

IF blue/red circles at EDGE: Ciclicle(IN)

IF blue/red circles at CENTER: Tail End(OUT)

IF DIAMOND shapes x2: Biting Halberd(Butt)

<basically repeating again from here>

  • New tethers appear: find a new partner and hug each other.
  • Wave Cannon: targets a random non-MT player. Away from its target.
  • Tyrfing(hits 6 times and fire damage)
  • Southern Cross
  • Broken Seal

<repeating ends here>

  • Biting Halberd/Ciclicle/Tail End:

Phase 4 Part 2

  • Soar: see below
  • The Demon's Claw: Does High damage and Stun icon1.png Stuns MT while putting Magic vulnerability up icon1.png Magic Vulnerability Up. OT Provoke.png  Provokes the boss off MT. MT will also get knocked back. Make sure position yourself at the center so MT doesn't get knocked back into the fiery wall.
  • Wave Cannon: targets MT (not sure if it targets OT if they Provoke.png  Provoke during Demon's claw or MT still gets targeted by it) and shows huge AoE box that arrows indicate into the AoE. Seems like people stack in the box to soak the damage together. However, my group just killed MT and had OT Provoke.png  Provokeing the boss after.

<basically repeating again from here>

  • New tethers appear: find a new partner
  • Wave Cannon: targets a random non-MT player. Away from its target.
  • Tyrfing(hits 7 times and fire damage)
  • Southern Cross
  • Broken Seal

<repeating ends here>

  • Biting Halberd
  • The Demon's Claw
  • Wave Cannon
  • New tethers appear
  • Wave Cannon
  • ... Probably repeating... You wanna kill the boss now.
  • Flame Halberd: Hard enrage cast


Mechanics

Soar

When Boss casts Soar, he shows 3 rectangle AoE's toward the edge of the arena. After Rectangle AoE, the boss disappears and spawn 3 mirages at the edge where the three rectangle AoE were targeting at. Then, 6 red unavoidable circle AoE(size of shadowflare or a little bit bigger) spawn on 6 randomly selected players. When 6 AoE's explode, three Divebombs of mirages happen at the same time, so should be away from mirage's divebomb range AND avoid clipping each other with red AoE circle. After the damage, one random player is targeted with a Stacking AoE marker(Thordan's Dragon's Rage AoE with 4 arrows indicating inside) while a random healer is targeted with a small red marker. Most of players should get into the Stacking AoE to soak the damage together, and the healer with a small red marker should be away from anyone around to avoid additional damage.

  • Save LB3 for healer LB so your healer can always raise everyone after the mechanic. If no death or a few deaths, Melee LB after the mechanic.
  • Divebomb Damage does a lot more damage than red Circle AoE AND also leaves Vulnerability Up icon1.png Vulnerability Up debuff to a player who gets hit. If there's no choice, I think clipping AoE is better than getting hit by mirage's divebombs.
  • Just TANK LB during Soar helps a lot! (for soar in the last phase)
  • Zurvan never Targets HEALERS with red AoE circles. IT means, it always targets 2 tanks and 4 DPS. Because of this, It's safe for healers to stack with any other players for this mechanic.
  • BUT, If a DPS or Tank is dead, a healer will be marked with the red AoE circle. likewise, if a healer dies, a dps will be marked with a small red marker, and therefore should not be in the stacking marker with the group. Check if you have the small red marker if a healer dies, as failing to notice it will usually result in a wipe.
Containment bay z1t9 (extreme) img2.png

Broken Seal

  • check this out for 3 different patterns:
Containment bay z1t9 (extreme) img1.png
  • If there are more than 2 deaths before this mechanic, expect a wipe
  • Communication is KEY. Say where you're going to!
  • After Southern Cross, position yourself either Right Flank or Left Flank of the boss. Have 1 red and 1 blue pairs on each side so you can simply go to the closest meteor circles. But Still, Calling out is the best strat.

IF blue/red circles at EDGE: followed by Ciclicle(IN)

IF blue/red circles at CENTER: followed by Tail End(OUT)

IF DIAMOND shapes x2: followed by Biting Halberd(Butt) -> Remember you CAN just walk through the boss.

Demon Claw

  • After Soar ends(in final phase part II), MT pulls the boss to the edge, and get knocked back to the other side.
  • All other players get into the ranged AoE to save their MT.
  • IF there's DARK KNIGHT, pull the boss to the edge of the arena and pop Living Dead right before Demon Claw and You'll be knocked back to the opposite side of arena. After a few seconds, Boss will target MT with Wave Cannon. Everyone stay away from it and Dark Knight will be killed and gain Walking Dead Status. Heal Dark Knight as necessary and everything's done!
    • PLD'sHallowed Ground also works just like Dark Knight's LD. Time it correctly; use it right before demon claw casting is done. Make sure you are not knocked back into the dirty wall or it's still going to kill you.
    • Hugging Wall still kills you even in hallowed ground/holmgang/walking dead status.

Loot

Images