Mount Ordeals
Mount Ordeals
- Level
- 90 (Sync: 90)
- Item Level
- 595
- Difficulty
- Normal
- Party size
- Full Party
8 man • 2 2
2  4
4 
- Unsyncing
- Allowed
- Time limit
- 60 minutes
- Phoenix Down
- Not Available
- Duty Finder
- Trials (Endwalker)
- Roulette
- Trials
- Tomestones
 12
12 - Req. quest
- Desires Untold
- Entrance
- Khadga (X:5.3, Y:6.1)
- Location
- Mount Ordeals
- Region
- Ilsabard
- Patch
- 6.3
 The Echo
- On wipe: +10% (max +50%)
Though seemingly impossible, Vrtra senses the presence of Azdaja in the Source, prompting you to travel north to bitterly cold Garlemald. In the mountains do you do battle with Cagnazzo, but though you prevail, your victory proves hollow. The archfiend of fire, Rubicante, seizes on your absence from Radz-at-Han and moves to destroy the voidgate in Alzadaal's Legacy. When confronted at the base of Khadga, he issues you a challenge─and thus do you make for the summit to extinguish the flame of the voidsent's ambition.
— In-game description
Mount Ordeals is a level 90 trial introduced in patch 6.3 with Endwalker.
Guide
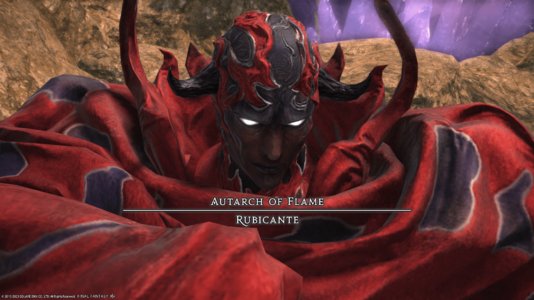
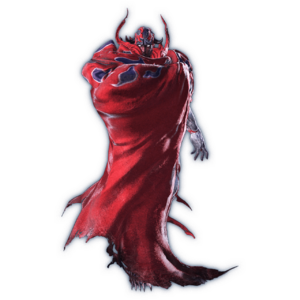
 Autarch of Flame: Rubicante
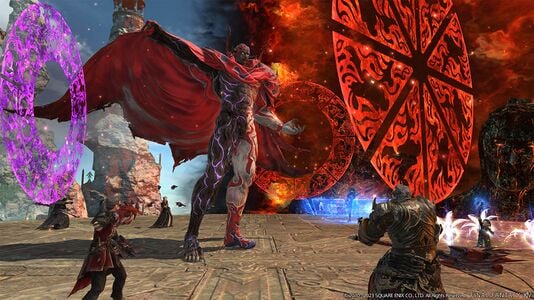
Note that players can fall off the edge of the arena to their death, although they can be resurrected after a moderate delay. There are no knockback mechanics to watch out for.
Phase 1
- Inferno: Unavoidable raidwide damage.
- Ordeal of Purgation: The boss summons three concentric circles on the arena (red, purple, red) and begin casting this ability. Each section will contain segments of blue fuses. The boss will aim a fireball that will travel along the blue fuses until it reaches the outside, containing blue triangle panels on each cardinal and intercardinal. The initial path of the fireball will be denoted by a yellow indicator on top of the fuse. A panel that is hit with a fireball will use a large conal AoE through the middle of the arena.
- The fuse segments on the red sections (inner and outermost) of the arena will always be straight. The fuse segments in the purple middle section can either be straight or be oriented towards an adjacent slice of the arena.
- During this cast, players will be inflicted with Penance. When the debuff expires, it will turn into Penitent's Shackles, immobilizing players until the AoEs resolve. Therefore, players will need to preemptively find the safe area to avoid getting hit.
- In later usages of this ability, the purple middle section can rotate as indicated by the arrows, which will shift the fuse segments over a slice (1/8th) of the arena, changing the path of the fireball. Standing near the originally targeted panel is always a safe choice for this version of the fight, as the altered path will send the fireball to an adjacent panel.
- Shattering Heat: Telegraphed AoE tankbuster.
- Arch Inferno: Spawns a small persistent AoE in the middle of the arena and two sets of rotating AoEs on the outsides. Later on, will also spawn telegraphed AoEs in random players' positions.
- Conflagration: Telegraphed line AoE through the middle of the arena, used with Arch Inferno.
- Radial Flagration: Telegraphed conal AoEs that hit most of the arena, used with Arch Inferno.
Adds Phase
The boss summons three Flamesent and one Greater Flamesent, which must be defeated before Rubicante's Power reaches 100, or the party will wipe.
- The Greater Flamesent will continuously use Ghastly Torch, dealing raidwide damage and inflict a stack of Burns, dealing damage-over-time, so healing and mitigation are recommended.
- While it has much more HP than its brethren, focusing on killing it first may be advisable if healers are struggling. This will also ensure the debuff doesn't overlap with further damage from the attack after the add phase.
- The Flamesent will use Ghastly Flame, spawning several AoE telegraphs that should be avoided.
- They will also use Ghastly Wind, telegraphing conal AoEs at random players.
- Shattering Heat is also used (may target either tank, regardless of threat).
- Blazing Rapture: Unavoidable raidwide AoE after the adds phase. Heal through and mitigate. The party will also be inflicted with another Burns damage-over-time effect during this cast.
Phase 2
The boss will transform in a cutscene and gain new attacks.
- Inferno: Telegraphed AoE markers on each player that also inflicts Bleeding. Spread out to avoid overlap.
- Flamerake: Two spinning arrows will appear around the boss. When they stop spinning, it will indicate the location of a line AoE through the boss's hitbox. This AoE will quickly cascade outwards, so dodge into the previously unsafe area.
- Soulscald: Telegraphed line AoEs (Scalding Fleet) aimed at each player. Spread out to avoid overlap. A subsequent set of line AoEs with blue telegraphs will then appear in the previous AoE's locations, but extended through the whole area.
- Dualfire: Massive tankbuster cleaves aimed at both tanks. The size of the AoEs are telegraphed.
- Sweeping Immolation: A combination of a telegraphed half-room cleave and spread AoEs on each player.
- The boss will revert to his Phase 1 form and loop through those mechanics again, then transform to Phase 2. This continues for the rest of the battle.
Loot
 12 Allagan Tomestone of Poetics
- Rubicante Card (Drops at a fixed rate.)
Dialogue
All lines from the boss are voice acted unless otherwise indicated.
Music
| Section | Theme |
|---|---|
| Main | Forged in Crimson |


