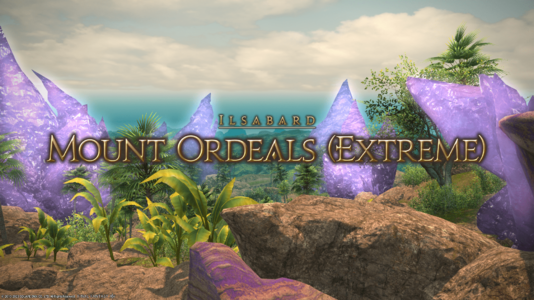
Mount Ordeals (Extreme)
Mount Ordeals (Extreme)
- Level
- 90 (Sync: 90)
- Item Level
- 610
- Difficulty
- Extreme
- Party size
- Full Party
8 man • 2 2
2  4
4 
- Unsyncing
- Allowed
- Time limit
- 60 minutes
- Phoenix Down
- Not Available
- Duty Finder
- High-end Trials (Endwalker)
- Roulette
- Mentor
- Tomestones
 25
25 - Req. quest
- I Wandered Sharlayan as a Minstrel
- Location
- Mount Ordeals
- Region
- Ilsabard
- Stone, Sky, Sea
- Available
- Patch
- 6.3
 The Echo
- On wipe: +5% (max +25%)
A monster in flesh, yet a man in spirit... Hearing the tale of your bout with Rubicante sets the wandering minstrel's mind to racing. What if the voidsent drank deeper of the great wyrm's aether? It is not long before the minstrel─with the help of his seemingly boundless imagination─conjures a fiery new composition. The pyretic tones set your ears to burning as your mind hearkens back to that fateful encounter with the archfiend of fire.
— In-game description
Mount Ordeals (Extreme) is a level 90 trial introduced in patch 6.3 with Endwalker.
Guide
Note that players can fall off the edge of the arena to their death, although they can be resurrected after a moderate delay.
The party should assign spread ("clock") positions with tanks/healers on cardinals and DPS on intercardinals, along with two light parties comprising 1 tank, 1 healer, 1 acting melee DPS, and 1 acting ranged DPS. They should also assign spread positions on four adjacent "slices" of the arena, each slice containing one melee/tank and one ranged/healer.
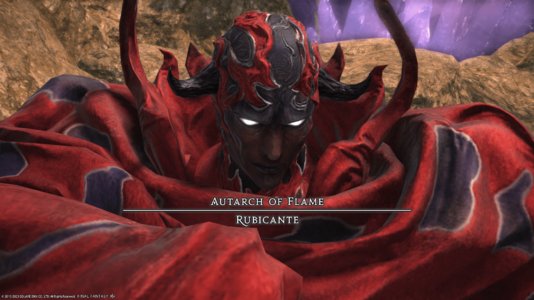
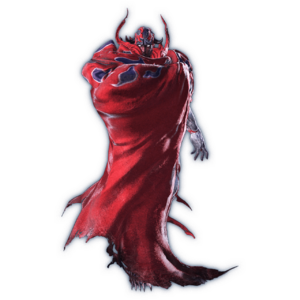
 Autarch of Flame: Rubicante
Phase 1
- Inferno: Moderate raidwide damage.
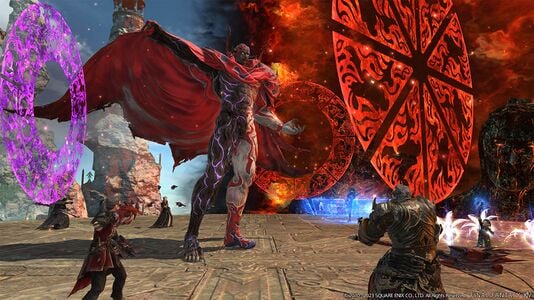
- Ordeal of Purgation: The boss summons three concentric circles on the arena (red, purple, red) and begin casting this ability. Each section will contain segments of blue fuses. The boss will aim one or two fireballs from the center that will travel along the blue fuses until they reach the outside, containing blue triangle or orange rectangle panels on each cardinal and intercardinal.
- Similar to normal mode, a blue panel that is hit with a fireball will use a large conal AoE through the middle of the arena.
- In extreme, the new orange panels will use a half-room AoE that hits the side closest to them if they are hit with a fireball.
- The fuse segments on the red sections (inner and outermost) of the arena will always be straight. The fuse segments in the purple middle section can either be straight or be oriented towards an adjacent slice of the arena.
- Any of the three circles may rotate clockwise or counterclockwise if indicated by the arrows, changing the positions of the fuses. They will rotate 1/8th (one slice) of the arena. If the outermost circle rotates, it will also rotate the location of the outside panels.
- During this cast, players will be inflicted with Penance. When the debuff expires, it will turn into Penitent's Shackles, immobilizing players until the AoEs resolve. Therefore, players will need to preemptively find the safe area to avoid getting hit.
- This mechanic is used multiple times throughout the fight with semi-fixed patterns. It may be prudent to mark one experienced player to follow. While players cannot move until the AoEs resolve, if some players are in an unsafe area, it may also be recommended to proactively use party mitigation to reduce the damage they take.
- Ordeal of Purgation (version 1): The boss aims a single fireball, while both the innermost and outermost (red) circles will rotate. The fireball will hit either an orange or blue panel.
- Ordeal of Purgation (version 2): The boss aims two fireballs starting 90 degrees form each other, while the outermost circle rotates. Each fireball will hit an orange panel, making the quadrant of the room opposite from the "V"-shaped center fuse segments safe.
- Arch Inferno: Spawns a small persistent AoE in the middle of the arena and two sets of rotating AoEs on the outsides, making either the northeast/southwest or northwest/southeast sides the initial safe spots. The party should split into light parties, with one group going north and the other going south. Players will rotate to dodge the AoEs, while the boss will sequentially use two of three mechanics:
- Both healers will receive a stack marker, so each light party should stack.
- All DPS or all tanks/healers will receive a blue, two-person stack marker. Tanks/melees should stack together while healers/ranged should stack.
- Each player will receive an orange marker, telegraphing AoEs that require the party to be fully spread.
- All of these mechanics inflict Magic Vulnerability Up, making overlap lethal.
- At the end of this sequence, the boss will cast Radial Flagration, which is a conal AoE on each player, so the party should spread to clock positions.
- Ordeal of Purgation (version 3): The boss aims two fireballs starting 90 degrees form each other, while the middle circle rotates. Each fireball will hit a blue panel. Find the quadrant that contains the "V"-shaped fuse and go between two panels in that quadrant, at max melee range.
- Ordeal of Purgation (version 4): The boss aims two fireballs starting 180 degrees form each other, while the middle circle rotates. Each fireball will hit an orange panel, making an eighth (slice) of the room safe. Identify the fuse segments that form a straight line through the entire room, then find the half that contains two bent fuses in the purple area. Starting from the straight fuse through the room, follow the arrows to the slice containing the bent fuse.
Adds Phase
The phase functions similarly to normal mode except with more adds and a few more mechanics. The boss summons five Flamesent and one Greater Flamesent, which must be defeated before Rubicante's Power reaches 100, or the party will wipe.
- The Greater Flamesent will continuously use Ghastly Torch, dealing raidwide damage and inflict a stack of Burns, dealing damage-over-time, so healing and mitigation are recommended. This add should be killed first to stop Ghastly Torch.
- The north Flamesent will use Ghastly Flame, spawning several AoE telegraphs that should be avoided.
- The northwest and northeast Flamesent will tether random players. Each tank should pick these up, because the adds will hit the tethered players with AoE tankbusters.
- The southwest and southeast Flamesent will tether random non-tank players, indicating they will use a conal AoE. The tethered players should face them away from the party to avoid cleaving others.
- Blazing Rapture: Unavoidable raidwide AoE after the adds phase. Heal through and mitigate. The party will also be inflicted with another Burns damage-over-time effect during this cast.
Phase 2
The boss will transform into his "winged" form, although this transition is much faster than in normal mode and does not have an unskippable cutscene.
- Flamespire Brand: Assigns various debuffs to players.
- Four players (all DPS or all tanks/healers) will receive Blooming Welt (flare icon). When the debuff expires, they will emit a roomwide AoE that deals proximity damage.
- One player of the other role group will receive Furious Welt (stack icon). When the debuff expires, they will be targeted with a split damage AoE that should be shared with the other three players in their role group.
- All players will receive Stinging Welt (red circle). When the debuff expires, they will be targeted with a medium-sized AoE that inflicts Magic Vulnerability Up, requiring the party to be spread.
- The flare/stack debuffs will always resolve first, followed by the spreads.
- Flamerake: Four spinning arrows will appear around the boss. When they stop spinning, it will indicate the location of a cross AoE through the boss's hitbox, hitting either the cardinals or intercardinals. This AoE will cascade outwards two times. For example, if the AoE hits the cardinals, the first follow-up AoE will hit the intercardinals, leaving the middle and the cardinals safe. The second AoE will then hit the edge of the arena containing the cardinals, leaving a large square in the middle safe. The Flamespire Brand debuffs will also resolve in conjunction.
- For example, the DPS receive flares and a tank receives stack. All players will begin near their clock positions. After the first Flamerake cross AoE resolves, the tanks/healers will move to the new middle safe spot to stack, while the DPS will move to the outer safe spots for their flares. The DPS will need to dodge inwards again to avoid the third AoE. Immediately after, all players will go to their initial clock positions to resolve the spread debuffs.
- Scalding Signal / Scalding Ring: A point-blank AoE (Scalding Signal) or donut AoE (Scalding Ring) that requires players to dodge by moving either out or in the boss's hitbox. They should also remain in clock positions, because each player will be hit with an untelegraphed line AoE (Scalding Fleet).
- Sweeping Immolation: The boss will face a random cardinal/intercardinal and use an untelegraphed half-room cleave in front. Meanwhile, he will telegraph either a full spread or stack based on the "flowers" on his wing.
- Multiple smaller flowers: spread
- One large flower: stack
- The party will need to be behind the boss to resolve the stacks/spreads while also dodging the follow-up AoEs from the prior Scalding Fleet, which hit the same areas as their initial location. If all players took these at their clock positions, it will partition the safe half into four smaller slices. If the party needs to stack, they should stack on one slice. If the party needs to spread, two players should occupy each slice (e.g., one melee/tank and one ranged/healer in each), as the AoEs are fairly large.
- Dualfire: Massive tankbuster cleaves aimed at both tanks. Unlike normal mode, the size of the AoEs are not telegraphed.
- Inferno: Untelegraphed AoEs on each player that also inflict Bleeding and Magic Vulnerability Up. Stay in clock positions and mitigate.
- The boss will then transform to its original (cloaked) form.
- Ordeal of Purgation (version 5): The boss aims a single fireball, while both the middle (purple) and innermost (red) circles will rotate. The fireball will hit either an orange or blue panel.
- Ordeal of Purgation (version 6): The boss aims two fireballs starting 90 degrees form each other, while the middle circle rotates. One fireball will hit an orange panel while the other will hit a blue panel. Find the "V"-shaped fuses and start between them. Then find to the straight line to the left or right of the V, and go to the slice just past the straight line.
- The boss will use another Inferno, but because he is in his cloaked form, this will be a normal raidwide that does not require spreading.
- Note that when this trial was first released, parties with high enough DPS will be able to kill the boss before the following major mechanic.
- The boss will transform into its winged form again.
- Flamespire Claw: The boss will mark each player from 1-8, indicating the order he will cleave them with a large (~100 degree) cleave that inflicts damage and Slashing Resistance Down. The boss will tether the players marked 7 and 8, which will quickly inflict stacks of Flamespire. Players who are tethered and are hit by a cleave will die, and if they reach 5 stacks of the debuff, they will explode and wipe the raid. To prevent reaching 5 stacks, players who just took their cleave should move to pick up a tether. The cleaves should be taken away from the party (e.g., odd numbers northwest / even numbers northeast, while the rest of the party and tethers are southwest / southeast).
- Another Inferno, but since the boss is in its winged form, players should spread.
- Scalding Signal/Ring, Scalding Fleet, and Sweeping Immolation will then be used again.
- The boss will transform into its cloaked form a final time.
- The boss will use two more Ordeals of Purgation, which will be the same patterns as versions 3 and 4 earlier in the fight.
- Inferno (enrage): The boss must be defeated before this cast finishes or the party will wipe.
Loot
- Each player will receive 2 Flamecloaked Archfiend Totems per kill. Collect 10 tokens to exchange for a weapon or 99 for a Lynx of Righteous Fire Flute at Nesvaaz in Radz-at-Han (X:10.6 Y:10.0).
 25 Allagan Tomestone of Poetics
- Rubicante Card (Drops at a fixed rate.)
 Treasure Coffer
Achievements
This duty is associated with the following achievements:
| Name | Points | Task | Reward | Patch |
|---|---|---|---|---|
| Ordeal by Fire | 10 | Defeat Rubicante on Mount Ordeals (Extreme). | - | 6.3 |
Music
| Section | Theme |
|---|---|
| Main | Forged in Crimson |


