Castrum Marinum
Castrum Marinum
- Level
- 80 (Sync: 80)
- Item Level
- 485
- Difficulty
- Normal
- Party size
- Full Party
8 man • 2 2
2  4
4 
- Unsyncing
- Allowed
- Time limit
- 60 minutes
- Phoenix Down
- Not Available
- Duty Finder
- Trials (Shadowbringers)
- Roulette
- Trials
- Tomestones
 12
12 - Req. quest
- Blood of Emerald
- Entrance
- Western Thanalan (X:12.0, Y:13.1)
- Location
- Castrum Marinum Drydocks
- Region
- Thanalan
- Patch
- 5.4
 The Echo
- On wipe: +10% (max +50%)
The liberation of Terncliff has led to the discovery of vital information regarding the Weapon project. A warmachina code-named “Emerald” is believed to have escaped by sea to an imperial installation, so you and Gaius make your way to Castrum Marinum, one of two likely locations. Retrieved data suggests that your foe is armed with floating manipulators, though how exactly these will be employed in battle remains to be seen.
— In-game description
Castrum Marinum is a level 80 trial introduced in patch 5.4 with Shadowbringers.
Strategy
This duty can be completed solo using a lv 90 character.
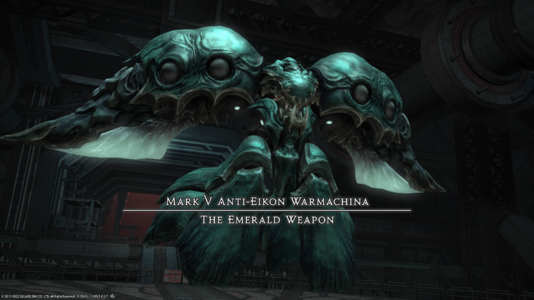
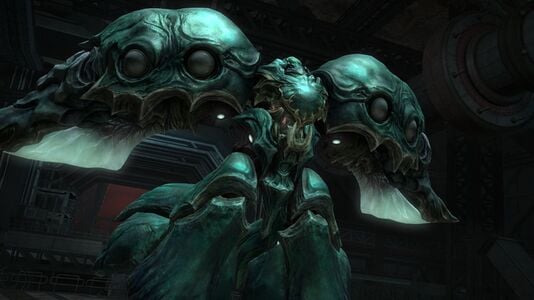
 Mark V Anti-Eikon Warmachina: The Emerald Weapon
Phase 1
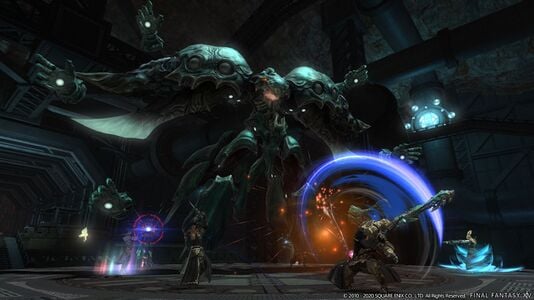
Your showdown with the iconic Emerald Weapon - another popular boss from Final Fantasy VII - takes place within a circular arena, surrounded by a fatal drop. Any player who walks (or is pushed over) the edge will suffer an immediate KO but can be revived after a moderate delay.
- Emerald Shot - causes Emerald Weapon to blast its primary target with a mild tank-buster.
- Emerald Beam - the Emerald weapon projects two cone-shaped AoE's from its front and rear that will eventually begin to rotate in the direction shown via a marker around its hitbox. Additionally, a point-blank AoE will also be dropped by the Emerald weapon just before the beams begin to rotate. Said point-blank AoE will shortly be followed by outward-traveling rings of AoE's, forcing the raid to not only move in a circle to avoid the rotating beams, but also step between the outward travelling set of AoE's as well.
Once Emerald Beam has concluded, the outer edge of the arena will collapse, shrinking the playing field.
- Magitek Magnetism - creates explosive mines within the arena that are telegraphed with large circular AoE's, indicating the radius that will be affected by their upcoming explosions. Before exploding, however, two of the mines will be tethered together with the magnet-mechanic (i.e, plus & minus symbols, where similar symbols will move away from each other and different symbols will move toward each other), indicating that the tethered mines will eventually be pushed apart or pulled together beforehand. As a rule of thumb, players should identify which of the mines are unaffected by magnets and/or identify the direction in which tethered mines will be pushed or pull, using this information to identify which area will be safe to stand in before they explode.
- Optimized Ultima - unleashes unavoidable raid-wide damage, similar to the Ruby Weapon encounter in Cinder Drift.
- Split - the Emerald Weapon will split in half, leaving behind its upper body, whilst the lower half disappears from the arena.
- Sidescathe - after a brief delay, one half of the arena will be blasted by a wave of laser beams from one Emerald Weapon's wings, indicated by said half of the arena being marked with an obvious telegraph. Simply run to the unmarked side of the arena to avoid the blast.
- Drop-Down - creates a large knock-back telegraph (blue circle) within the arena. After a delay, the lower half of Emerald Weapon will slam into the marked area, knocking all players back from the circle. Like most knock-back circle mechanics, players should position themselves close to the edge of the circle beforehand and position themselves so that they are not punted out of the arena. As always, pushback immunity cooldowns can also be utilized if desired. Once the knock-back has concluded, the Emerald Weapon will reform into its original shape.
From here, mechanics will essentially begin to repeat with some new additions and complications. For starters, the next Emerald Beam will cause an outer portion of the arena to fall away, shrinking the battlefield (much like the Titan's Geocrush in The Navel).
- Emerald Hands - summons flying mechanical hands that will float within the arena, followed shortly by a donut-AoE telegraph. Whenever you see the mechanical hands enter the fray, prepare to run into Emerald Weapon's hitbox to avoid their upcoming assault.
- Divide Et Impera - a vicious tank-buster against Emerald Weapon's primary target, indicated by a red-circular marker around said target.
- Pulse Laser - causes the Emerald Weapon to aim three straight-line AoE's at random targets numerous times.
- Sidescathe + Emerald Hands - players will notice a wave of mechanical hands forming a semi-circle outside the arena. Eventually, each hand will release a slow-moving stream of glowing white orbs that will travel towards (and through) the arena centre that all players should avoid. Simultaneously, the Emerald Weapon will charge another Sidescathe, which will eventually blast one half of the arena (indicated by a telegraph). All players will need to avoid the blasted side of the arena whilst also weaving between waves of orbs, followed very closely by another Drop-Down (knock-back).
- Drop-Down - creates another blue-circle marker within the arena, indicating that the lower-half of Emerald Weapon will soon inflict another knock-back. Considering that the arena has shrunk in size since the first knock-back, players will need to be extra careful with their positioning, making every effort to avoid being punted over the edge to an early doom.
Just like earlier, Drop-Down marks the end of a mechanical loop, causing Emerald Weapon to rinse-and-repeat the above mechanics until it has been damaged to 1% health. From here, a brand new phase begins. Just like the encounter with Ruby Weapon, reaching the next phase of the battle creates a checkpoint, meaning that if you wipe for any reason, the fight will now resume from the second phase rather than force you to start at the very beginning of the battle.
Phase 2
The battle resumes within a square-shaped arena, surrounded by a bright blue-glowing wall of energy that will instantly kill any player who touches it.
- Divide Et Impera #2 - the vicious (red-marked) tank-buster from earlier, except this time, it will also emit cone-AoE's in the direction of all other players whenever it is cast.
- Primus Terminus Est - marks three players with pushback markers - bright blue columns with a directional arrow. After a delay, all marked players will drop a column AoE and be violently shoved in the indicated direction. Bear in mind that any unmarked player caught in the column will also suffer a knockback. Before the pushback takes place, three circular AoE's will also spawn in the direction of the pushback. As a result, marked players will need to ensure that they do not stack on top of each other, avoid clipping other members of the raid with their column AoE, and also position themselves so that they are not knocked into the outer-wall or the circle AoE's.
- Secundus Terminus Est - causes all participants to be marked with a variation of white "+" or "x" shaped markers. After a delay, AoE telegraphs (in the shape of each player's marker) will be fired from their location(s). For example, if you have a "+" marker and stand in the centre of the arena, straight-line telegraphs will be fired in a + shape from that location. Due to the volume of AoE's and directions, players should coordinate themselves so that they do not cover the arena too heavily. For example, having all players stack loosely within a corner will ensure that there will be wide safe-zones to use afterwards, whereas if players stand in a more randomized fashion, safe-spots (if any) will be harder to identify.
- Tertius Terminus Est - causes three pairs of swords to drop into the arena, one after the other. Each pair of swords (in the order they were dropped) will eventually fire straight-line AoE's across the arena in an "x" shaped pattern. However, they will not detonate until all three pairs of swords have dropped, giving the impression that nowhere is safe. To avoid being hit, players should memorize which pair of swords dropped first and stand within the line of fire of the swords that dropped last, giving them time to allow earlier swords to fire and provide safe-spots that can be used to avoid follow-up blasts.
- Legio Phantasmatis - causes the Emerald Weapon to disappear from the arena, leaving behind an image of "Black Wolf" (Gaius van Baelsar), an add that should be picked up by a tank as soon as possible. Shortly after, the Black Wolf's Image will also summon an army of imperial legion images outside of the arena that will eventually form a firing line at one edge of the battlefield. Once the firing line has been formed, straight-line AoE's will soon be shot across the arena from each line of soldiers, one after the other.
Note that one soldier will be missing from each of the three firing lines - one missing at the front, one missing in the middle, and one missing in the back - forming a "/" or "\" shape. As such, players should first identify the missing soldier near the front and stand in that firing lane, then side-step into the lane with a soldier missing from the second line (and so on) until all three lines have fired their shot.
Keep in mind that any damage inflicted to the "Black Wolf" will be transferred to the Emerald Weapon afterwards, so be sure to maintain as much uptime as possible throughout the ordeal.
Assuming the raid survives the firing squad, Emerald Weapon will enter a mechanical loop, repeating the above list of mechanics until the boss has been defeated or the party wipes.
Loot
 12 Allagan Tomestone of Poetics
- Emerald Weapon Card (Drops at a fixed rate.)
Dialogue
Duty Dialogue
Let us help you!
It was used in Werlyt all those years ago.
But no matter what, I can't afford to lose!
Activating Oversoul!
Initiating organic core overwrite.
What have you done!?
Wait...that glow...
Could the synthetic auracite be causing this!?
Music
| Section | Theme |
|---|---|
| Phase 1 | Ultima (The Primals) |
| Phase 2 | The Black Wolf Stalks Again |


