Castrum Fluminis
Castrum Fluminis
- Level
- 70 (Sync: 70)
- Item Level
- 335
- Difficulty
- Normal
- Party size
- Full Party
8 man • 2 2
2  4
4 
- Unsyncing
- Allowed
- Time limit
- 60 minutes
- Phoenix Down
- Not Available
- Duty Finder
- Trials (Stormblood)
- Roulette
- Trials
- Tomestones
 12
12 - Req. quest
- The Primary Agreement
- Location
- Castrum Fluminis
- Region
- Othard
- Patch
- 4.3
 The Echo
- On wipe: +10% (max +50%)
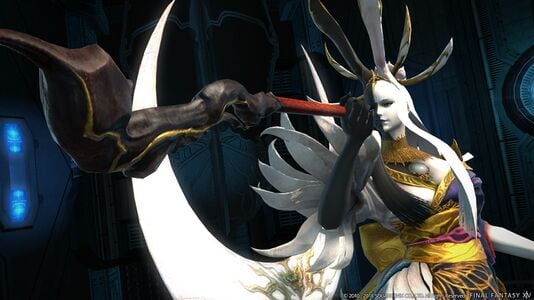
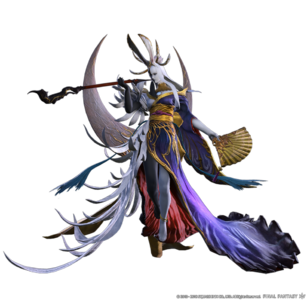
Tsukuyomi, divinity of night and the moon. Through sinister design is this figure of Far Eastern mythology given form, descending upon the world in a primal incarnation. The Warrior of Light must stand firm, else Doma be swallowed by the encroaching darkness...
— In-game description
Castrum Fluminis is a level 70 trial introduced in patch 4.3 with Stormblood.
Strategy
 The Lady of the Moon: Tsukuyomi
Phase 1
- Torment Unto Death - Large frontal cone tank buster. As usual, all other players must not stand in front of the boss
- Zashiki-Asobi - This is similar to Titan's circle of Bomb Boulders in
 The Navel (Hard), or Shiva's "Icicle Impact" (also known as "chandelier drop") in
  The Akh Afah Amphitheatre (Hard). Tsukuyomi will spawn fans around the arena; one in the centre, and the others around. They will explode in the same order they spawned in. It is recommended to stand in another fan (ones that will explode last) as the centre one explodes, then head back to the centre.
- Nightfall - Casts during Zashiki-Asobi, signaling a random AoE from the following list:
- Steel of the Underworld - Large frontal cone on primary target.
- Reprimand - Raid-wide AoE damage; sheld/heal through.
- Midnight Haze Spawns two Midnight Haze adds on opposite sides of the arena. Destroy them before they reach each other or finish their casts of To Ashes.
- Lead of the Underworld - Casts a line AoE marked by a line stack marker. Players must line up with the targeted player to share the damage. If a Midnight Haze add is still up, the targeted player can line up with the add so other players can still attack it.
Phase 2 (add phase)
Starts with Nightbloom - raid-wide damage and stun.
Adds will spawn during this phase. Destroy the adds as soon as they come up.
- Wave 1: Specter of the Matriarch and Specter of the Patriarch
- Wave 2: Specter of the Homeland x3 and Specter of the Empire x3
- Wave 3: Specter of Asahi
- Wave 4: Specter of Zenos
Duty Gauge - Suffering - During phase 2, the Suffering gauge will fill up over time. Destroy the adds as soon as possible as the longer the phase goes on, the more suffering is accumulated, which deals more damage at the end of the phase. Naturally, if the gauge hits 100%, it will wipe the group. Shield/heal as necessary.
Phase 3
Phase 3 will run with the same abilities you have seen so far with the addition of some others. She will also continue to cast Nightfall.
- Selenomancy - Causes the platform to be split into two sections. Standing in one section stacks debuffs. If the debuffs reach 5 stacks, a Doom and bleed debuff will be applied, and you'll likely die. To avoid this, players must switch sections to remove their stacks. And it is also important to note that simply switching sections does not remove the stacks, players must remain in their new section until the next stack would be applied (when the moon appears above the character's head) for their stacks to be removed. It is recommended to switch sections at 3 stacks since that is a safe amount, and she is likely to cast an AoE around that time; this way, you are not trapped on one side. Doughnut AoEs and Nightfall will cast during this time, so keep on your toes.
- Antitwilight/Perilune - Removes Selenomancy and debuffs and deals raid-wide damage.
During Selenomancy, Tsukuyomi can also cast Midnight Haze (the cloud adds), so be mindful of your stacks when they spawn. Move to the section needed to kill the add and reset your stacks.
- Dance of the Dead - Signals final phase change, dealing heavy raid-wide damage.
- Lunacy - Essentially "Akh Morn" from dragon bosses, such as in
 The Keeper of the Lake or
  The Final Steps of Faith. Players must stack together, and stay grouped as the attack will hit multiple times. (1 hit, pause, then 2 quick hits)
- Dark/Bright Blade - Tsukuyomi will cleave slightly-more-than-half the arena with a sword. The side she attacks depends on the blade she is using.
Loot
 12 Allagan Tomestone of Poetics
- Tsukuyomi Card (Drops at a fixed rate.)
Dialogue
Tsukuyomi: Oh...it's going to be a long night. (voice acted)
Tsukuyomi: Worm! (voice acted)
Tsukuyomi: A courtesan has her tricks!
Tsukuyomi: Let's share the torment, shall we...?
Tsukuyomi: Your end is near! (voice acted)
Tsukuyomi: Just a puff or two before we go on!
Tsukuyomi (exhales twice) (voice acted)
Tsukuyomi: Enough of that.
I wouldn't want the pain to grow familiar.
Tsukuyomi: Beg for mercy! (voice acted)
Tsukuyomi: Struggle all you wish─I encourage it!
Your death will be all the sweeter... (voice acted)
Tsukuyomi: Why does it fade away...?
Tsukuyomi: ...Ah. I understand.
It feeds on my spite. On my suffering...
Yotsuyu: Come forth, shades of the dead! Curse my name!
Strike my body! Fill my soul with blackest malice!
Specter of the Patriarch: Worthless excuse for a daughter.
You're nothing but trouble.
Specter of the Matriarch: A font of misery, that's what you are!
Yotsuyu: Yes, my dearest parents.
I was the bane of your existence unto the very end!
Specter of the Empire: Your fall from grace is long overdue, savage!
Specter of the Homeland: Naeuri's cursed orphan!
Specter of the Empire: Artful wiles won't save you now!
Specter of the Homeland: Widow of Sashihai... Witch of Doma!
Specter of Asahi: Fight like your life depends on it, dear sister.
You wouldn't want to disappoint me...
Yotsuyu: If it isn't the cold-blooded little worm.
Always crawling through my rotten heart.
Specter of Asahi: I should have been the one!
Specter of Asahi: This cannot be! (voice acted)
Specter of Zenos: Your pitiful fortunes can bring you no lower...
Yotsuyu: You have come to deliver judgment for my failure?
Cut me down, then. Surely it is a simple task!
Specter of Zenos: Begone...
Specter of Gosetsu: Stay behind me, Tsuyu!
Yotsuyu: Why...?
You have no place here...
Specter of Gosetsu: Hrrrgh!
Specter of Zenos: Tedious...
Specter of Gosetsu: You must survive, Tsuyu!
The kami spared us, and we cannot repay that boon in death!
Specter of Zenos: Savor your hollow victory...
Specter of Gosetsu: Tsuyu... Must...survive...
Yotsuyu: Perhaps... But it is too late for me.
There can be no redemption.
Yotsuyu: A nightbloom shall flower here upon the site of my demise...
Tsukuyomi: In darkness blooms the spider lily... (voice acted)
Tsukuyomi: From mortal husk I rise anew! (voice acted)
Tsukuyomi: Suffused with night, I shall prevail! (voice acted)
Tsukuyomi: In moonlight's chill, shine petals pale... (voice acted)
Tsukuyomi: Suffused with night, I shall prevail! (voice acted)
Tsukuyomi: In sunless gloom, black tendrils trail... (voice acted)
Tsukuyomi: No. No... Not yet. (voice acted)
Not. Yet. (voice acted)
Tsukuyomi: I'll grind you under my heel! (voice acted)
Tsukuyomi: This is far from over!
My bloodied hands have much left to accomplish!
Tsukuyomi: Am I sunk to my lowest, then...?
Music
| Section | Theme |
|---|---|
| Phase 1 | Nightbloom |
| Phase 2 (Adds) | Lunacy |
| Phase 3 | Wayward Daughter |
Images
Trivia
- "Castrum Fluminis" is Latin, and approximately translates to "river castle".


