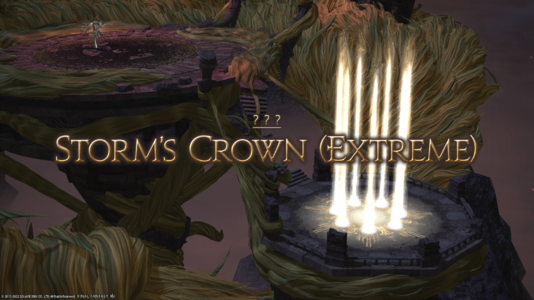
Storm's Crown (Extreme)
Storm's Crown (Extreme)
- Level
- 90 (Sync: 90)
- Item Level
- 600
- Difficulty
- Extreme
- Party size
- Full Party
8 man • 2 2
2  4
4 
- Unsyncing
- Allowed
- Time limit
- 60 minutes
- Phoenix Down
- Not Available
- Duty Finder
- High-end Trials (Endwalker)
- Roulette
- Mentor
- Tomestones
 25
25 - Req. quest
- I Wandered Sharlayan as a Minstrel
- Location
- Storm's Crown
- Region
- ???
- Stone, Sky, Sea
- Available
- Patch
- 6.2
 The Echo
- On wipe: +5% (max +25%)
The void─a world without death, where the strong devour the weak... Upon hearing your tales from that lightless place, the wandering minstrel cannot help but wonder: what if Barbariccia had devoured more of the great wyrm's aether? Having mused thus, the man then calls upon his not inconsiderable dramatic flair to weave a new verse, one which imagines a vastly empowered archfiend. The breezy melody sets your mind adrift upon shadowed winds, where you relive the stormy encounter, now stormier still...
— In-game description
Storm's Crown (Extreme) is a level 90 trial introduced in patch 6.2 with Endwalker.
Guide
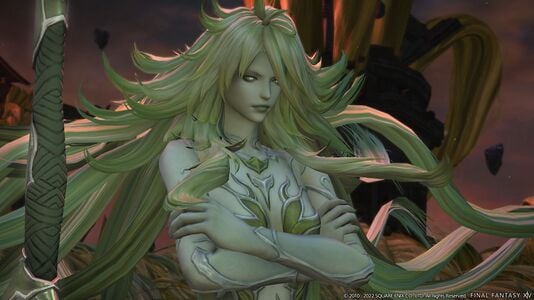
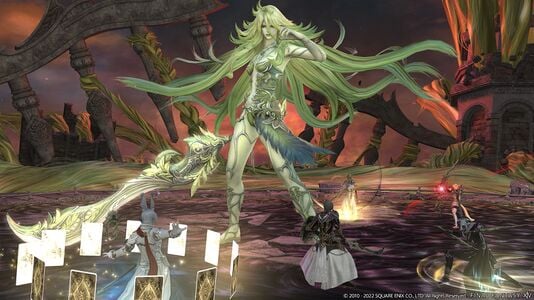
 Empress of the Winds: Barbariccia
Setup
Split the raid into two light parties (tank, healer, two DPS). Mark the healers as 1 and 2.
Place arena markers at the cardinal (N, S, W, E) and the intercardinal points (NE, NW, SE, SW) in the middle between the arena's center and its edges. Assign each player to one of these spread-out points: main tank north, offtank south, healers east and west, and DPS at the intercardinal points.
Phase 1
Void Aero IV
Raid-wide damage. The boss casts additional untelegraphed raid-wide damage intermittently.
Savage Barbery
The boss faces a random direction, preparing to throw her sword. This is telegraphed with an arcing line. There are two variants of this mechanic:
- Sword held aloft. Casts a line AoE through the boss and an AoE where the sword lands. Stack behind the boss, on the opposite side of the arc of her throw, outside her hitbox.
- Sword held to the side. Casts a donut AoE around the boss and an AoE where the sword lands. Stack behind the boss, on the opposite side of the arc of her throw, inside her hitbox.
Hair Raid
Facing towards the thrown sword, the boss performs a mechanic with four variations. She will either:
- squat down: She will dash towards the sword and cleave the arena with a huge conal AoE. Only the edges of the arena to her sides, up to about the intercardinal points, are safe.
- float in the air: She will recall the sword and cast a donut AoE around her.
She additionally casts one of two mechanics:
- Stack markers on the healers: Both light parties stack on their respective healer:
- if she squats: to her sides at the arena's edge (one light party per side),
- if she floats: on opposite sides of the boss's hitbox.
- AoE on each player: The players spread out in the safe space allowed by the first mechanic:
- if she squats: spread along the safe area at the arena's edge to her side (one light party per side). The cleave will go off first, allowing the DPS to move into the arena a bit to spread out the player-targeted AoEs.
- if she floats: Players spread out inside her hitbox in the direction of their assigned points, wait until the donut AoE goes off, and then spread out into the arena to distribute the player-targeted AoEs.
Savage Barbery
The boss repeats Savage Barbery, doing the opposite of what she did the first time (line AoE or donut AoE). Therefore, if players previously stacked behind her inside her hit box, they now need to stack outside of it, and vice versa.
Hair Raid
The boss also repeats Hair Raid with the opposite of what she did the first time. For example, if she previously cast the conal AoE with the stack markers, she will now cast the donut AoE with the player-targeted AoEs.
Void Aero III
Tankbuster targeting the main tank. This incurs a stack of Wind Resistance Down, forcing a tank swap ( Provoke by the offtank, and Shirk by MT on OT) immediately afterwards, or the main tank will die.
Teasing Tangles
The boss moves to the center, and telegraphed large AoEs go off at the cardinal points, leaving hair cones behind. Two players are each randomly pulled into the boundary around these cones, debuffed with Tangled, and have their movement slowed. If they attempt to move out of the boundary, they will be pulled back to the center and debuffed with a strong damage over time which will kill them.
In total, two players are afflicted with a huge player-centered AoE telegraph, and two players with a blue two-player stack-up circle, while four players remain unmarked. To solve this mechanic, players must move to the edge of their Tangled boundaries as follows:
- if carrying the big AoEs: move to the outside of the arena, towards the same intercardinal near them (either NE and SW, or NW and SE, as agreed beforehand)
- if carrying the stack-up marker: move to the opposite intercardinal, towards the unmarked player in the adjoining circle
- if unmarked: move to the opposite intercardinal, towards the player with the stack-up marker in the adjoining circle, so that both are inside the marker (which intersects both haircone boundaries)
Secret Breeze
Before the AoEs from Teasing Tangles go off, the boss casts telegraphed conal AoEs in the cardinal directions, forcing players to adjust their position as necessary. The conal AoEs go off at the same time as the AoEs from Teasing Tangles.
Immediately afterwards, the players will need to spread out around the arena. The boss casts untelegraphed conal AoEs at each player, which preferably should not overlap.
Void Aero IV
Raid-wide damage again.
Curling Iron
Phase transition. Move out of the boss's hitbox to avoid knockback. The boss inflicts raidwide damage and jumps out of the arena. Stack in the center to heal to full and to mitigate the massive raidwide damage that occurs when the boss lands back in the center.
Phase 2
The following mechanics have no cast bar.
Brutal Gust (Tanks/Healers)
Spread out to your positions. The boss will tether to and dash at the healers and tanks in turn, leaving a line AoE behind. The tethered players should evade the dash and AoE sideways.
Boulder Break and spiral AoE
Both tanks should stack north to share a double tankbuster, while everybody evades a telegraphed spiral AoE.
Center stacking
As soon as the red AoE at the center of the spiral resolves, all players should stack in the very center. This lets them evade the series of line AoEs cast by the copies of the boss outside of the arena.
At the same time, all players are tagged with a big arrow marker above their head. The center red AoE and the spiral AoE telegraphs reappear, followed by a cluster of huge circle AoE telegraphs, one beneath each player. By stacking in the center, players make these overlap as much as possible.
Brittle Boulder
As soon as these AoE telegraphs appear, players sprint outwards from the center to their position, evading the spiral AoE. As they do so, another smaller AoE telegraph appears beneath each player, whose damage must be absorbed.
Enumeration
After the prevous AoEs resolve, the tanks and healers at the cardinal positions are afflicted with a two-person stack-up marker. They need to rotate clockwise to stack up with the DPS at the intercardinal positions (or vice versa; this needs to be agreed beforehand). At the same time, a set of concentric telegraphed AoEs goes off, covering first the center and then the fringes of the arena. The four pairs of players must evade them while pairing up.
Brutal Gust (DPS)
Spread out to your positions again. The boss will now tether to and dash at the four DPS in turn.
Knuckle Drums
The boss pounds the floor, inflicting repeated heavy raidwide damage. Stack north of the boss for optimal shielding and healing.
AoEs and Brutal Gust
At the end of the pounding, each player gets their own AoE telegraph under them, four times in succession. Still stacked together, players need to rotate clockwise to the cardinal points to evade these AoE clusters.
While this goes on, the boss also tethers and dashes to the tanks and healers. The party will automatically evade these dashes by circling around the boss to evade the AoEs.
Bold Boulder
Both tanks are marked with triangular flare markers and need to run away from the party, spreading out to either side of the boss near its hitbox. Meanwhile, the party stacks up on the healer with the stack-up marker. The boss knocks all players back to the edges, forming a triangle between the two tanks and the rest of the party at the arena's edges.
Brutal Gust (random players)
Spread out to your positions again. The boss will tether to and dash at random players.
Teasing Tangles
Again, four AoE telegraphs turn into hair cones, pulling in one tank/healer and one DPS each. Facing the boss, the tanks/healers should move to the left and the DPS to the right (or vice versa, as agreed beforehand). Players need to dodge the various AoE telegraphs and small tornadoes that appear. Four players will be marked with an Enumeration two-player stack-up maker and must share it with the unmarked player in the circle next to them.
Knuckle Drums
The boss again pounds the floor, inflicting repeated heavy raidwide damage.
Phase 3
The boss transitions back to her original form. Players should stay out of her hitbox to avoid damage.
Entanglement
All players are marked with one of four Playstation symbols: square, cross, circle, triangle. The players with the same marks are pulled together into pairs, and debuffed with Tangled as before.
To resolve this mechanic, as soon as the markers appear, players move to the intercardinal waymark of the same color as their marker (yellow for the light green triangles). Once the entanglement begins, tanks/healers and DPS move left or right as in the previous mechanic.
Secret Breeze
This positioning allows players to avoid the conal AoE telegraphs cast in the cardinal directions, and to spread out afterwards to avoid overlap of the conal AoEs targeted at each player.
Savage Barbery and Hair Raid
The boss repeats the Savage Barbery and Hair Raid mechanics from the first phase.
Void Aero IV and III
Again, raidwide damage is followed by a tankbuster requiring a tank swap.
Entanglement and Enumeration
Players are again marked with Playstation symbols and entangled. This time, four players get an Enumeration two-person stackup marker. The marked players should try to form a straight line of stack up markers across the arena, while the unmarked players each find a marked partner.
Savage Barbery and Hair Raid
The boss again casts the opposite variants of Savage Barbery and Hair Raid that she used previously.
Maelstrom
Enrage. The boss must be defeated before this cast resolves, or the party will wipe.
Loot
- Each player will receive 2 Windswept Archfiend Totems per kill. Collect 10 tokens to exchange for a weapon at Nesvaaz in Radz-at-Han (X:10.6 Y:10.0) or 99 for a Lynx of Imperious Wind Flute at Nesvaaz in Radz-at-Han (X:10.6 Y:10.0).
 25 Allagan Tomestone of Poetics
- Barbariccia Card (Drops at a fixed rate.)
 Treasure Coffer
Achievements
This duty is associated with the following achievements:
| Name | Points | Task | Reward | Patch |
|---|---|---|---|---|
| Razor's Edge | 10 | Defeat Barbariccia in Storm's Crown (Extreme). | - | 6.2 |
Music
| Section | Theme |
|---|---|
| Main | Battle with the Four Fiends (Buried Memory) |
Images
Trivia
- The phase transition in the extreme trial is much shorter than the one in the normal mode trial, with no unskippable cutscene. This may have been influenced by player feedback in previous expansion extreme trials in which lengthy mid-fight transitions or cutscenes made them tedious to farm.


