The Dancing Plague
The Dancing Plague
- Level
- 73 (Sync: 74)
- Difficulty
- Normal
- Party size
- Full Party
8 man • 2 2
2  4
4 
- Unsyncing
- Allowed
- Time limit
- 60 minutes
- Phoenix Down
- Not Available
- Duty Finder
- Trials (Shadowbringers)
- Roulette
- Trials
- Req. quest
- Acht-la Ormh Inn
- Entrance
- Il Mheg (X:18.6, Y:16.1, Z:1.1)
- Location
- The Dancing Plague
- Region
- Norvrandt
- Patch
- 5.0
 The Echo
- On wipe: +10% (max +50%)
The white dress, the shell crown, the stone scepter, the crystal shoes... Having acquired the four fae relics through considerable effort, you now stand ready to break the seal over Lyhe Ghiah and confront the Lightwarden of Il Mheg─the fallen faerie king, Titania. Yet even as you hunt the sin eater, you are in turn hunted by the forces of Eulmore, who have thrown all caution to the wind and march resolutely on the faerie kingdom...
— In-game description
The Dancing Plague is a level 73 trial introduced in patch 5.0 with Shadowbringers.
Guide
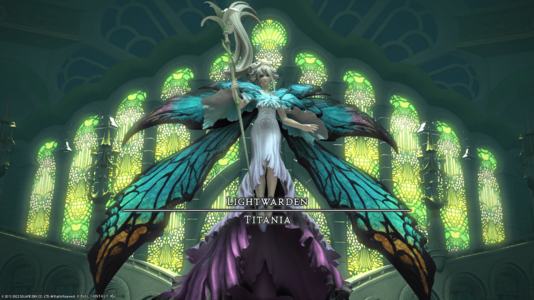
The fight against Titania mainly consists of dealing with several "Rune" named abilities, as well as two consecutive add phases.
Phase 1
For the first 30% of the fight, Titania will use the following abilities:
Divination Rune: A frontal cone Tankbuster that hits for ~80k unmitigated. As always don't be in front of the boss unless tanking.
Bright Sabbath: Unavoidable party-wide AoE.
Phantom Rune: This will either be a floor pattern that causes you to stack under Titania, or one that asks you to move away from them.
Water Rune: This has no cast bar but the spell causes 4 pools of water to spawn in the middle of the arena. Each puddle will have a timer that will gradually fill, requiring at least one player to be standing in each one. When the timers fill, puddles with no players will summon a Spirit of Dew add, which must be defeated quickly or they will explode (Spring Shower), dealing high magical party-wide damage.
Standing in the puddles does not deal damage but provide you with a Fire Resistance buff if stood in for 5s. See Flame Rune.
Flame Rune: Titania will cast this after Water Rune has been in effect for ~15s. It will place a fiery fist in the air at the centre of the arena. After another short delay it will cause a marker to appear around a player. You need to stack on that player AND stand in a pool of water together to both share the damage and all benefit from the Fire Resistance buff. If the marked player is not standing in a puddle, it will flood the entire arena in fire, dealing high damage to all players.
Phase 2
At 70% HP Titania will cast "Midsummer Nights Dream" which will cover the arena in grass and introduce new abilities and adds to the fight.
Growth Rune: This is cast right after the phase transition and displays a star marker in the centre of the arena. After a delay, roots will spread in the direction of the marker and stun anyone caught in them, also causing damage over time.
Frost Rune: Several circle markers will appear in the air over the arena in a delayed pattern. Once the arena is covered they will trigger in the order they were cast causing large amounts of damage. Move into the safe zones once the rune has triggered. This is followed instantly by Mist Rune.
Mist Rune: Places AoE markers under select players. Spread and do not overlap in order to reduce damage taken.
Add Phase
At 50% HP Titania will become immune, summon 3 adds and disappear.
Puck: Puck is the most dangerous of the 3 adds. He has a swipe attack called "Hard Swipe" which hits for ~80k unmitigated damage. This hits in a non-telegraphed area in front of him reminiscent of 111-tonze swipe.
Peaseblossom: Peaseblossom also has a slam attack which deals a reasonable amount of damage, but not as much as Puck. This is also targeted at the person currently tanking him. So that this slam and Puck's swipe do not overlap it is recommended that separate tanks take these two adds. Peaseblossom also uses Peasebomb which places AoE markers to avoid on the ground.
Mustardseed: Mustardseed is the simplest of the 3 and does not need to be tanked. He deals damage in the form of line markers directly in front of him. Stand in the safe spots in between the lines.
In which order you deal with these adds is up to your group. Killing Puck first reduces the damage considerably on 1 tank and minimises the chance of DPS getting hit by swipe. Killing Mustardseed first will reduce the movement needed by the group and possibly overall party damage. Peaseblossom mixes the two in smaller amounts but none of the three have huge amounts of health.
Once the adds are defeated, Titania will appear, resurrect them and cause them to become giants standing at the northern, eastern and western points of the arena. The adds retain their abilities and act in the same way as before, their skills dealing more damage and requiring more precise movement. Mustardseed will stretch his lines from his edge to the other, Peaseblossom has larger, more frequent AoE markers for Peasebomb and Puck will use "Puck's Breath" to deal considerable damage to the tank.
During this phase Titania will appear in the middle and use a spell causing directional markers (Puck's Rebuke) to appear on the ground facing away from the middle that will push you in this direction once cast. Standing in the blue middle circle is a OHKO. Stand as close as you can to the middle without being in it to reduce the distance you are pushed.
Once you have, again, defeated the adds Titania will cast Being Mortal.
Being Mortal: This is an unavoidable party-wide AoE. During the add phase Titania has a separate power bar called "Titania's Power". This increases steadily as the phase goes on and the total amount at the end of the phase will determine the damage of Being Mortal. If the gauge filled, this attack will wipe the party.
Phase 3
Until the end of the fight you must now remember and take care of all of Titania's abilities NOT including any add related abilities.
They will use several Growth Runes to cover most of the arena. They will also use Water Rune and Phantom Rune to throw your movement off followed by Flame Rune. Remember to heal the group through Bright Sabbath and the tank through Divination Rune. Stack in the Water Rune for Flame Rune and be careful of Frost Rune followed by Mist Rune.
Loot
- Titania Card (Drops at a fixed rate.)
Dialogue
Cutscene
Duty Dialogue
Post-battle cutscene
Music
| Section | Theme |
|---|---|
| Main | What Angel Wakes Me |


