The Minstrel's Ballad: Nidhogg's Rage
The Minstrel's Ballad: Nidhogg's Rage
- Level
- 60 (Sync: 60)
- Item Level
- 220
- Difficulty
- Extreme
- Party size
- Full Party
8 man • 2 2
2  4
4 
- Unsyncing
- Allowed
- Time limit
- 60 minutes
- Phoenix Down
- Not Available
- Duty Finder
- High-end Trials (Heavensward)
- Roulette
- Mentor
- Tomestones
 20
20 - Req. quest
- Nidhogg's Rage
- Location
- Steps of Faith
- Region
- Coerthas
- Stone, Sky, Sea
- Available
- Patch
- 3.3
 The Echo
- On wipe: +5% (max +25%)
Scarcely had Nidhogg fallen on the Steps of Faith, when taverns across Eorzea began to rumble with the rumors of your victory. In one such establishment did you regale a certain story-staved bard with the true details of your accomplishment – a humble account that he soon expanded into a flowery ballad of heroic proportions. Even as the lilting notes fade away, your mind is carried off by recollections of a monstrous foe, writ considerably more terrifying by the wandering minstrel's exaggerated poetry...
— In-game description
The Minstrel's Ballad: Nidhogg's Rage is a level 60 trial introduced in patch 3.3 with Heavensward.
Strategy
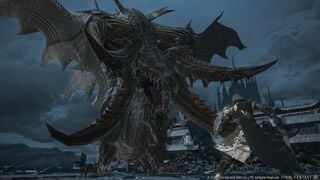
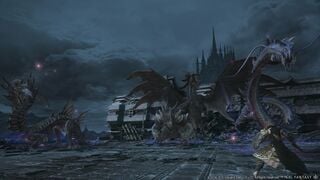
Nidhogg will utilize many different abilities across a total of 5 phases, some of which are dealt in his standard Dragon Form, while others are exclusive to his Human Form later in the battle. Should the battle go on for 11 minutes, Nidhogg will spend 10 seconds to cast a Deafening Bellow that will wipe the entire raid.
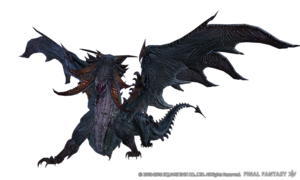
Nidhogg's Dragon Form Abilities
- Scarlet Whisper: A magic-based frontal-cleave tank-buster with no cast time. Only the main tank should stand in front of the boss.
- Deafening Bellow: An arena-wide attack that deals moderate damage to the entire group.
- Horrid Roar (Sky): Targets random players with orange overhead markers. After 6 seconds, will hit victims with lightning for moderate AoE damage.
- Horrid Roar (Floor): Creates cuts in the ground under 4-8 players that open into AoEs reminiscent of eyes. After 3 seconds, the puddles will explode, dealing high damage to those inside.
- Inflicts Hysteria for 6 seconds. Multiple puddles can be stacked on top of each other for ease of avoidance.
- Cauterize: Nidhogg appears at a random edge of the arena before diving across in straight line, dealing massive damage to any players caught in its wake. This attack covers half the arena.
- Hot Tail: A straight AoE attack from Nidhogg's head and tail, passing through his center. Inflicts moderate damage and a Supperation DoT to anyone it hits. Stand to Nidhogg's sides to avoid.
- Hot Wing: The inverse of Hot Tail - an AoE attack extending from Nidhogg's sides. Stand at Nidhogg's head, tail, or underside to avoid.
- Touchdown: Minor damage dealt to those near Nidhogg's landing spot when returning to the arena.
Phase 5 Exclusive:
- Bitter Hate: A stacking debuff to the primary enmity target that will inflict lethal damage on reaching 8 stacks. A tank swap should occur at 5 or 6 stacks.
- Akh Morn: A multi-strike stack marker. Nidhogg will repeatedly blast players for heavy damage divided equally across those in range.
- Akh Morn adds one additional blast every time it's casted. Starts at four.
- Flame Blast: Groups of flame orbs will appear around the room in sequences of two or three. After 15 seconds they will explode in a + shape, dealing massive damage to players in range.
Nidhogg's Human Form Abilities
- Ala Morn: A physical-damage tank-buster that deals massive damage to the main target, encouraging the use of mitigation skills. Not to be confused with Akh Morn.
- Drachenlance: A physical-damage frontal-cleave tank-buster. Deals moderate damage.
- High Jump: An AoE targeting multiple non-tank players, indicated by purple markers above their heads. After 5 seconds, marked players will be hit by moderate damage and will leave behind an AoE puddle which will persist for 20 seconds. These puddles will apply Bleeding while standing inside.
- Geirskogul: Line AoE created from High Jump puddles and Nidhogg. Aimed at random players and cuts through the entire arena.
- Soul Tether: Interceptable purple tethers that will attach to one (phase 3) or both (phase 4) healers. After 10 seconds, these tethers will explode for major AoE damage. Tethers must be grabbed by tanks.
- Eye of the Tyrant: A standard stack marker cast during Phase 3. Always targets a player with a blue tether. Only players with red tethers should stack on this marker.
- Darkdragon Dive: Four tower markers spawn around the center of the arena. Towers must have a player standing in them or else the party will likely wipe. Deals moderate damage to those inside. Leaves a puddle on the ground after that inflicts Burns.
- Super Jump: Places a flare marker at the location of a High Jump, dealing damage to players based on their proximity to its epicenter. Place High Jumps at the edge of the arena and run far away from this attack.
Phase 1 (Dragon Phase) - 100% - 80%
Phase 1 is simply about dodging.
Nidhogg will alternate Scarlet Whisper (tank-buster cleave) and Deafening Bellow (raid-wide damage). After the second Scarlet Whisper, he will leap into the air and use Cauterize twice. During these dives, Horrid Roar (Sky and Floor) will be used on random players. The first Cauterize will always be cast from either the northern or eastern side of the arena, whereas the second will always be used from the southern or western sides. Nidhogg then returns with Touchdown.
After another rotation of Scarlet Whisper and Deafening Bellow, Nidhogg will use Hot Wing and Hot Tail in a random order. The party should move towards Nidhogg's sides for Hot Tail and to his center for Hot Wing.
These attacks will repeat until Nidhogg is brought to 80% and starts the next phase.
Phase 1 Rotation: Scarlet Whisper → Deafening Bellow → Scarlet Whisper → Cauterize x2 → Scarlet Whisper → Deafening Bellow → Scarlet Whisper → Hot Wing + Tail → Deafening Bellow → Repeat
Phase 2 (Add Phase)
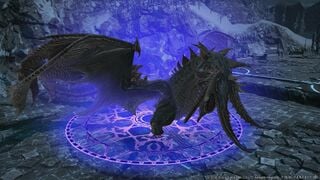
After being pushed below 80% health, Nidhogg will summon three adds, two of which must be tanked, and a third add that cannot be tanked at all. This phase serves as a DPS check.
- Shadow Brobinyak: Spawns on the west of the arena and must be tanked. It utilizes The Serpent's Apple, which is a tank buster that inflicts stacks of Physical Vulnerability Up.
- If this creature isn't slain quickly, it will repeatedly cast Original Sin on the tank, a magic attack that inflicts an incurable Disease. Killing this enemy should be the party's first priority.
- After this enemy is killed, the tank that was handling this enemy should immediately run to and provoke the Shadow Falak.
- Shadow Falak: Spawns on the east side of the arena and must also be tanked. It utilizes Electric Predation, which is a tank buster that inflicts Magic Vulnerability Up.
- Unlike it's physical counterpart, Magic Vulnerability Up causes magic attacks to deal extra damage based on the player's maximum health. Two stacks will cause the next magic attack to add 50% of max health as damage, likely causing death.
- Due to Original Sin being magic damage, the tank that took this enemy can not tank Shadow Brobinyak.
- Shadow Dragon: Spawns on the north side of the arena and completely ignores enmity (threat), meaning it cannot be tanked. It will alternate between a Fireball attack, targeting the farthest player, and a Ripper Claw melee cleave. Both attacks can be dodged, however, if any of its attacks do connect, the victim(s) will be inflicted with Damage Down.
- Once the Shadow Dragon has been reduced to moderate health (60-65%), it will inflict Vulnerability Up on the entire group. As a result, this add should be ignored until both the Shadow Brobinyak and the Shadow Falak have been slain.
- Once it has inflicted Vulnerability Up, it is very likely that anyone hit by its telegraphed attacks will receive fatal damage.
- Once the Shadow Dragon has been reduced to moderate health (60-65%), it will inflict Vulnerability Up on the entire group. As a result, this add should be ignored until both the Shadow Brobinyak and the Shadow Falak have been slain.
Players will have roughly 90 seconds to deal with these adds.
Players will have roughly 90 seconds to deal with these adds.
After the last enemy has died or 90 seconds have passed, Nidhogg will cast Mortal Chorus, dealing moderate raid-wide damage and knocking players back. If any enemies are still alive at this point, the follow-up attack will wipe the party.
Final Chorus will be cast after a lengthy animation, dealing much higher damage to the entire party and starting the next phase.
Phase 3 (Human Form)
Phases will now automatically progress once Nidhogg finishes his rotation, however, Nidhogg will skip to his final phase if brought to 40% health early.
During this phase, tanks must be wary of Ala Morn (not to be confused with Akh Morn), which mitigations should be saved for whenever possible. Drachenlance is also cast periodically, so Nidhogg should always be facing away from the rest of the party.
Nidhogg will begin marking players for High Jump, which leaves puddles on the ground that will be used as part of the Geirskogul and Soul Tether mechanics. These AoEs should always be brought to the edges, away from players may need to dodge. It is often best to have the group stack up in the centre after High Jump in order to bait the line-AoE's into one area and avoid unnecessary chaos. This will also make it infinitely easier for your tank to collect Soul Tether's.
Nidhogg will then summon his Fang and Claw, a destructible staff and sword that will slowly attempt to cast Self-Destruct. These must be killed before the cast finishes or the party will wipe.
- Nidhogg's Fang: A blue staff that spawns at 50% health. Will tether to the main-tank and two random players (marked as Fangbound). Whenever these players take damage from any source, Nidhogg's Fang will heal itself based on that damage.
- Tanks need to tank-swap immediately to stop Nidhogg's attacks from healing the Fang. All Fangbound players should avoid taking any damage at all, staying away from orbs and not joining any stack markers.
- All players (excluding whoever is tanking Nidhogg) should focus on attacking and destroying Nidhogg's Fang as quickly as possible.
- Nidhogg's Claw: A red sword that is invulnerable to all attacks. Will tether itself to three random non-tank players (marked as Clawbound). The only means of damaging Nidhogg's Claw is by having Clawbound players take damage.
- Clawbound players should intercept the blue Flare Star orbs that spawn around the arena immediately, as well as join any stack markers that appear.
Once tethers go out, three Flare Stars will spawn. Each of the three Clawbound players should stand on an orb, ready to take the damage in order to damage the Claw.
Afterwards, Nidhogg starts casting Eye of the Tyrant on a random Fangbound player that is not the tank. The targeted player should move to a safe spot for the Clawbound players to stack with while the other two Fangbound players stay away and continue attacking the Fang.
Once Eye of the Tyrant ends, tethers will randomly change their targets and the current main-tank will become Fangbound. Another tank-swap must occur and players must repeat the blue orb and Eye of the Tyrant process a second time. If towers are not killed after this second rotation, they will complete their cast and the party will wipe.
Phase 3 Rotation: Drachenlance → High Jump → Geirskogul + Soul Tether → Ala Morn → Drachenlance → Fang & Claw + 3 Flare Stars → Ala Morn → Eye of the Tyrant → Tether Swap → 3 Flare Stars → Eye of the Tyrant → Ala Morn x2 → Drachenlance → Phase 4
Phase 4 (Darkdragon Towers)
Four Darkdragon Dive towers will be summoned around the center of the arena and two healers will be marked by High Jump. While healers run to the edges, players should split so that each tower has at least one player standing inside. If a tower is left empty, massive damage will be dealt to the entire party and likely cause a wipe.
After this, four more players will be marked for another High Jump, Geirskogul begins casting, and both healers will have a Soul Tether that should be intercepted by tanks. Tanks and healers should have assigned towers and High Jump positions to run to so that they are in the same corner once the Soul Tethers appear.
One of the four players marked for the second High Jump will drop a Super Jump. At this point, players will have about ten seconds to avoid any remaining Geirskoguls while moving as far away from the Super Jump marker as possible.
After landing from Super Jump, Nidhogg will rotate between Drachenlance and Ala Morn before beginning the final phase.
Phase 4 Rotation: 4 Towers + 2 High Jumps → Geirskogul + 4 High Jumps + 2 Soul Tethers → Geirskogul + Super Jump → Drachenlance → Ala Morn → Drachenlance → Phase 5
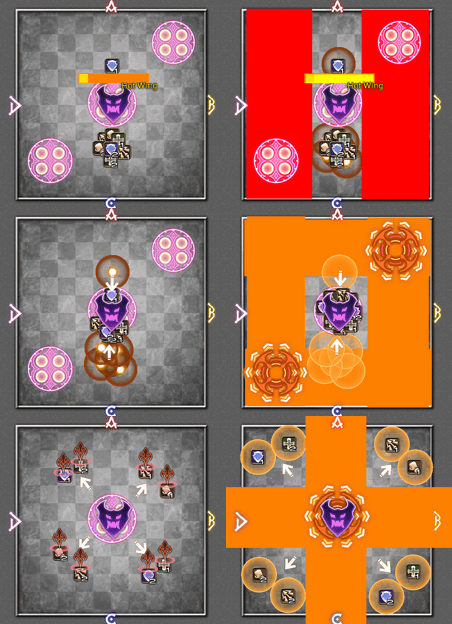
Phase 5 (Heart of the Dragon) - After Phase 4 or at 40% Health
This phase begins with Bloodrage, which deals moderate raid-wide damage. Nidhogg returns in dragon form and casts Cauterize, along with Horrid Roar (Sky and Floor) on every player.
After landing with Touchdown, Nidhogg will immediately cast his signature multi-strike stack marker, Akh Morn. This initially strikes four times, but will add one strike every time it is cast.
Throughout this phase, the main enmity target will gain stacks of Bitter Hate. If this reaches 8 stacks, the main tank will die. A tank swap should happen ideally around 5 or 6 stacks.
Nidhogg will then start his Flame Blast combination attack. Orbs will spawn on the outside corners of the room, followed by more orbs in the center. He will start charging Hot Wing. After Hot Wing finishes casting, a Horrid Roar (Floor) will be placed under every player. Once these appear, every player must run to the very center of the room to dodge the outer Flame Blasts, then immediately run to the outer corners of the room to dodge the second Flame Blast while at the same time being targeted by Horrid Roar (Sky).
Tanks should now tank swap to manage their stacks of Bitter Hate, and Nidhogg will begin another cast of Akh Morn, hitting 5 times now. Afterwards, face Nidhogg away from the party to avoid cleaving anyone with Scarlet Whisper.
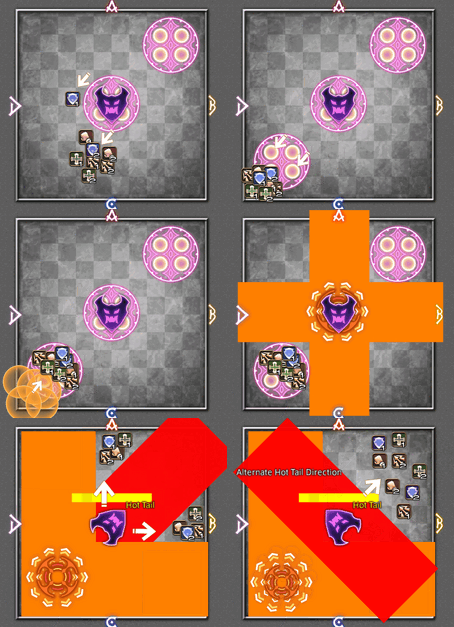
Nidhogg will begin their second combination of Flame Blast. Three sets of orbs will spawn, one in the center, one in a corner, then one in the opposite corner. The party should run far into the corner where the last set of orbs spawned, trying to drop the Horrid Roar (Floor) into the far corner of the room. Once the Horrid Roars (Floor) appear, be prepared to run to the center after the center Flame Blast explodes. Nidhogg will begin casting Hot Tail towards a random player. The party will need to either continue straight through Nidhogg to the opposite corner, or adjust to the sides depending on where Hot Tail is aiming.
Nidhogg will then repeat this cycle until death or the 11 minute mark where he will begin casting a very final Deafening Bellow. This is his hard enrage; it takes 10 seconds to cast, but will KO the entire party if successful.
Phase 5 Opening: Bloodrage → Cauterize + Horrid Roars → Akh Morn → Flame Blast Combination 1 → Rotation Start
Phase 5 Rotation: Akh Morn → Scarlet Whisper → Deafening Bellow → Scarlet Whisper → Deafening Bellow → Flame Blast Combination (1 or 2 Alternating) → Defeaning Bellow → Repeat
Loot
- Each player will receive 1 Horde Totem per kill. Collect 10 totems to exchange for a weapon or 99 for a Dark Lanner Whistle at Bertana in Idyllshire (X:5.9 Y:5.2).
 20 Allagan Tomestone of Poetics
- Nidhogg Card (Drops at a fixed rate.)
 Treasure Coffer
| Name | Type | Item Level | Rarity | Quantity |
|---|---|---|---|---|
| Paladin's Horde Arms (IL 235) | Other | N/A | Blue | 1 |
| Horde Axe | Marauder's Arm | 235 | Blue | 1 |
| Horde Guillotine | Dark Knight's Arm | 235 | Blue | 1 |
| Horde Spear | Lancer's Arm | 235 | Blue | 1 |
| Horde Knuckles | Pugilist's Arm | 235 | Blue | 1 |
| Horde Katana | Samurai's Arm | 235 | Blue | 1 |
| Horde Daggers | Rogue's Arm | 235 | Blue | 1 |
| Horde Bow | Archer's Arm | 235 | Blue | 1 |
| Horde Handgonne | Machinist's Arm | 235 | Blue | 1 |
| Horde Rod | Two-handed Thaumaturge's Arm | 235 | Blue | 1 |
| Horde Grimoire | Arcanist's Grimoire | 235 | Blue | 1 |
| Horde Rapier | Red Mage's Arm | 235 | Blue | 1 |
| Horde Cane | Two-handed Conjurer's Arm | 235 | Blue | 1 |
| Horde Codex | Scholar's Arm | 235 | Blue | 1 |
| Horde Star Globe | Astrologian's Arm | 235 | Blue | 1 |
| Nidhogg's Scale | Material | N/A | Basic | 1 |
| Horde Weapon Coffer (IL 235) | Other | N/A | Basic | 1 |
| Dark Lanner Whistle | Other | N/A | Basic | 1 |
| Faded Copy of Revenge of the Horde | Other | N/A | Basic | 1 |
Achievements
This duty is associated with the following achievements:
| Name | Points | Task | Reward | Patch |
|---|---|---|---|---|
| Let Me Be Your Hogg | 10 | Defeat Nidhogg in the Minstrel's Ballad: Nidhogg's Rage. | - | 3.3 |
| Mightier than the Horde | 5 | Complete the Minstrel's Ballad: Nidhogg's Rage with a party of only blue mages, Silence Echo turned on, and Unrestricted Party turned off. | - | 5.15 |
Music
| Section | Theme |
|---|---|
| Phase 1 | Dragonsong |
| Phase 2 | Freefall |
| Phase 3 | Revenge of the Horde |

