The Minstrel's Ballad: Hades's Elegy
The Minstrel's Ballad: Hades's Elegy
- Level
- 80 (Sync: 80)
- Item Level
- 450
- Difficulty
- Extreme
- Party size
- Full Party
8 man • 2 2
2  4
4 
- Unsyncing
- Allowed
- Time limit
- 60 minutes
- Phoenix Down
- Not Available
- Duty Finder
- High-end Trials (Shadowbringers)
- Roulette
- Mentor
- Tomestones
 20
20 - Req. quest
- Minstrel from Another Mother
- Location
- The Dying Gasp
- Region
- Norvrandt
- Stone, Sky, Sea
- Available
- Patch
- 5.1
 The Echo
- On wipe: +5% (max +25%)
Hearken unto a requiem for a hero fallen. A man who lived a thousand thousand of our lives clinging desperately to faint hope, never shirking his sworn duty to his long-lost brethren. A man who stood proud and did avow his true name on the threshold of the battle that would see him fall to his rival─the light to quench his shadow. Borrowing liberally from the funereal rites of the Night's Blessed, the minstreling wanderer weaves an elegy in that hero's honor─the tragic-yet-triumphant tale of a man and a battle that ne'er shall be forgotten.
— In-game description
The Minstrel's Ballad: Hades's Elegy is a level 80 trial introduced in patch 5.1 with Shadowbringers.
Strategy
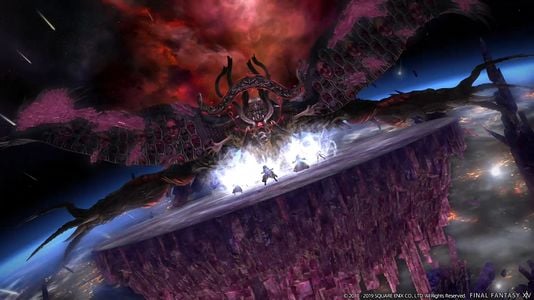
Just like normal mode, your encounter with Emet-Selch (Hades) takes place within a circular arena overlooking the ruins of Amaurot, deep within the Tempest. Thanks to a small outer railing during the opening phase, players will be incapable of falling over the edge. However, the railing will eventually be destroyed as the fight progresses, meaning players can plummet to their doom if they stray too far.
Below is a list of all Hades' abilities and phases.
First Phase
- Ancient Double - Hades provides himself with a buff at the beginning of the engagement, causing all of his future abilities to be cast in doubles for the rest of the encounter.
- Shadowspread - causes all participants to become the target of two consecutive cone-shaped AoE's one after the other due to Ancient Double. As a result, all players should be assigned cardinal or inter-cardinal positions around the boss (like a clock) so that the cone attacks do not overlap each other. Once the first cone has been fired, all players can then side-step to avoid the follow-up attack.
- Bad Faith - creates a large purple wall through the centre of the arena, with each half of the wall having spikes (arrows) protruding out in different directions. After a brief delay, the spikes will shoot across the platform in the direction they are pointing - one half firing north while the other fires south. To avoid being blasted, players should position themselves behind a side of the wall that does not have spikes pointing in their direction. After the wall has fired, Ancient Double will cause the attack to happen again - inverted with no telegraph. As a result, the previously safe areas will then be blasted whilst the previously unsafe areas become safe-spots.
- Ravenous Assault - Hades cleaves his primary target with a vicious AoE tank-buster. Unlike normal mode, Ravenous Assault will be also doubled and comes with a debuff. As a result, tanks will need to decide between having one tank take both hits using an invulnerability cooldown, or organizing a tank-swap between the two hits.
- Arcane Utterance - causes the arena to fill up with either Red Orbs or Blue Mirrors. In both cases, there will always be a missing orb or mirror, which can be used to determine where a future safe spot will be present.
If Arcane Utterance spawns Red Orbs, they will eventually explode in an AoE fashion once Hades casts Arcane Control. However, one orb will be noticeably missing within the arena, indicating where players should stand to avoid the explosions. For reference, players can check the circular patterns on the floor, as the circles on the floor indicate the radius of the orb explosions.
If Arcane Utterance spawns Blue Mirrors, they will eventually shoot straight-line AoE's in the direction they are facing once Hades has cast Arcane Control. However, one mirror will be noticeably missing, and a mirror in the centre of the platform will be pointing towards the gap, meaning the gap is not safe. To avoid, players will need to stand behind the mirror opposite the empty space.
- Broken Faith - causes a random pattern of aetheric (glowing blue) circles to slowly transcend from the sky into the arena. Once a circle touches the ground, it will detonate, searing anyone caught in their wake for moderate damage and also apply a stackable debuff. Keep in mind that the explosions are wider than the circles themselves. For reference, players can check the circular patterns on the arena floor to see how big the detonation will be. To avoid, simply avoid the first few circles until they detonate, then move into a previously detonated area away from other upcoming circle explosions, repeating the process as many times as necessary until the mechanic resolves. Bear in mind that Broken Faith will drop far more circles over time compared to the version witnessed in normal mode.
Once Broken Faith has concluded, the previously unused Arcane Utterance effect will take place. For example, if the first Arcane Utterance involved Red Orbs, players will now be dealing with Blue Mirrors. Once the alternate Arcane Utterance has concluded, Hades will execute another Shadow Spread (doubled cone-attacks), Bad Faith (double wall-attacks), Ravenous Assault (double tank-buster) before entering an enraged state, imposing a DPS check via Ancient Dark IV. If Hades hasn't been sufficiently damaged before the cast goes off, the party is vocally deemed 'unworthy' and suffer an unavoidable wipe.
Assuming the group manages to push Hades to 10% health or lower, they will transition to a new phase, and can even skip various mechanics if the overall DPS is high enough.
As the arena submerges into total darkness, shades of various ascians that you have defeated in the past will be summoned to the arena, each one utilizing different mechanics.
Shade of Nabriales
A shade of Nabriales will appear in the middle of the platform and begin to long-cast Quake III. If successfully cast, the raid will suffer unavoidable damage depending on how much HP the shade had left. The group will need to reduce the shades health to at least 50% or lower to survive.
To complicate matters, pairs of Comets will slowly begin to descend into the arena simultaneously, indicated by circles on the ground. Much like all other comet mechanics, at least one player will need to be occupying a circle before the comet reaches the platform. If any comet reaches the platform unsoaked, the raid will be wiped. Unfortunately, a hefty number of comets will continuously drop in pairs for a large portion of the Nabriales add phase, rotating around the arena with each drop. As a rule of thumb, both tanks should work on soaking the comets (with cooldowns) so that the rest of the raid can maintain uptime on Nabriales.
Furthermore, four Shadow Of The Ancients will eventually enter the arena - each one tethering itself to a damage dealer. After a delay, the shadowy ancients will aim a blast at their respective (tethered) victim that inflicts high damage and debuffs. As a result, all tethered players should try to avoid aiming their tether towards other members of the raid - especially those who are soaking comets, as doing so will likely result in their death(s).
After the ancients have blasted their tethered victims, both healers will acquire a stack-up marker via Ancient Water III, and each tank will be marked by an AoE circle via Ancient Darkness. The raid will need to be split in half so that each healer has sufficient people to absorb the damage, whereas tanks will need to ensure that they do not overlap the stacking groups with their AoE circles.
Once Ancient Water III + Ancient Darkness has resolved, the shade of Nabriales will finalize its Quake III cast, dealing damage based on how much health it had remaining.
Note: As of patch 6.5, if running undersized/unrestricted, it is unlikely DPS players will be able to soak comets, and not feasible for a single tank to soak them due to the spacing. Bring at least 2 tanks. Additionally, comets that are not soaked do around 200,000 to 300,000 damage. This is not an instant wipe but is difficult to recover from.
Shades of Igeyorhm & Lahabrea
Shades of Igeyorhm and Lahabrea will enter the arena as tankable adds and immediately pepper the raid with Fire Sphere and Blizzard Sphere, inflicting all members of the group with either a Fire Brand (increased damage from fire mechanics) or Freezing Brand (increased damage from ice mechanics). At this point, each shade should be kept apart while being destroyed, and players with Fire Brand should only attack (or tank) Igeyorhm (ice-aspected) whilst those with Freezing Brand should only attack (or tank) Lahabrea (fire-aspected).
Each shade will frequently utilize a mini-tankbuster which is not overly dangerous by itself, but if a fire-branded tank takes on Lahabrea (who is fire-based), the results will be nasty. Furthermore, the raid should make an effort to kill both adds as close to simultaneously as possible.
Soon after, four Shadow of the Ancients will appear within the arena - one in the north, south, east, and west. All four ancients will tether themselves to random players - two of the tethers being ice-based and two being fire-based. After a delay, the ancients will bombard the tethered victim with AoE damage of the tethered element. Seeing as players take increased damage from mechanics of the same element to their brand, the raid will need to swap or intercept tethers so that they do not have a tether of the same element, as failure to do so will likely be fatal. Furthermore, anyone designated to taking tethers should make sure that they are not standing close to other players, as the AoE damage from the ancient shades may overlap.
For best results, each tank and healer should intercept tethers (opposite to their respective elemental brand) so that the damage dealers can maintain uptime on Igeyorhm and Lahabrea, away from the designated tether holders.
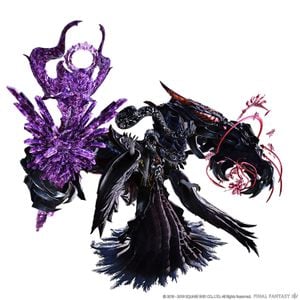
Once the tethers have resolved, Igeyorhm and Lahabrea will cast another Fire Sphere and Blizzard Sphere, causing all ice and fire brands to be reversed. As a result, a tank swap will likely be required. Once both shades have been defeated, Igeyorhm and Lahabrea will merge into Ascian prime, much like they did in the The Aetherochemical Research Facility back in Heavensward.
Ascian Prime
After merging into the dreaded Ascian Prime, it will immediately cast Universal Manipulation, reducing the HP of all participants to single digits. Soon after, all players (based on role) will acquire a collection of overlapping debuffs. Meanwhile, the Ascian Prime will be long-casting Blight, which will take place once all debuffs have been resolved.
All Tanks and Healers will be afflicted with:
- Doom - a ticking debuff that will outright slay the victim if they are not healed to full health before the debuff expires.
- Ancient Circle - causes affected players to emit a large donut AoE from their present location after a delay.
- Cursed Shriek - causes players to eventually emit a gaze attack, petrifying any player looking directly at them when the debuff expires.
All Damage Dealers will be afflicted with:
- Beyond Death - a debuff that can only be removed by taking fatal damage.
- Off-Balance - causes affected players to be knocked backwards a set distance once they take damage.
- Forked Lightning - causes the affected players to eventually detonate (large AoE) at their current location once the debuff has expired.
One method of dealing with the onslaught of debuffs is to have healers immediately start healing to cure off all Doom debuffs as soon as Universal Manipulation has been cast. During that, each tank and healer should stand close to the centre of the arena at cardinal positions around Ascian Prime (north, south, east, and west of its hitbox), which ensures that their eventual Ancient Circle donut AoE's are in manageable positions, providing a safe spot right in the centre so that no other tank or healer will be clipped.
Meanwhile, each damage dealer should pair-up with a tank or healer - standing behind them with their back to the outside so that they will receive fatal damage from Ancient Circle, removing their Beyond Death debuff. As a result of taking damage, damage dealers will also be knocked back to the arena edges via Off-Balance (assuming they have their back turned to the outer edges), safely away from all other party members. Once achieved, all damage dealers will then need to turn away from the tanks and healers in the centre to avoid the petrifying gaze of Cursed Shriek. Just remember that Off-Balance will knock you backwards in the opposite direction you are facing, so be sure you are facing the right direction for the knockback before turning away from the gaze attack afterwards.
After the knockback, damage dealers should remain in position until their Forked Lightning detonates.
- Blight - causes the Ascian Prime to blast the raid with unavoidable damage and apply a vicious bleed to all participants shortly after the debuffs from Universal Manipulation have resolved. The bleed itself will persist for 30 seconds, and the initial blast itself will also hurt a great deal, thus healers will have to ensure that everyone is topped up as soon as possible once the Universal Manipulation debuffs have resolved, and continue healing for quite a while afterwards.
- Height Of Chaos - a vicious tank-buster against the Ascian Prime's main target.
- Megiddo Flame - places a stack-line marker on each healer, forcing the raid to split into two groups to help share the damage of each. Healers must also make sure that their stack-line's do not overlap as the results may be fatal.
- Shadow Flare - hits the entire raid with a burst of shadowy energy. Healers will need to ensure that everyone has been sufficiently topped up after the previous Megiddo Flame stack-lines to avoid untimely deaths.
- Ancient Eruption - causes two players to drop AoE circles beneath their feet, following them for a total of three detonations each. If targeted by Ancient Eruption, be sure to run to the outer edges of the arena, preferably avoiding the bulk of the raid (and each other) while doing so.
With enough overall DPS, some of the above mechanics will be skipped.
Assuming the raid successfully slay the shade, Hades will return to the arena and the final phase of the encounter begins.
Final Phase
Throughout the rest of the encounter, Hades will no longer be moveable, remaining rooted to the north of the arena with a much larger non-directional hit-box. Whilst in this form, the target with the highest enmity (typically the tank) will be constantly peppered by ranged auto-attacks in-between all other mechanics. Furthermore, the arena itself will no longer have an outer railing, meaning players can accidentally walk (or be knocked over) the edge. Thankfully, any player who falls to their death can be resurrected after a moderate delay.
- Again The Majestic - summons two Comets which will begin to fall at the north and south ends of the arena. Just like earlier, each comet will need to be soaked by at least one player to avoid fatal damage, and is best achieved by having the main-tank take the comet close to Hades whilst the off-tank absorbs the comet to the south - preferably with mitigation CDs. Also, much like the comets you dealt with during the Nabriales add phase, they will continue to drop in pairs for a hefty portion of the phase, so be wary!
- Captivity - marks a random healer with an AoE circle. After a brief delay, the marked healer (and anyone overlapped by their circle) will be forcibly sucked into the centre of the arena and entrapped within an Aetherial Gaol. Players trapped in this manner will be raised into the air and unable to move or act in any way. All untrapped players will need to quickly destroy the Aetherial Goal as soon as possible to free their comrade(s). If this is not done in time, all trapped players will be executed regardless of their HP.
- Again The Martyr - creates a stack-up marker on each healer, an ice-based AoE marker on all damage dealers, and charges up a knockback that will eventually punt all players from the centre of the arena. Seeing as damage dealers cannot stack with the healers to help with the damage, each healer should pair up with a tank for that purpose, preferably by having them pair up slightly to the east and west of the arena centre. Meanwhile, all damage dealers should stand at a more diagonal position. As a result, each marked healer (and a paired tank) will be knocked back together and successfully soak the stack-markers, whilst the damage dealers are knocked at a diagonal angle and drop their ice-markers away from the stacked pairs.
- Again The Abyssal Celebrant - causes Hades to emit cone-shaped telegraphs in multiple directions, leaving two small safe-zones nearer his hitbox and two longer safe zones cutting across the arena in a larger shape. Simultaneously, both healers will acquire a stack-line marker that will eventually inflict multiple hits that need to be soaked. Lastly, the two farthest damage dealers will also acquire purple AoE circles, causing them to drop three persistent puddles one after the other. All three mechanics will resolve at the same time, so positioning is key.
To deal with the overlapping mechanics, each healer should move to the smaller safe-lines near Hades (one per safe-zone) whilst the tanks and unmarked damage-dealers split up to help soak the stack markers. Meanwhile, the two damage-dealers marked with AoE circles should use the larger safe-slices to move as far away from Hades as possible. Once their puddles begin to drop, they will have plenty of room to drop each of their three puddles (one after another). Once all mechanics have resolved, the AoE puddles will persist for quite some time, so be wary.
- Dark Seal - creates two orbs within the arena that will begin to slowly grow in size and should be avoided at all costs. The position of the orbs can be one of two different patterns, with safe spots for either pattern being quite close to Hades himself. Whilst the orbs are growing, Hades will either cast Polydegmon's Purgation or Shadowstream.
-- If Shadowstream is cast - Hades will emit a non-telegraphed column straight through the middle of the arena, indicated by a large ball of dark energy swirling in front of Hades' face. If you notice the animation, simply move to the east or west side of the platform to avoid the upcoming blast (whilst also avoiding the growing Dark Seal orbs).
-- If Polydegmon's Purgation is cast - Hades will emit an inverted version of Shadowstream (see above). Instead of a column AoE through the centre, Hades will instead blast the left and right side of the arena, leaving only the centre as a safe spot. In either case, all players will also need to avoid colliding with the growing Dark Seal orbs.
After reaching this point, Hades will begin to loop the above mechanics until his health has been dropped to 30% or lower. Once that has been achieved, players will have to deal with an Active Time Maneuver, much like they did in normal mode.
- Dark Current - causes multiple AoE circles to spawn at the east and west sides of the arena (in lanes) that will eventually begin to travel across the platform from one side to the other in a straight line. Due to the lane-line nature of the mechanic, an easy method of avoiding them is to simply stand behind an AoE circle that has passed you by, as each lane will only contain one traveling circle. However, bear in mind that Dark Current will happen in two waves, not just one.
- Gigantomachy - a raid-wide blast of darkness, keeping healers on their toes.
- Quadrastrike #1 - a multi-hitting raid-swipe.
- Quadrastrike #2 (Towers) - creates a pillar to the east and west of the platform that needs to be soaked by at least one player each - preferably tanks. After a brief delay, Hades will bring each fist down upon those locations, inflicting tremendous damage to those standing by the pillars.
- Quadrastrike #3 - another multi-hitting raid-buster, except this time, all participants will receive a very heavy damage-over-time debuff with a long duration. Healers will need to be on their toes until it expires.
With the whole raid taking continuous damage over time, Hades will unleash another set of travelling AoE's via Dark Current, followed by another Gigantomachy (raid-wide blast), and one final Quadrastrike (multi-hitting raid-swipe) before entering an enraged state, long-casting a super-powered Gigantomachy that will wipe the raid if Hades isn't defeated beforehand.
Loot
- Each player will receive 2 Hades Totem per kill. Collect 10 totems to exchange for a weapon or 99 for a Shadow Gwiber Trumpet at Fathard in Eulmore (X:10.3 Y:11.8).
 20 Allagan Tomestone of Poetics
- Hades Card (Drops at a fixed rate.)
 Treasure Coffer
| Name | Type | Item Level | Rarity | Quantity |
|---|---|---|---|---|
| Agonia | Red Mage's Arm | 465 | Blue | 1 |
| Aischune | Samurai's Arm | 465 | Blue | 1 |
| Deima | Archer's Arm | 465 | Blue | 1 |
| Ekplexis | Machinist's Arm | 465 | Blue | 1 |
| Eleos | Dark Knight's Arm | 465 | Blue | 1 |
| Enochlesis | Scholar's Arm | 465 | Blue | 1 |
| Epikairekakia | Arcanist's Grimoire | 465 | Blue | 1 |
| Faded Copy of Invincible | Other | N/A | Basic | 1 |
| Hades Weapon Coffer (IL 465) | Other | N/A | Basic | 1 |
| Hades's Auracite | Material | N/A | Basic | 1 |
| Himeros | Astrologian's Arm | 465 | Blue | 1 |
| Kelesis | Two-handed Conjurer's Arm | 465 | Blue | 1 |
| Menis | Lancer's Arm | 465 | Blue | 1 |
| Odune | Gunbreaker's Arm | 465 | Blue | 1 |
| Oknos | Two-handed Thaumaturge's Arm | 465 | Blue | 1 |
| Paladin's Hades Arms (IL 465) | Other | N/A | Blue | 1 |
| Phthonos | Rogue's Arm | 465 | Blue | 1 |
| Shadow Gwiber Trumpet | Other | N/A | Basic | 1 |
| Thumosis | Marauder's Arm | 465 | Blue | 1 |
| Zelos | Pugilist's Arm | 465 | Blue | 1 |
| Zelotupia | Dancer's Arm | 465 | Blue | 1 |
Achievements
This duty is associated with the following achievements:
| Name | Points | Task | Reward | Patch |
|---|---|---|---|---|
| Don't Look Back | 10 | Defeat Hades in the Minstrel's Ballad: Hades's Elegy. | - | 5.1 |
| Mightier than the Underworld | 5 | Complete the Minstrel's Ballad: Hades's Elegy with a party of only blue mages, Silence Echo turned on, and Unrestricted Party turned off. | - | 6.45 |
Music
| Section | Theme |
|---|---|
| Phase 1 and Adds | Shadowbringers |
| Phases 2-3 | Invincible |


