The Tower at Paradigm's Breach
The Tower at Paradigm's Breach
- Level
- 80 (Sync: 80)
- Item Level
- 495
- Difficulty
- Normal
- Party size
- Alliance
24 man • 3 6
6  15
15 
- Unsyncing
- Allowed
- Time limit
- 120 minutes
- Phoenix Down
- Not Available
- Duty Finder
- Alliance Raids (Shadowbringers)
- Roulette
- Alliance Raids
- Tomestones
 100
100  120
120  15
15 - Req. quest
- Brave New World
- Entrance
- The Puppets' Bunker (X:9.8, Y:14.2)
- Location
- The Tower at Paradigm's Breach
- Region
- Norvrandt
- Patch
- 5.5
The white-garbed 2P's discovery was the first domino to fall in a series of conflicts that have only escalated since the arrival of the black-shrouded 2B, the pattern they form growing ever more complex. The time of revelation may be at hand, but is this tale one of hope...or despair?
— In-game description
The Tower at Paradigm's Breach is a level 80 raid introduced in patch 5.5 with Shadowbringers. It is the third part of YoRHa: Dark Apocalypse.
Unlike ![]() The Copied Factory and
The Copied Factory and ![]() The Puppets' Bunker, this area does not become an explorable zone after clearing the raid.
The Puppets' Bunker, this area does not become an explorable zone after clearing the raid.
Objectives
- Clear staging node A: 0/1
- Clear staging node B: 0/1
- Clear staging node C: 0/1
- Clear staging node D: 0/1
- Clear the ascension platform: 0/1
- Clear Beyond: 0/1
Bosses
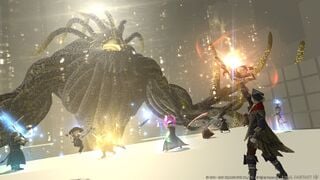
- Roar - Raid-wide damage, the boss opens with this. Sometimes it doesn't animate right away so keep an eye on the cast bar.
- Colossal Impact A linear AoE attack with two variants. When the boss first casts this, he will always do it twice. First one, then the other.
- Hands are open to the side and mouth is glowing red' The boss will cast a line AoE down the middle of the arena
- Hands in fists, leaning back, yellow glow The boss will cast line AoEs down both sides of the arena
- Magic Artillery Beta - A splashing tank buster targeting each alliance's tank.
- Replicate - another boss will appear on the left or right side of the arena. The first time it will always be one clone, but afterwards there may be two. They are not targetable
- Stacking the Deck - the boss will briefly tether its clones and mark the order in which they will attack. Shown by the number of blue/white cubes in front of each boss. The actual boss will always go first.
- The boss and its clones will cast Colossal Impact in the order shown during Stacking the Deck. They may cast the same version of Colossal Impact or different versions.
- Spheroids - Orbs appear and will spit out red balls which float towards players causing splash damage and vulnerability stacks on contact. This is often cast in conjunction with Colossal Impact and an alternate version is cast with Magic Artillery Alpha
- Magic Artillery Alpha - AoE markers on several players
- Spheroids will be cast with this after the first cast, but instead of shooting orbs it will do two casts of line AoEs across the arena. Avoid the first cast, then move into where it was to avoid the second cast.
- Light Leap - two proximity AoEs appear on the left and right and boss. The boss will jump and hit these spots. Generally, run forward so you're right on him to optimize uptime.
- Boxes will appear at the square AoEs during Light Leap
- Lunge - A knockback attack that always follows Light Leap (although the boss will often cast Replicate and Stacking the Deck inbetween). Line yourself up with the white boxes so you are knocked back into them.
- The boss will eventually (starting the third cast of Light Leap?) begin casting Colossal Impact after Lunge when Replicate is up. Make sure to line up with a box in such a way that you are not 1, knocked off the map by the clone's lunge but also not getting caught in the boss' Colossal Impact
This fight introduces mechanics one at a time and then quickly begins to combine them. Keep an eye on the boss' cast bars and for its physical tells to avoid taking unnecessary damage.
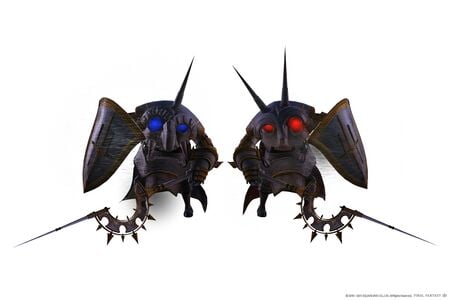
Hansel and Gretel will regularly cast Upgraded Shield and Upgraded Lance. The boss with lower HP will always use Upgraded Shield, while the other will use Upgraded Lance.
- Upgraded Shield: Creates a shield around the caster's rear and flanks, leaving its front exposed. Attempting to attack a shielded side results in the attack being reflected back for high damage.
- Upgraded Lance: Increases the caster's damage dealt.
- The bosses will tether to each other if they get too close, resulting in both bosses gaining the effects of both buffs. Keep the bosses spread apart. As the bosses lack cleaving attacks, tanks can point the Shielded boss's front toward the party to allow players to deal damage to both bosses simultaneously.
- Wail: Raid-wide AoE.
- Crippling Blow: Tankbuster.
- Tandem Assault: Bloody Sweep: Hansel and Gretel move to one edge of the arena and hold their halberds into the air, coating them in flames. Subsequent uses of the ability may also tether the bosses together with a red-and-blue arrow helix, indicating that the bosses will swap places with each other before the following attack happens.
- Bloody Sweep: Deals damage on sides of the arena based on how the bosses hold their weapons: If both halberds are held on the "inside", the safe area is the furthest point from the bosses. If both halberds are held on the "outside", the safe spot is the edge of the arena between the bosses.
- Seed of Magic Alpha: Targeted circle AoEs on four random players. Occurs at the same time as Riot of Magic.
- Riot of Magic: Stack marker on a fifth random player. Occurs at the same time as Seed of Magic Alpha.
- Note, later in the fight: Seed of Magic Alpha and Riot of Magic are used without cast bars, but the AoEs and Stack markers are telegraphed as normal.
- Tandem Assault: Passing Lance: The bosses rush to one edge of the arena and lock their halberds together in preparation for Passing Lance.
- Passing Lance: A line of fireballs appear in front of Hansel and Gretel to the opposite edge, with a gap somewhere in the line. The bosses will charge as a wide line AoE, and will also detonate the fireballs into narrow line AoEs perpendicular to the charge that cover the entire arena, save for the gap with no fireball.
- Wandering Trail: Yellow spinning discs appear on the arena. The first time, they will simply move around the edge of the arena, damaging anyone caught in them. In later casts, they may move towards the center of the arena and back out.
- Breakthrough: Cast while Wandering Trail's discs are active. Hansel and Gretel will move to opposite edges of the arena, hold their halberds to one side of the arena and raise their shields, then charge into each other in the center. The attack is composed of two parts: A proximity AoE from the center of the arena that deals high damage even at the furthest point, and an AoE that hits the entire side of the arena the bosses' halberds were held out to for extreme damage.
- Seed of Magic Beta: Circle AoEs below six random players.
- Hungry Lance: Hansel and Gretel move to the center of the arena, face opposite directions, and each launch wide cone AoEs in the direction they're facing.
After one of the bosses is defeated, the other will lose its Upgrade buff if it had one, interrupt any ability it was casting, and will begin repeatedly using Lamentation until it is defeated.
- Lamentation: High damage to the entire alliance.
Part 1
- Cruelty - Heavy raid-wide damage. She opens with this and will continue to cast it throughout the raid.
- The boss will create orange/red kill zones around the edge of the arena and the direct middle. This is appear and disappear throughout the fight, but there's a moment of safety for you to get out if you happen to be in it when it first appears
- Shockwave - AoE markers on select players, they will be either 'white' or 'black'. The amount of time you have until it explodes is indicated by the ring above each player's head. Be careful not to stack too many of these on accident as you can kill yourself or someone else by doing so
- Generate: Barrier (part 1) - White and black barriers form a cross through the arena. This is cast immediately after Shockwave and the players marked by Shockwave are to line up with the blocks opposite the color of their AoE to destroy it. Ground AoEs (white or black) will appear under some sections of barrier, in which case someone with an AoE does not have to line up with that section as it will be destroyed by the ground AoE.
- Black AoE Line up with a 'White' barrier to destroy it
- White AoE Line up with a 'Black' barrier to destroy it
- Variant - Instead of a cross, this one will be a box. Players inside will be stuck inside and some close by might be sucked in, too.
- Generate: Barrier (part 2) - This will often follow the first Generate: Barrier cast and features a line of arrows on one side of the arena. You want to position yourself so that you have a section of barrier of the SAME color as the arrow is between you and the arrow.
- (arrow) > (barrier section of same color) > you, the player
- Note: The barriers don't affect line of sight, so healers can continue to AoE heal and ranged DPS can continue to DPS
- Recreate Meteor This first shows up after the variant casts of Generate: Barrier and will appear in the middle of what's left of the box. Players need to position themselves such that a section of barrier the same color as the coming meteor (shown by the color on the ground and pulsing effects) is between them and the meteor
- (meteor) > (barrier section of the same color) > you, the player
- Manipulate Energy - Splashing tankbusters that target all three alliance tanks
- Replicate - The boss will create a number of regular sized red girls around the arena and each girl will then telegraph 1, their triangular aoe and 2, the direction in which they will rotate.
- The suggested way to deal with this is pick a girl and stick right behind her and rotate with her
- Sublime Transcendence - Cruelty but also the phase change. Healers have a very short window in which to heal their party back up before they are pulled into the intermission phase and will be unable to heal until Phase 3.
Intermission phase
- The hacking minigame from NiER: Automata. You'll be a little pointy triangle with two abilities: Shoot and Change Color. It's very short.
- You must be the opposite color of the 'barriers' and Pylons to damage them
- You must be the same color as the pulsing ground AoE to avoid the pulsing ground AoE. You can also look at the cast bar to know what color to match (Wave: Black or Wave: White)
- You must destroy the Pylons before you can continue to damage Red Sphere
Part 2
Note: This phase will open with Cruelty, so healers make sure your alliance has sufficient health if you were unable to do so before going into intermission phase.
- Child's Play - A number of players will be tethered by chains and will be subjected to Forced March in the direction indicated by the arrows around Red Girl's hand
- Later in the fight, when there are multiple large Red Girl's, Child's Play will be cast by each large Red Girl alongside Replicate and tether instead to the myriad of regular sized Red Girls around the arena and be pulled in various directions.
- Pick a girl, rotate with her until she's pulled away, and if no red girls get pulled to you you're safe, if one does get pulled to you quickly adjust to rotate with her.
- The direction options are: Left, Right, and In (towards her). She will never push you away.
- AoEs will spawn on the ground during this but will go off AFTER Forced March expired.
- What you want to do is ensure you are in a safe spot when you are released from Forced March, which often means you will start by standing in an AoE so you will end not standing in an AoE. Be mindful of the killzones along the edge and in the middle of the arena
- Later in the fight, when there are multiple large Red Girl's, Child's Play will be cast by each large Red Girl alongside Replicate and tether instead to the myriad of regular sized Red Girls around the arena and be pulled in various directions.
- Shockwave - In this phase, this will be cast with Child's Play instead of Generate: Barrier It will target both on tethered and untethered players. The color is irrelevant, just try not to stack too many AoEs or you'll die. It's a regular player-targeted aoe.
- Generate: Barrier - Unlike in phase 1, this will NOT be followed by Shockwave and there will be gaps already in the barrier. Arrows will also now appear in both colors and in both directions, but the same principles apply as before. Be between a barrier of the same color as its oncoming arrow.
- This is now ALWAYS cast TWICE and the arrows will be perpendicular on their second cast. So if they initially cast east/west + west/east they will then be cast north/south + south/north)
- Recreate Meteor - This is cast after two Generate: Barrier and unlike in phase 1 there are two meteors, one black and one white.
- Generate: Barrier Repeats ONCE on top of this and will remove sections of barrier.
- You want 1, avoid Generate: Barrier and 2, run to the safe zone where a black barrier and white barrier are between you and their respectively colored meteors. There will be only one safe combination of barrier sections.
This is probably the single most complicated fight in the raid and harshest to newcomers. Everyone dies here. A lot. Especially with how many instant kill attacks there are. Take your time to learn the mechanics and be patient with both yourself and others.
It is highly recommended to not LB until you are sure you will not need healer LB3.
- Mini bosses. You will first start with Xun-Zi and when sufficiently damaged they will temporarily exit and then return on the north side of the platform with Meng-Zi spawning on the west.
- The only mechanics worth noting are as follows:
- Deploy Armaments Telegraphed attacks used by both mid-bosses following the same rules as Knave of Hearts in the first battle,
- Red - A line AoE down the middle
- Yellow - Line AoEs down the sides
- This attack will be performed by both Xun-Zi and Meng-Zi one after another so make sure to position accordingly
- Deploy Armaments Telegraphed attacks used by both mid-bosses following the same rules as Knave of Hearts in the first battle,
 41626572726174696F6E: False Idol
Part 1
- Screaming Score - raid-wide damage
- Made Magic - A red wheel will appear and start turning towards one side of the arena ,look at which way and head to the opposite way (so if the wheel is spinning to the right, go left and vice versa)
- Lighter Note - AoEs will spawn on 3 players and once placed/set will consecutively fire in the direction of the arrows
- Rhythm Rings - Rings will appear in front of the boss and purple bullets will slowly fall, get out of the way of them as beams will fire the entire part of the arena
- There will be two rounds of this, and boss will also cast Seeds of Magic which are small AoE puddles from the sky that fall
Part 2
- Made Magic - A red wheel will appear and start turning towards one side of the arena, look at which way and head to the opposite way (so if the wheel is spinning to the right, go left and vice versa).
- Screaming Score - raid-wide damage
- Darker Note - all three tanks get a pink AoE damage marker
- Lighter Note - AoEs will spawn on 3 players and once placed/set will consecutively fire in the direction of the arrows
- Made Magic - A red wheel will appear and start turning towards one side of the arena; look at which way and head to the opposite way (so if the wheel is spinning to the right, go left and vice versa).
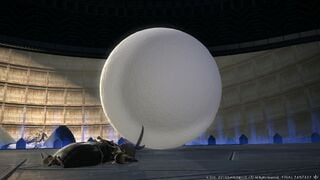
- Eminence - raid-wide damage and a Down for the Count buff applied, followed by cutscene and transition into next phase/boss. The party will also receive a checkpoint and will not need to repeat this boss if they wipe to the next one.
Part 1
- Pervasion - the floor will become transparent, getting you ready for next cast
- Recreate Structure - a building below the floor will have a 5 circle countdown and you can see where/when it is going to come up - dodge as necessary. Anyone hit will be knocked off the platform and killed.
- This will repeat a couple of times
- Recreate Signal - changes the arena to a train track
- Mixed Signals - makes the signals red and green, stand on a red to miss the incoming trains
- This will repeat a couple of times and then the arena will reset back
- Lighter Note - AoEs will spawn on 3 players and once placed/set will consecutively fire in the direction of the arrows
- Screaming Score - raid-wide damage
- Darker Note - all three tanks get a pink AoE damage marker
- Heavy Arms - if the boss forms its arms into pillars, move to the middle, if the boss forms the pillar and hugs it/sits on it then move to the sides
- Distortion - players get a circle surrounding them - half white/half black
- Final Song - a large ring will start to drop in the center - you need to match your half of color to it to avoid damage
- Pillar Impact - you need to stand next to the first pillar as its a knockback, if you position correctly you should get knocked back to the other pillar that is also about to drop second and then it will knockback you again.
- Towerfall - both towers will start to fall and eventually fall, so move out of the away
Part 2
- Recreate Signal - this time only 1 train track appears just off the arena
- Mixed Signals - calls a train to the track and it will stop, Red Girls will get off and start sending out purple balls which should be avoided
- Distortion - players get a circle surrounding them - half white/half black
- Final Song - a large ring will start to drop in the center - you need to match your half of color to it to avoid damage
- Heavy Arms - if the boss forms its arms into pillars, move to the middle, if the boss forms the pillar and hugs it/sits on it then move to the sides
- Lighter Note - AoEs will spawn on 3 players and once placed/set will consecutively fire in the direction of the arrows
- Heavy Arms - if the boss forms its arms into pillars, move to the middle, if the boss forms the pillar and hugs it/sits on it then move to the sides
- Recreate Signal - changes the arena to a train track
- Mixed Signals - makes the signals red and green, stand on a red to miss the incoming trains
Note: The boss will cast Rhythm Rings before the trains arrive, blocking your view of what is to come, so be ready to check and move out of the way.
- Rhythm Rings - Rings will appear on the side of the arena and purple bullets will slowly fall, get out of the way of them as beams will fire the entire part of the arena
- Screaming Score - raid-wide damage
- Pillar Impact - again, stand next to the first pillar for its knockback, or use your knockback nullifier right before the first one drops.
- Towerfall - same as part 1.
The mechanics then repeat until the boss is dead.
Rewards
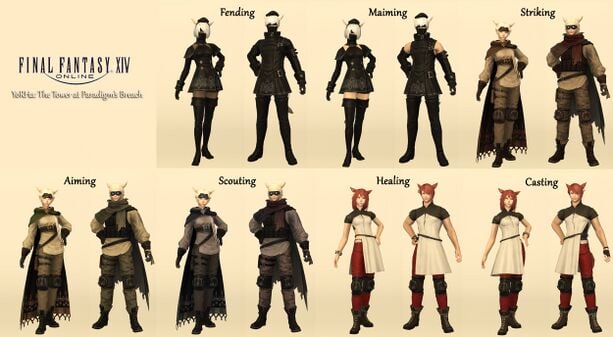
When originally released, players could receive only one reward item per week for completing duties in The Tower at Paradigm's Breach. As of patch 5.58, all weekly loot restrictions have been removed.
Completion Reward
- Upon completing the Tower at Paradigm's Breach, players can also earn a separate reward: 2 Cracked Stellacluster.
Loot
| Name | Type | Item Level | Rarity | Quantity |
|---|---|---|---|---|
| Obsolete Android's Boots of Aiming | Feet | 520 | Blue | 1 |
| Obsolete Android's Boots of Casting | Feet | 520 | Blue | 1 |
| Obsolete Android's Boots of Healing | Feet | 520 | Blue | 1 |
| Obsolete Android's Boots of Scouting | Feet | 520 | Blue | 1 |
| Obsolete Android's Boots of Striking | Feet | 520 | Blue | 1 |
| Obsolete Android's Hairpin of Casting | Head | 520 | Blue | 1 |
| Obsolete Android's Hairpin of Healing | Head | 520 | Blue | 1 |
| Obsolete Android's Headband of Aiming | Head | 520 | Blue | 1 |
| Obsolete Android's Headband of Scouting | Head | 520 | Blue | 1 |
| Obsolete Android's Headband of Striking | Head | 520 | Blue | 1 |
| YoRHa Type-55 Cap of Fending | Head | 520 | Blue | 1 |
| YoRHa Type-55 Cap of Maiming | Head | 520 | Blue | 1 |
| YoRHa Type-55 Thighboots of Fending | Feet | 520 | Blue | 1 |
| YoRHa Type-55 Thighboots of Maiming | Feet | 520 | Blue | 1 |
| Name | Type | Item Level | Rarity | Quantity |
|---|---|---|---|---|
| Obsolete Android's Gloves of Aiming | Hands | 520 | Blue | 1 |
| Obsolete Android's Gloves of Scouting | Hands | 520 | Blue | 1 |
| Obsolete Android's Gloves of Striking | Hands | 520 | Blue | 1 |
| Obsolete Android's Trousers of Aiming | Legs | 520 | Blue | 1 |
| Obsolete Android's Trousers of Casting | Legs | 520 | Blue | 1 |
| Obsolete Android's Trousers of Healing | Legs | 520 | Blue | 1 |
| Obsolete Android's Trousers of Scouting | Legs | 520 | Blue | 1 |
| Obsolete Android's Trousers of Striking | Legs | 520 | Blue | 1 |
| Obsolete Android's Wristdress of Casting | Hands | 520 | Blue | 1 |
| Obsolete Android's Wristdress of Healing | Hands | 520 | Blue | 1 |
| YoRHa Type-55 Bottoms of Fending | Legs | 520 | Blue | 1 |
| YoRHa Type-55 Bottoms of Maiming | Legs | 520 | Blue | 1 |
| YoRHa Type-55 Gloves of Fending | Hands | 520 | Blue | 1 |
| YoRHa Type-55 Gloves of Maiming | Hands | 520 | Blue | 1 |
| Name | Type | Item Level | Rarity | Quantity |
|---|---|---|---|---|
| Obsolete Android's Boots of Aiming | Feet | 520 | Blue | 1 |
| Obsolete Android's Boots of Casting | Feet | 520 | Blue | 1 |
| Obsolete Android's Boots of Healing | Feet | 520 | Blue | 1 |
| Obsolete Android's Boots of Scouting | Feet | 520 | Blue | 1 |
| Obsolete Android's Boots of Striking | Feet | 520 | Blue | 1 |
| Obsolete Android's Cloak of Aiming | Body | 520 | Blue | 1 |
| Obsolete Android's Cloak of Scouting | Body | 520 | Blue | 1 |
| Obsolete Android's Cloak of Striking | Body | 520 | Blue | 1 |
| Obsolete Android's Halfrobe of Casting | Body | 520 | Blue | 1 |
| Obsolete Android's Halfrobe of Healing | Body | 520 | Blue | 1 |
| YoRHa Type-55 Jacket of Fending | Body | 520 | Blue | 1 |
| YoRHa Type-55 Jacket of Maiming | Body | 520 | Blue | 1 |
| YoRHa Type-55 Thighboots of Fending | Feet | 520 | Blue | 1 |
| YoRHa Type-55 Thighboots of Maiming | Feet | 520 | Blue | 1 |
Achievements
This duty is associated with the following achievements:
| Name | Points | Task | Reward | Patch |
|---|---|---|---|---|
| Deus et Machina | 5 | Complete the Tower at Paradigm's Breach. | - | 5.5 |
| Mapping the Realm: The Tower at Paradigm's Breach | 10 | Discover every location within the Tower at Paradigm's Breach. | - | 5.5 |
Music
| Section | Theme |
|---|---|
| Main | Mourning |
| Boss 1: Knave of Hearts | Emil (Despair) |
| Boss 2: Hansel and Gretel | Song of the Ancients (Atonement) |
| Boss 3: Red Girl | The Sound of the End |
| Boss 3 Hacking Minigame | The Sound of the End: 8bit |
| Boss 4 Phase 1: False Idol | Possessed by Disease |
| Boss 4 Phase 2: Her Inflorescence | Kainé (Final Fantasy Main Theme Version) |
Images
Gear Images
Dungeon Images
Concept Art
Notes
- The raid was developed by NieR series producer Yosuke Saito and scenario writer and director YOKO TARO, with music composed by Keiichi Okabe.
- The symbols on the various magic circles are Angelic script from the NieR games. Only the letters A, C, T, and G appear, which together indicate DNA sequences.
- One of the buildings summoned by Her Inflorescence has the letters "SQE" on its upper right corner, for Square Enix.
- Several lines of boss dialogue are written in hexadecimal code, though with some digits corrupted (black squares). Despite this, they can all be decoded:[1][2]
- The False Idol's boss title "41626572726174696F6E" = "Aberration".
- After Her Inflorescence uses Mixed Signals, mixed English and Japanese dialogue appears from a speaker called "766f696365" = "voice".
Knave of Hearts: 696E2■6469737■616E74206D■■■D6F7279 = "69 6E 20 64 69 73 74 61 6E 74 20 6D 65 6D 6F 72 79" = "in distant memory"
Knave of Hearts: 6F6E636■2■7765 = "6F 6E 63 65 20 77 65" = "once we"
Knave of Hearts: 7■■57265206F6E■5 = "77 65 72 65 20 6F 6E 65" = "were one"
Gretel: 70656■■06C65 = "70 65 6F 70 6C 65" "people"
Hansel: 6E6565642■70656F706■6■ = "6E 65 65 64 20 70 65 6F 70 6C 65" "need people"
- If Hansel is killed first
Gretel: 7■74696C6C20■■6F75 = "73 74 69 6C 6C 20 79 6F 75" "still you"
Gretel: 67■97■6520616E6■2067697665 = "67 69 76 65 20 61 6E 64 20 67 69 76 65" "give and give"
- If Gretel is killed first
Hansel: 7374696■■C2079■F75 = "73 74 69 6C 6C 20 79 6F 75" "still you"
Hansel: 74616B■5206■6E642074616B■5 = "74 61 6B 65 20 61 6E 64 20 74 61 6B 65" "take and take"
References
Dialogue
Duty Dialogue
Anogg: Waugh! What's that!?
9S: Don't worry about it. There's no actual meaning behind anything machines do.
9S: It's locked.
9S: You need to destroy the obstructing consciousnesses from inside the network.
2B: Go ahead, 9S.
9S: Right─I'll hack the door, you infiltrate the network and take down any guards.
System: You transcend the ego collective.
Anogg: Wait, the network is a place?
2B: This is the tower's network. Its digital consciousnesses are here.
2B: Use the pods.
Anogg: You first.
901P: To live...is to know loneliness...
To live...is to know love...
901P: I'll live as many times as it takes...
I'll die as many times as it takes...
To know... To know... To know...
2B: Enemy sighted!
Knave of Hearts: 696E2■6469737■616E74206D■■■D6F7279
2B: Massive energy readings! Don't take your eyes off it.
2B: Self-replication! There's another on the side!
2B: Something's coming... Don't forget about that copy.
2B: Get as far away as you can!
2B: It'll knock us off if we're not careful.
Knave of Hearts: 6F6E636■2■7765
Knave of Hearts: 7■■57265206F6E■5
2B: Stay focused.
Anogg: Still not enjoying the creepy voice, thanks!
Anogg: Good luck! Don't die!
2B: There's the leader.
875P: They're all─
No!
I don't want to be alone...
Gretel: 70656■■06C65
2B: Brace yourself.
Hansel: 6E6565642■70656F706■6■
2B: A defense program. Choose your target carefully.
2B: This one's going to hurt.
(If Hansel Killed First)
Gretel: 7■74696C6C20■■6F75

(If Gretel Killed First)
Hansel: 7374696■■C2079■F75
2B: One to go!
(If Hansel Killed First)
Gretel: 67■97■6520616E6■2067697665

(If Gretel Killed First)
Hansel: 74616B■5206■6E642074616B■5
2B: Let's get back to 9S.
9S: We're in! Let's go.
Anogg: Well done!
9S: Did that say “gates”?
2B: Don't waste time trying to understand. We're here to kill the enemy. That's all.
9S: Here we go again.
Hacking in three...two...!
System: You transcend the ego collective.

2P: What, aren't you enjoying yourselves?
Red Girl: Ahahaha! You'll never eliminate us...
2B: Oh no you don't!
Anogg: Do they...have feelings too?
Anogg: Well, you know what to do!
Red Girl: Even if you defeat us... Do you really think you'll win?
2B: We're prepared to fight until the end. Yours, or ours.
Red Girl: You fight and fight and fight...
You're made that way, after all.
Red Girl: You have so little control over your nature...
Red Girl: All you can do is watch as the world falls to ruin.
9S: A logic virus! It's interfering with my hacking!
9S: Destroy its core!
2B: We made it.
System: You eradicate the logic virus, ending the machines' counteroffensive.
Red Girl: Not half bad.
Red Girl: Your little alliance is pointless.
Red Girl: You'll never compare to us.
Red Girl: Ahahaha! You probably think you're clever.
But we've had just about enough...
2B: Time to move.
9S: Whatever they're planning, we need to stop them before it's too late!
2B: I'm aware.
9S: We should be able to move it using this panel.
9S: Looks like this goes all the way up.
2B: Hm.
2B: Enemy units! 9S, cover Anogg.
Anogg: More!?
9S: Be careful!
Xun-Zi: Let your voices...be heard...
Meng-Zi: Sing with me...
Meng-Zi: Such...delights... Did you...have fun?
2B: Is that it?
9S: I'm not picking up any more hostiles.
Anogg: Everyone all right?
2B: You know what will happen to the sphere's creations when it's destroyed.
Anogg: There's no choice. We do it.
Cutscene
2B: What will it take for these things to die and stay dead?
9S: No... Stop them!
Duty Dialogue
False Idol: You will be among the first to see the new world...
2B: Destroy the target.
2B: An energy signal! Watch which way it turns.
False Idol: ...But we still have some time. Why not enjoy it?
2B: Multiple heat signatures coming from around the target.
Be ready!
False Idol: We've waited so long to throw these gates wide...
False Idol: Let the light in!
2B: Where...?
Her Inflorescence: All memory lives within me.
2B: It's manipulating the space around us.
Her Inflorescence: So many dreams slumber here...
2B: Right below us!
Her Inflorescence: Each memory's form is unique.
2B: Watch the periphery!
766f696365: We will sooなく...danger...the traんろ.
To ensure your safety...pleassssさイ...
766f696365: We will sooなく...danger...the traんろ.
To ensure your safety...pleassssさイ...
Her Inflorescence: You would render all this meaningless?
Her Inflorescence: The final song...just for you.
2B: You'll need to match wavelengths to create interference.
Her Inflorescence: You will soon find out how lowly you are.
2B: They're going to fall. Move!
Her Inflorescence:                      AH♪
              ah♪
ah♪ ah♪
2B: Again!?
766f696365: We will sooなく...danger...the traんろ.
To ensure your safety...pleassssさイ...
Her Inflorescence: You will soon find out how lowly you are.
Post-duty Pop-up
2B: Threat suppressed.


