The Forked Tower: Blood
The Forked Tower: Blood

- Level
- 100 (Sync: 100)
- Item Level
- 690 (Sync: 700)
- Know. Level
- 20
- Difficulty
- Savage
- Party size
- Flexible
24-48 man • 24-48
- Unsyncing
- Not Allowed
- Time limit
- 30 minutes + extensions
- Phoenix Down
- Not Available
- Tomestones
 80
80  40
40 - Req. quest
- Past and Crescent
- Entrance
- The Occult Crescent: South Horn (X:22.7, Y:21.5)
- Location
- Tower of Blood
- Region
- ???
- Patch
- 7.25
An ominous tower looms on the horizon of the isle's south horn, twisted spires shimmering in the haze. What revelations await within its uppermost chambers?
— In-game description
The Forked Tower: Blood is a level 100 field operation introduced in patch 7.25 with Dawntrail. Instead of being a separate instance, it exists within The Occult Crescent: South Horn. Similar to The Baldesion Arsenal and Delubrum Reginae (Savage), Forked Tower is designed to be a high-end duty that requires group coordination and the use of specific phantom job actions to complete.
This duty is considered a Critical Encounter and will count towards achievements involving those.
Participation
The required degree of coordination and large raid size makes this raid impractical to recruit for solely through Party Finder or other in-game methods. Thus, in North American and European data centers, the most popular way of completing this content is through premade groups organized through various player-run Discord servers. Each server has its own specific rules and organizational methods.
Requirements & Entrance

Players must purchase Sanguine Ciphers from the Expedition Antiquarian (X:38.1, Y:7.0) for ![]() 200 or
200 or ![]() 320. When at least 24 different players use the ciphers at a cipher reliquary (X:22.5, Y:21.4) by the Solitary Pavilion landmark during
320. When at least 24 different players use the ciphers at a cipher reliquary (X:22.5, Y:21.4) by the Solitary Pavilion landmark during ![]() Auroral Mirages weather, an aetherial node will activate, teleporting them to within the tower after a brief period.
Auroral Mirages weather, an aetherial node will activate, teleporting them to within the tower after a brief period.
All players must contribute at least one cipher to be eligible to enter the duty. Players must have also have a Knowledge Level of 20 to enter.
Spawn conditions for the auroral mirages weather are as follows:
- There are at least 24 players in the South Horn instance with knowledge level 20 and have unlocked the tower by making sufficient progress in Past and Crescent.
- In a newly spawned (fresh) instance, the weather will appear after 5 minutes if the above condition is met.
- The timer can be reduced as explained below.
- Afterwards, the weather will respawn on a hidden 60 minute timer.
- The timer starts when there is no Forked Tower in the instance currently ongoing (indicated by the lack of the
 tower icon in the minimap).
 - The timer is reduced by 5 minutes for each successful completion of a Critical Encounter.
- The timer is reduced by 1 minute for each successful completion of a FATE.
- The timer starts when there is no Forked Tower in the instance currently ongoing (indicated by the lack of the
When both the player count/progression requirement is met, the timer expires, and any ongoing Critical Encounters conclude, the auroral mirages weather will appear.
The weather will last for approximately 5 minutes.
Up to 48 players may join the instance. If there are more than 48 players standing in the aetherial node, players will be randomly selected for teleportation, which will be indicated by the ![]() Right of Entry: The Forked Tower status. Players who used more ciphers will have a higher chance of being selected.
Right of Entry: The Forked Tower status. Players who used more ciphers will have a higher chance of being selected.
- Note: This "overbooking" is generally not an issue because nearly all runs of this raid are from pre-made alliances, who have exclusive access to the South Horn instance until the tower activates.
If the player is not selected to enter or if the tower does not activate because fewer than 24 players used ciphers, all players will be refunded their cipher(s).
Unlike standard content, players cannot be resurrected by normal means will have 3 non-replenishable stacks of the debuff ![]() Resurrection Restricted. Defeated players may only be resurrected by Revive from
Resurrection Restricted. Defeated players may only be resurrected by Revive from ![]() Phantom Chemist or level 3 healer limit breaks. Each time they are revived, they will lose one stack. When a player has no more stacks remaining, they will receive the
Phantom Chemist or level 3 healer limit breaks. Each time they are revived, they will lose one stack. When a player has no more stacks remaining, they will receive the ![]() Resurrection Denied status, preventing resurrection by any means and must therefore leave the raid if they die again.
Resurrection Denied status, preventing resurrection by any means and must therefore leave the raid if they die again.
- There is a bug where players who are revived by a healer limit break when they have a pending resurrection from a chemist will lose 2 stacks.
Players may only swap their job or phantom job in the starting room of the raid. Once they leave the room, they will be given the ![]() Duties as Assigned status and be unable to swap their job or phantom job.
Duties as Assigned status and be unable to swap their job or phantom job.
Party Functions
Most raid groups will typically form six parties of up to eight players each outside the raid. The specific role composition per party is flexible, but each party should contain at least one tank and one healer. The Party Finder recruitment for this raid is listed as the 48-player option for the Occult Crescent: South Horn.
Players are usually separated into three "letter" parties (A, B, C) and three "number" parties (1, 2, 3). Alliances D, E, F in the Party Finder UI correspond to the number groups. This separation is used for multiple points in the raid that require players to split into two groups. Players may freely leave, (re)join, disband, and reform parties while inside the raid.
Waymarks, Ready Checks, and Countdowns
Waymarks, ready checks, and countdowns are only visible in the player's individual party and are not shared by the entire raid. Each party may designate a party leader who is responsible for placing waymarks and conducting ready checks, but anyone in the party is usually free to contribute.
As of patch 7.5, waymarks can be saved and loaded in the in-game waymark preset feature. A common set of waymarks should be shared for the entire raid group to ensure everyone is on the same page. Waymarks do not need to be placed precisely, with the exception of the last boss to facilitate a common strategy ("BAP Daggers") used for it. In this strategy, each party will use a different set of waymarks.
After ready checks are conducted, they are often communicated to the rest of the raid via the /yell chat to show that the party is ready.
In place of countdowns, the raid leader will usually designate boss pull times based on the Forked Tower duty timer, which is shared by all raid members. For example, a pull time of "30:00" means that the boss will be pulled at 30:00 left on the timer.
Phantom Job Requirements
Specific phantom jobs are mandatory to clear the raid. As there is no effective in-game functionality for coordinating phantom job compositions, this is often done through external spreadsheets such as this. All players should be maximum level on the phantom job they wish to use for the raid.
With the addition of new phantom jobs in patch 7.5x, it is likely that the current requirements and recommendations may change in the future.
Mandatory Jobs
| Phantom Job | Number Required | Responsibilities |
|---|---|---|
| 2 (1 per side) |
| |
| 2 (1 per side) |
| |
| 2 (1 per side) |
| |
| 2 (1 per side) Recommended 1 per party |
| |
| 1 ~6 recommended for damage |
|
Recommended Jobs
| Phantom Job | Number Recommended | Responsibilities |
|---|---|---|
| Up to 1 per party |
| |
| 1 per party |
| |
| 2 (1 per side) |
| |
| 1 (only if no Dancer) |
| |
| 1 (only if no Cannoneer) |
| |
| 1 per berserker |
| |
| 1 |
| |
| As many as possible |
|
Hidden Explosive Traps

Similar to other large-scale raids such as The Baldesion Arsenal and Delubrum Reginae, there are hidden explosive traps that may spawn in certain locations (see maps). Traps are only located in the sections of the raid between the boss encounters, specifically areas that are demarcated by thick red lines on the floor. Glyphs will emanate from one side of the line, denoting the area with traps.
Traps can be revealed with Trap Detection from ![]() Phantom Thief. In the areas with traps, the rest of the party should remain behind the thief in their group at all times.
Phantom Thief. In the areas with traps, the rest of the party should remain behind the thief in their group at all times.
For safety, traps should be disarmed when possible. There are two types of traps, the second type is significantly more dangerous and will cause wipes if carelessly detonated.
| Trap | Image | Effect | Disarming Method |
|---|---|---|---|
| Normal Trap |  |
Releases a small AoE when detonated (slightly larger than the trap itself), killing anyone in range. |
|
| Unstable (Super) Trap |  |
Releases a massive AoE when detonated, killing anyone in range. |
|
It is possible to slightly outrange the radius of a super trap explosion to disarm, but is highly not recommended to disarm them using this action unless in an experienced group. Rangers should be especially careful not to disarm a super trap during the bridges encounter, as it will likely wipe the raid.
Objectives
- Clear the Paleography Room.
- Clear the central passages.
- Clear the Astronomy Room.
- Clear the pronged passages.
- Clear the Glaciology Forum.
- Clear the binding lock.
- Clear the Haematology Room.
Enemies and Bosses
A minimum of 24 players is needed to resolve certain mechanics in the raid, and boss HP will scale based on the number of players inside, starting from 24.
Being hit with any avoidable AoEs during boss encounters will inflict a stack of ![]() Thrice-come Ruin that lasts indefinitely until the end of the boss or until the player dies. If a player receives three stacks, they will be inflicted with
Thrice-come Ruin that lasts indefinitely until the end of the boss or until the player dies. If a player receives three stacks, they will be inflicted with ![]() Doom and die.
Doom and die.
After defeating a boss, players have a random chance of receiving the ![]() Battle High status for 15 minutes, increasing their Critical Hit and Direct Hit Rate and providing healing-over-time.
Battle High status for 15 minutes, increasing their Critical Hit and Direct Hit Rate and providing healing-over-time.
Players may fall off the edge of the arena to their deaths.
The boss is a large enemy that bisects the room into two square halves. Players may not pass through the boss. At certain points in the battle, the boss will levitate, allowing players to pass under. The boss will auto-attack the top three enmity players.
- Demonic Dark II: Massive raid-wide magical damage, requiring heavy mitigation.
- Ray of Dangers Near or Ray of Expulsion Afar: The boss will levitate and use one of two possible attacks. In either case, three large red orbs will spawn in front of the boss that will resolve as a persistent AoE hitting one entire side of the arena (Ray of Ignorance), requiring the party to move under the boss to the other side of the arena.
- Ray of Dangers Near: The boss will slam down, emitting a late telegraphed point-blank rectangular AoE (Landing) dealing physical damage. Move away from the boss to dodge.
 Phantom Samurai can ignore this attack with Shirahadori. Anyone under the boss will die.
 - Ray of Expulsion Afar: The boss will slam down, emitting a late telegraphed bi-directional knockback (Landing). Move close to the boss (but not directly underneath it) and ride the knockback to avoid being knocked off, or use knockback immune. Anyone under the boss will die.
- Ray of Dangers Near: The boss will slam down, emitting a late telegraphed point-blank rectangular AoE (Landing) dealing physical damage. Move away from the boss to dodge.
- The boss follows with another random Ray of Dangers Near or Ray of Explusion Afar, requiring the party to move under it again to the south side.
- Occult Chisel: Telegraphed magical AoE tankbusters on the top three enmity players. It is common for these players to stack up so that
 Phantom Berserkers can capitalize on Rage. The stacking tanks and berserkers should use their regular invulnerability cooldowns if so ( Pledge will only mitigate 2 of the 3 hits).
 - Demonograph of Dangers Near or Demonograph of Expulsion Afar: The boss will levitate, and six four-person stack markers (towers) will spawn, three on each half of the arena. In each half, two towers will be in melee range, while the third is at the back of the platform. Based on the cast name, the boss will either use a point-blank rectangle AoE or a knockback. After this resolves, all players should go to their assigned tower based on their party (which will commonly be indicated with a waymark) and soak them, inflicting minor magical damage (Explosion). Towers that do not have at least four players will explode for high raid-wide damage (Massive Explosion) and inflict a
 Thrice-come Ruin stack.
 - Rotate (direction): One of the two possible attacks
- Rotate Left: The boss rotates 90 degrees counterclockwise, hitting its relative northeast and southwest with AoEs (Rotation) that will knock anyone hit off the arena.
- Rotate Right: The boss rotates 90 degrees clockwise, hitting its relative northwest and southeast with AoEs that will knock anyone hit off the arena.
- To resolve, players should go to the half of the boss (facing it) that is opposite the direction of the cast name. For example, if it uses Rotate Left, players will go to the right side of the boss looking at it regardless of which side of the arena they are on.
- The boss will use another Rotate attack and then immediately follow with a persistent Lacunate Stream AoE in front of where it is facing. Therefore, after dodging the first Rotate, all players should move behind the boss and position to dodge the second Rotate, causing them to remain behind the boss. The boss will always rotate to face the north, so all players can dodge the second Rotate by moving to the south half of the arena and behind the boss.
- Cometeor of Dangers Near or Cometeor of Expulsion Afar: The boss will levitate and random players will be assigned debuffs or stack markers.
- Four random players will receive stack markers with a trajectory indicator. Two will be pointing north, while the other two will be pointing south. The stack AoEs will inflict magical damage (Portentous Comet) and fling players around a quarter of the arena length.
- Eight other random players will receive a meteor overhead marker and a 12-second
 Crater Later debuff. When it expires, the player will place a massive circle AoE telegraph (Portentous Cometeor) at their location with a radius of around two-thirds the length of the arena.
 - In addition, either the north or south edge of the arena will contain a large meteor marker, indicating the epicenter of another Portentous Cometeor AoE.
- To resolve, players should loosely spread before the mechanic begins to determine if they have a marker/debuff.
- All players with meteor markers should go to the side with the fixed meteor marker.
- The stack marker players should go to the side that allows them to point their trajectory arrow towards the boss.
- All other players with no marker/debuff should go to the side without the fixed meteor marker.
- The boss will slam down and do either a point-blank AoE or a knockback based on its cast. If it uses a knockback, meteor players should not use knockback immune and instead should ride the knockback to the very edge of the platform.
- Immediately after, the meteor debuffs will resolve. All meteor players must be at the back of the arena to create as much space as possible.
- Afterwards, the stack markers will resolve.
- The stack marker players on the meteor side should position to be close to the boss, which will allow them and the meteor players to be flung above the boss to the safe side of the platform.
- The stack marker players on the safe side should position at the wall to prevent them from being flung to the unsafe (meteor) side. Ranged players should stack with these players to mitigate damage, while unmarked melee players are free to remain in melee range and ignore the stacks.
- After the stack markers resolve, the placed Portentous Cometeor AoE telegraphs will detonate.
- Rotate Left/Right x2
- Summon: The boss will levitate, spawn a point-blank rectangle AoE telegraph, and tether six fixed locations of the arena, three on each side.
- After the boss slams back down, an add will spawn at each tethered location. On each side, the two spots closer to the boss will each spawn a Summoned Demon, while the spot further away will spawn a Summoned Arch Demon.
- The adds are immobile but will use auto-attacks, so tanks should establish enmity on their assigned party's add (same as their tower location), while players defeat their assigned add.
 Phantom Time Mages must use Occult Dispel on the large Arch Demon adds to remove their
  Dark Defenses buff, or they will take very little damage.
- If the adds are not defeated in time, they will enrage with repeated casts of Abyssal Transfixion, dealing massive damage to individual players and inflicting Thrice-come Ruin.
- Summon: The boss will now spawn four gargoyle statues, two per north/south side of the arena. The pattern of the statues is the same per side if looking at the boss. Each side will have one corner open that is furthest away from each statues.
- Demonography: The boss will spawn six 4-person stack markers on one side of the arena. Three of the stack markers will be levitating on top of the three stack markers on the ground.
- Gravity of Dangers Near or Gravity of Expulsion Afar: The boss will levitate and use either a point-blank AoE or knockback based on the cast. In addition, up arrows will appear by the demon statues, indicating they will levitate. Any players near them when they are levitated will receive a 10-second
 Defying Gravity buff and be levitated themselves, allowing them to soak an airborne tower.
 - To resolve, the entire raid should go to the side with the towers. Resolve the point-blank or knockback AoE first, then have half the raid (e.g. the three numbers parties) go near a statue to be levitated. Afterwards, all players should soak their assigned towers. The boss will then cast Restore Gravity, causing the statues to slam down with large, late telegraphed point-blank AoEs, so the party should go to the safe corner after soaking the towers.
- Mechanics then repeat until the boss enrages:
- Rotate Left/Right x2
- Cometeor of Dangers Near or Cometeor of Expulsion Afar
- Ray of Dangers Near or Ray of Expulsion Afar
- Occult Chisel
- Demonic Dark II
- End of History (enrage)
After the boss is defeated, players can interact with the transporter at the north to move to the next area, containing a personal spoils coffer and a knowledge crystal for knights to refresh Pray. The raid will need to divide into two groups to proceed: usually, the letter parties will take the left passage and the number parties will go right. Each passage contains a one-way teleporter to the next section.
Central Passages ("Hallways")

This section of the raid requires the two groups to proceed through hallways full of hidden traps and dangerous mobs, making use of their phantom job actions. This section contains some optional personal spoils coffers with extra Sanguinite; groups may opt to either collect these or skip them. The layout of this section is mirrored for each group but is otherwise identical.
Traps will randomly spawn in fixed locations. As a rule of thumb, ![]() Phantom Thieves should be ahead of the rest of the group and use Trap Detection to reveal traps. Experienced groups may choose to have tanks or
Phantom Thieves should be ahead of the rest of the group and use Trap Detection to reveal traps. Experienced groups may choose to have tanks or ![]() Phantom Rangers "blind pop" traps, i.e., disarm them before they have been revealed.
Phantom Rangers "blind pop" traps, i.e., disarm them before they have been revealed.
All enemies have telegraphed AoE attacks that will instantly kill anyone who is hit. ![]() Phantom Time Mages should use Occult Slowga on all mob pulls to give others more time to dodge the AoEs. Crowd control attacks from jobs such as
Phantom Time Mages should use Occult Slowga on all mob pulls to give others more time to dodge the AoEs. Crowd control attacks from jobs such as ![]() Phantom Cannoneers and instant kill phantom actions are also very useful. The enemies do very heavy-hitting auto-attacks, so tanks should ensure they are the first to establish enmity and should use mitigation.
Phantom Cannoneers and instant kill phantom actions are also very useful. The enemies do very heavy-hitting auto-attacks, so tanks should ensure they are the first to establish enmity and should use mitigation.
There are two enemies to note:
- The Tower Manticore enemies have a simple but dangerous mechanic that requires players to pay attention to them. They will use either Left Hammer or Right Hammer, a large late telegraphed 180-degree cleave based on the cast name. If they are slowed, the telegraph will be significantly longer. After the first cleave, they will immediately follow with a very fast cast of a cleave in the opposite direction, requiring players to dodge to the first unsafe side. Tanks should point these enemies to give the party ample room to dodge, e.g., face them either directly towards or opposite the party.
- The Tower Scarab enemies will use Rhino Guard, giving them an
 Evasion Up buff that should be dispelled by Phantom Time Mages to make them easier to hit.
Green orbs with a point-blank AoE field will be patrolling this section as well. Anyone who steps inside the AoE will be inflicted with a 60-second-long uncleansable ![]() silence, so players with spell actions should avoid these.
silence, so players with spell actions should avoid these.
| Enemy | Status Vulnerabilities |
|---|---|
| Light Sprite | Stun, Sleep, Slow, Stop, Paralyze, Blind, Doom |
| Tower Achamoth | Slow, Blind, Doom |
| Tower Bandersnatch | Stun, Sleep, Slow, Stop, Paralyze, Blind, Doom |
| Tower Dhruva | Stun, Sleep, Slow, Stop, Paralyze, Blind, Doom |
| Tower Drip | Stun, Sleep, Slow, Stop, Paralyze, Blind, Doom |
| Tower Manticore | Slow, Blind, Doom |
| Tower Scarab | Slow, Blind, Doom |
| Tower Weapon | Stun, Sleep, Slow, Stop, Paralyze, Blind, Doom |
 Dead Stars: Nereid, Triton and Phobos
This fight consists of three bosses. The arena is divided into six wedges by lines extending from the center to the edge, with an inner and outer ring, a six-pointed star pattern, and blue regions outside of the star. (There is a third ring well beyond the star as well, but it becomes a death wall soon after the battle begins.)
All bosses are vulnerable to taking extra damage from Holy Cannon. In many groups, some or all bosses will be reduced to 0.1% HP long before the encounter ends; the encounter cannot be completed until the Enrage Phase begins, at the earliest.
Due to the inability to skip major mechanics and the random personal responsibility, players must be prepared to react correctly if they are targeted with certain mechanics, as failing to do so will wipe the raid.
Opening
- For approximately three GCDs (about 8 seconds), all three bosses will be movable by the tanks; they should bring them together to allow the use of powerful cleaving abilities and debuffs, especially
 Silver Sickness. After this time, each enemy will jump to a fixed position on the outer ring: Phobos in the southwest, Triton in the north, and Nereid in the southeast.
 - Decisive Battle: Each boss emits a very large telegraphed point-blank circular AoE; being hit by multiple is fatal. Each player is assigned a debuff that restricts them to attacking only one of the three bosses, indicated briefly by a tether connecting them to that boss (
 Phobosic Gravity,
  Nereidic Gravity, or
  Tritonic Gravity). Although players are typically assigned the debuff corresponding to the boss they were hit by, uneven party sizes may cause some players to receive a different ("mismatched") debuff; these players must quickly move to their assigned boss.
- If the main tank is assigned a mismatched debuff, they should wait to move to their assigned boss until after Slice 'n' Dice; another tank will need to serve as that boss's main tank for the remainder of the encounter.
- At this time, the third ring of the arena becomes a death wall.
- Slice 'n' Dice: Telegraphed conal tankbusters on each boss's top enmity player.
Slime Phase
- Three-body Problem 1: Each boss jumps to the inner ring of the arena, and they appear to channel a shared attack; however, Nereid and Triton will be turned into balls of blue and red slime (with small telegraphed point-blank circular AoEs (Noisome Nuisance), which can be avoided at max melee distance) as Phobos jumps to the center of the arena. At this time, the Gravity debuffs are temporarily cleansed, allowing all players to attack Phobos.
- Primordial Chaos: Magical raidwide and assigns all players 1-3 stacks of
 Ice Ooze or
  Nova Ooze. Similar to the "hot and cold" mechanics of Trinity Avowed in Delubrum Reginae, being hit with mechanics of the opposite "temperature" will reduce and eventually cleanse the debuff.
 - Frozen Fallout: Each ball of slime will telegraph a total of four jumps, each time landing on an intercardinal of the arena and emitting a large point-blank circular AoE from the point where it lands. Shortly after all jumps have been telegraphed, the slimes will begin jumping; being hit by both slimes at once is fatal.
- Each hit from the blue slime (Liquified Nereid) removes one stack of Nova Ooze if a player has any, or adds one stack of Ice Ooze if a player does not. Each hit from the red slime (Liquified Triton) removes one stack of Ice Ooze if a player has any, or adds one stack of Nova Ooze if a player does not.
- Be aware that, because the debuffs are random per player, a raid leader can only call out the safe spot for the final jump (as no player that has correctly resolved the mechanic should need to be hit by the fourth jump).
- Each slime will only jump to each intercardinal once. The final jump always leaves an entire half of the arena safe.
- Noxious Nova: Magical raidwide; fatal for any players with any remaining stacks of Ice Ooze or Nova Ooze, piercing invulnerability skills. Nereid and Triton are returned to their original forms, becoming targetable shortly after.
- If a player dies to Noxious Nova, they should not accept a raise until after Vengeful Fire III & Vengeful Blizzard III. If they immediately accept a raise, it's unlikely that they will be able to avoid the conal AoEs; even if they take no damage due to having
 Transcendent, they will still be inflicted with two Thrice-come Ruin stacks.
- If a player dies to Noxious Nova, they should not accept a raise until after Vengeful Fire III & Vengeful Blizzard III. If they immediately accept a raise, it's unlikely that they will be able to avoid the conal AoEs; even if they take no damage due to having
- Vengeful Fire III & Vengeful Blizzard III: Nereid and Triton jump to random "inner corners" of the six-pointed star pattern, always leaving one corner between them; each shoots a massive late-telegraphed conal AoE at Phobos. They can be avoided by moving to the blue region between the two bosses; while the AoEs are survivable, each inflicts a Thrice-come Ruin stack. Phobos appears temporarily dazed.
- After Phobos returns to normal, the Gravity debuffs are restored, the bosses equalize their HP, and each boss jumps to its Decisive Battle position after a few seconds.
- Delta Attack: Three-hit raidwide dealing massive damage. Players with a mismatched debuff should join the rest of their party to receive mitigation and healing for this attack, then quickly return to their assigned boss.
- Firestrike: Each boss targets a random player with their Gravity debuff with a line stack.
Snowball Phase
- Three-body Problem 2: Each boss jumps to the inner ring of the arena, and they appear to channel a shared attack; however, this time Phobos and Triton will be turned into snowballs (with small telegraphed point-blank circular AoEs (Icebound Buffoon), which can be avoided at max melee distance) as Nereid jumps to the center of the arena. At this time, the Gravity debuffs are temporarily cleansed, allowing all players to attack Nereid.
- Frozen Triton and Frozen Phobos each begin with 4 stacks of
 Icebound Buffoonery, which make them invulnerable until the end of the phase; until this time, all damage should be focused on Nereid.
 - Snowball Flight: Each snowball telegraphs a series of three line stacks on the ground, indicating the path in which it will roll across the ground. Each party is responsible for soaking one of these line stacks.
- In general, the letters parties are responsible for the northern snowball (Frozen Triton), and the numbers parties are responsible for the southwestern snowball (Frozen Phobos). Parties A/1 soak the first lines, B/2 the second, and C/3 the third.
- Each stack (Snow Boulder) is a "wild charge," meaning that the tanks should stand closest to the snowball; additionally, each stack has a small knockback.
- If at least four players are in a line stack, one of the snowball's stacks of Icebound Buffoonery is removed; this must occur with every stack for the mechanic to be successfully resolved.
- Being hit by a charge will inflict a temporary
 Physical Vulnerability Up, so players cannot soak more than one stack without an invulnerability cooldown, or they will die.
- Chilling Collision: One random player is tethered to each snowball with a distance tether and a stack marker, and Nereid telegraphs a massive knockback from the center of the arena. Tethered players must be knocked back to the very edge of the arena opposite their snowball, and the rest of the raid must split up to soak the stack markers.
- If a player is assigned a tether, they will not necessarily be tethered to the snowball that they soaked a stack from.
- These stacks (Avalaunch) deal proximity damage, meaning that standing even slightly into the arena will likely cause the stack to be fatal; players should be as close to the edge as possible.
- If at least four players are in a stack, one of the snowball's stacks of Icebound Buffoonery is removed. If all stacks have been successfully resolved, both snowballs will have no remaining stacks, and they can be damaged.
- Self-destruct & To the Winds: DPS check. Each snowball must be defeated, breaking Phobos and Triton out, before the casts finish and wipe the raid. The attacks are harmless if the DPS check is met.
- If either snowball has any remaining stacks of Icebound Buffoonery, the mechanic cannot be successfully resolved and a wipe is guaranteed. A "chemist cheese" may be prepared at this point to allow another attempt.
- Vengeful Fire III & Vengeful Bio III
- After Nereid returns to normal, the Gravity debuffs are restored, the bosses equalize their HP, and each boss jumps to its Decisive Battle position after a few seconds.
- Delta Attack
- Slice 'n' Strike: Each boss targets its top enmity player with a telegraphed conal tankbuster, and a random player with their Gravity debuff with a line stack. In general, the tankbuster target moves to the left of the boss while all other players move to the right (based on looking toward the center of the arena).
Fireball Phase
- Three-body Problem 3: Each boss jumps to the inner ring of the arena, and they appear to channel a shared attack; however, for this final use, Phobos and Nereid will be turned into fireballs (with small telegraphed point-blank circular AoEs (Blazing Belligerent), which can be avoided at max melee distance) as Triton jumps to the center of the arena. At this time, the Gravity debuffs are cleansed (and will not return), allowing all players to attack Triton.
- At opposite sides of the arena, two sets of small "footprint" arrow markers appear on the lines dividing the arena, along the outer ring, and move clockwise or counterclockwise by one "wedge" of the arena. When these markers reach their destination, they become tankbuster towers.
- In general, letters parties are responsible for the tower/fireball (Gaseous Phobos) that spawns in the northern half of the arena, and numbers parties are responsible for the tower/fireball (Gaseous Nereid) that spawns in the southern half of the arena.
- Elemental Impact x3: Three times in quick succession, a fireball will slam into each tower, dealing massive damage to the tank inside and firing a conal AoE (Fire Spread) at a random nearby healer and DPS. Starting from the first Elemental Impact, the fireballs become targetable.
- In general, a tank will take the first hit of Elemental Impact with mitigation cooldowns, then the other two with their invulnerability ability (or Pledge/an ally's Invulnerability).
- In North American groups, DPS are generally positioned between the wall and the tower, and healers are generally positioned on either side of the tower. Tanks that are not soaking the tower can be positioned anywhere.
- In Japanese groups, both DPS and healers are generally positioned between the wall and the tower, with DPS to the left and healers to the right (based on looking toward the center of the arena).
- Geothermal Rupture x3 & Flame Thrower: A series of three circular AoEs are telegraphed at each player's position (Geothermal Rupture), along with a line stack (Flame Thrower) targeting a random player on each side of the arena.
- In general, players collapse onto the DPS, move clockwise around the tower to bait Geothermal Rupture, remain loosely stacked for Flame Thrower, then return to their original positions around the tower.
- If the player targeted by Flame Thrower dies before the attack goes off, a random player will be targeted instead; if this causes both stacks to hit the same side of the arena, a wipe is likely due to the attack inflicting
 Magic Vulnerability Up.
- Elemental Impact x3: As above. Assuming they have not used either ability on any other mechanics, a
 Phantom Knight tank can soak both towers due to having two invulnerability abilities, both from their job and from Pledge, but other tanks should be prepared to step into the tower in case the tank dies. If one side has defeated their fireball before the other, they should refrain from getting too close to the other fireball to avoid baiting Fire Spread.
 - Self-destruct & To the Winds: DPS check. Each fireball must be defeated, returning Phobos and Nereid to normal, before the casts finish and wipe the raid. The attacks are harmless if the DPS check is met.
- To the Winds will not be cast if both fireballs are already defeated before its casting begins.
- Vengeful Blizzard III & Vengeful Bio III
- After Triton returns to normal, the bosses equalize their HP, and each boss jumps to its Decisive Battle position after a few seconds. The Gravity debuffs are not restored.
Enrage Phase
- Six-Handed Fistfight: After a long cast, the bosses jump to the center of the arena and begin clashing. They merge into a single boss (Dead Stars), combining their HP and making the entire inner ring unsafe; standing inside the ring deals damage (Bodied), knocks players out of the ring, and inflicts a Thrice-come Ruin stack. The merge is accompanied with a heavy-hitting raidwide.
- This is the earliest point at which the encounter can be completed. If all three bosses' HP are depleted before merging, the bosses will immediately un-merge after using Six-Handed Fistfight, completing the encounter.
- Only the debuffs inflicted on Triton are preserved when merging.
- Collateral Damage
- Telegraphed conal AoEs telegraphed on alternating wedges of the arena (Collateral Gas Jet, Collateral Cold Jet, Collateral Heat Jet), then the other half of the wedges.
- Small untelegraphed circular AoEs on each player (Collateral Bioball, Collateral Iceball, Collateral Fireball), randomly targeting a third of the players at a time and very briefly inflicting Magic Vulnerability Up.
- Each party should spread within one wedge of the arena; each wedge is large enough to comfortably contain eight players without overlapping their AoEs.
- Collateral Damage
- Fusion Burst (enrage)
Pronged Passages ("Bridges")
This encounter can be thought of as a number of small add pulls, most of which also contain one or more traps. There are two strategies for addressing these traps: either revealing them with Trap Detection and having players navigate around them (possibly detonating some normal traps using Occult Falcon), or "pre-popping" all traps by using Occult Falcon in the section ahead of the party. While both strategies are viable, it is extremely important for all players to be aware of the intended strategy, as any players not aware can kill themselves with a normal trap or even wipe the raid with an unstable (super) trap.
As time passes in this encounter, fire will begin to engulf the map, eventually covering the entire map as a "soft enrage;" however, the damage dealt by the fire is not lethal (roughly 40,000 damage every ![]() Burns tick), so players should be careful not to run ahead of the group to avoid it and possibly cause greater issues, such as walking into a trap. Players with
Burns tick), so players should be careful not to run ahead of the group to avoid it and possibly cause greater issues, such as walking into a trap. Players with ![]() Battle Bell can even use this damage to accumulate
Battle Bell can even use this damage to accumulate ![]() Battle's Clangor stacks, at the risk of annoying their healers.
Battle's Clangor stacks, at the risk of annoying their healers.
Both sides of the bridge should have an equal number of players, three parties to each side. Typically, letter parties (A-C) will go left and number parties (D-F) will go right. Each side must have at least one ![]() Phantom Bard and
Phantom Bard and ![]() Phantom Geomancer, and ideally one
Phantom Geomancer, and ideally one ![]() Phantom Time Mage. Unless stated otherwise, all sections should be considered to occur identically on both sides of the bridge.
Phantom Time Mage. Unless stated otherwise, all sections should be considered to occur identically on both sides of the bridge.
In sections 1, 2, and 4, Arcane Spear attacks will occur. The bridges will be lit up in four columns, and shortly after line stacks will go off in each column. These are "wild charges," meaning that a tank should be at the front of the column (and all players should be in a single column). The player at the front of each column is inflicted with ![]() Piercing Resistance Down, meaning they cannot be at the front of the column again until the debuff expires - so a different tank must be at the front for the next Arcane Spear. Note that because these stacks deal physical damage,
Piercing Resistance Down, meaning they cannot be at the front of the column again until the debuff expires - so a different tank must be at the front for the next Arcane Spear. Note that because these stacks deal physical damage, ![]() Phantom Samurai can help their tanks by moving to the front and using Shirahadori.
Phantom Samurai can help their tanks by moving to the front and using Shirahadori.
Section 1: Bhoots and Bogys
- The Tower Bhoot will occasionally cast Paralyze III, which must be interrupted.
- The two Tower Bogys have no noteworthy mechanics.
- An Aetherial Ward blocks progression to the next section, though it otherwise has no noteworthy mechanics. Once the Aetherial Ward has been attacked, Arcane Spear attacks will begin in this section. It is usually preferred for both sides to progress to the next section at the same time.
- Players should be careful to avoid aggroing the Tower Abyss enemies beyond the barrier with AoE attacks, as it can result in a wipe if they are aggroed early.
Section 2: Abysses
- The only enemy in this section is a Tower Abyss. It will quickly cast Dense Darkness, granting it
 Magic Damage Up. This must be dispelled with Occult Dispel before its next cast. (Note that while it is ideal for both sides to have a Phantom Time Mage, the range of Occult Dispel is large enough that a single player can dispel both Abysses - but this is not recommended.)
 - Diffuse Darkness is a massive AoE, dealing lethal damage to all players on its side (and some on the other side) if Magic Damage Up has not been dispelled.
- In front of the Aetherial Ward, there is a single normal trap, positioned randomly at the left, middle, or center of the bridge.
- Once again, an Aetherial Ward blocks progression to the next section. Once the Aetherial Ward has been attacked, Arcane Spear attacks will begin in this section. It is usually preferred for both sides to progress to the next section at the same time.
Section 3: Idols, Bhoots, Bogys, and Suspension
- Shortly after walking into this section, six Tower Idols will spawn, beginning to cast Ancient Aero III soon after. Once all six idols begin to cast (and not before!), a
 Phantom Bard must use Romeo's Ballad to stop all of them; after this, they will only perform autoattacks. Stopping any of them before they begin to cast will cause them to perform the cast after being unfrozen, so players must avoid stopping them too early.
 - Just ahead of the Idols are two normal traps; one is always in the middle of the bridge, and the other is randomly on the left or right. (Note that using Occult Falcon in the middle will always detonate both traps.)
- The
 Phantom Geomancer on the right side, once they know that they may safely progress past the traps, must use Suspend to walk into the electrified ground and interact with the Trap Control Plinth to fill in the missing ground for the left side. (Tank invulnerability abilities cannot be used to activate the plinth, as its interaction time is longer than 10 seconds and even a single tick of
  Electrocution damage is lethal.)
 - After the missing ground on the left side (and at the same position on the right) are another two Tower Bogys and a Tower Bhoot. Their mechanics are identical as above. At roughly the same position, there is an unstable trap in the middle of the bridge and a normal trap randomly on the left or right. Players seeking to pre-pop these traps can do so by aiming at the Bhoot, but should be aware that the enemies will aggro onto them.
- Past these traps, the Phantom Geomancer on the left side must use Suspend as above to fill in the missing ground for the right side.
Section 4: Progenitor and Progenitrix
- Ahead of the minibosses of this encounter, the bridge splits in half. At random, one path has a normal trap and the other has an unstable trap. Groups using Trap Detection will locate the side with a normal trap, then use Occult Falcon or a tank invulnerability to remove it; groups pre-popping traps will detonate both with Occult Falcon to minimize the risk of additional deaths.
- Additionally, about halfway through the final section of the bridge, there is an unstable trap, positioned randomly at the left, middle, or center of the bridge. Groups using Trap Detection will locate the trap, then carefully avoid it for the rest of the encounter; groups pre-popping traps will often engage the minibosses using Occult Falcon to also detonate the trap. (If a pre-popping group has low DPS, the fire may be encroaching on them at this point; it is especially important not to recklessly move out of the fire here, as they may instead walk into range of the unstable trap.)
- The left side has the orange Tower Progenitrix, and the right side has the blue Tower Progenitor - both are, color aside, identical enemies. Once a boss has been engaged, Arcane Spear attacks will begin in this section.
- Close Call/Far Cry to Detonate: Both bosses gain
 Short Fuse and a blue tether with arrows pointing outward (Close Call to Detonate) or
  Long Fuse and a green tether with arrows pointing inward (Far Cry to Detonate). For the duration of the buff, while the tether is visible (i.e. the bosses are too close together with a blue tether, or too far apart with a green tether), they will pulse for huge raidwide damage inflicting
  Vulnerability Up. The variation of this attack used is determined by the positions of the bosses when the cast begins - if they are already close together, they will use Close Call to Detonate, and vice versa.
 - Bombshell Drop: Each boss spawns two Lava Bombs tethered to itself. The Lava Bombs will slowly move toward their tethered boss, causing a Massive Explosion raidwide which inflicts Vulnerability Up if they reach their boss. These adds must be killed, as they will eventually move to their boss in a split-second if left alive for too long. Typically, the bosses will begin south, be pulled north during the first Bombshell Drop, then back south during the second, and so on.
- Punishing Pounce: High damage stacks targeting a random player on each side.
- Massive Explosion: When one of the bosses is defeated, the other must be defeated within 12 seconds or the raid is wiped.
Encounter timeline:
- Close Call/Far Cry to Detonate
- Bombshell Drop
- Close Call/Far Cry to Detonate
- Punishing Pounce
- Bombshell Drop
- Close Call/Far Cry to Detonate
- (???)
- Massive Explosion
After completing this encounter, no reward is provided. What gives?
The arena is an extremely large circle with no important markings; the outer ring becomes a death wall once the encounter begins. Before the fight, six tanks (one per party) should be identified as main tanks.
Throughout the fight, the boss will spawn water mechanics and ice mechanics. Water mechanics can be considered "inactive," and standing in them has no effect or harm. Ice mechanics are considered "active," and thus must be avoided or resolved as appropriate. When ice mechanics make contact with water mechanics, the water mechanics freeze (damaging anyone standing in them) and become ice mechanics, which then resolve.
For mechanics that require each party to address a tower or add, typical waymarks for this fight place party A northwest, party B north, party C northeast, party 1/D southeast, party 2/E south, and party 3/F southwest.
Opening
- Imitation Star: Hard-hitting raidwide with an accompanying
 Bleed.
 - Draconiform Motion: The boss turns to face a random player, followed by late-telegraphed 90-degree cones from its front and back. Typically, groups will stack at the boss's south (with tanks north) to bait these cones north and south. Players not confident with remembering when the boss uses Draconiform Motion should be cautious when executing side positionals, or simply avoid them by using True North, to avoid baiting the cones improperly. Anyone hit by these cleaves will be knocked into the death wall and killed.
Imitation Rain 1
- Imitation Rain: Moderate raidwide with no castbar; spawns eight water circles in two horizontal lines of four. In each line, one circle has spikes in a plus shape, and the other three do not. Water circles with spikes will explode in a plus-shaped AoE when frozen, and circles without spikes will explode in a circular AoE when frozen.
- Imitation Icicle: Spawns two ice circles, one overlapping with each of the lines of water circles.
- Draconiform Motion: Must be baited properly (north/south) to keep the sides safe for this mechanic.
- Shortly after Draconiform Motion, the ice circles explode, setting off a chain reaction with the water circles.
- To dodge the chain reaction, locate the spiked water circle in the southern line during Imitation Rain, or the ice circle closer to the wall during Imitation Icicle. This will determine the side to dodge towards - but do not dodge yet! (Either method will locate the safe side.)
- Once the cast bar for Draconiform Motion appears, dodge toward the side identified as safe, opposite from the ice circle. For example, if the ice circle closer to the wall is on the east, and it overlaps with the southern line of water circles, dodge to the east and slightly north of center.
- The water circle overlapped by the ice circle will freeze, then explode; as soon as it does, run ( Sprint is recommended) into where its AoE was to avoid the rest. Be careful not to run in line with the other circles, as you will be hit by the plus-shaped AoE that comes later if you do.
- Dread Deluge: Heavy-hitting tankbusters (non AoE) on the six highest enmity players; should be taken with mitigation regardless of whether invulnerability abilities are used, as there is a very strong accompanying
 Dropsy lasting longer than 10 seconds.
Imitation Rain 2
- Imitation Rain: Moderate raidwide with no castbar; spawns seven water circles. One circle is in the center, which always has spikes; the rest are in two arcs of three circles across the north and south, with one circle in each arc having spikes.
- Frigid Twister: Spawns two ice twisters, one east and one west.
- Draconiform Motion
- Shortly before the cones from Draconiform Motion, the ice twisters begin rotating clockwise or counterclockwise (both move in the same direction, but which direction is random), setting off a chain reaction with the water circles.
- To dodge the chain reaction, first listen for the side the raid leader is having the group dodge toward - but do not dodge yet! This mechanic has 180-degree rotational symmetry, so this decision is arbitrary and the mechanic can be resolved on either side - but the group should stay together so that everyone can continue hitting the boss during the mechanic.
- Once the cast bar for Draconiform Motion appears, dodge toward the side identified by the raid leader, and take note of the direction the twister rotates, as well as the type of water circle it is moving into.
- If it is moving toward a spiked circle first, dodge the plus-shaped AoE at the far cardinal (or dead center), then dodge the remaining AoEs at the inter-intercardinal by the initial spiked circle.
- If it is moving toward a non-spiked circle first, dodge the two circular AoEs near the opposite spiked circle, then dodge the plus-shaped AoE at the far cardinal.
- Dread Deluge
Adds Phase
- Withering Eternity: Raidwide; boss becomes untargetable, leaves the arena, and spawns six Ice Golems: one at each of northwest, north, northeast, southwest, south, and southeast. Each party should pick up the Golem at its assigned position. The Golems gain a powerful
 Vulnerability Down when near each other, so they should be tanked at their original locations as much as possible.
 - Imitation Rain: Moderate raidwide with no castbar; spawns seven water circles. One circle is in the center, which always has spikes, but can be rotated into an X shape instead of a plus shape; the other six are in two arcs of three centered on random opposing cardinals or intercardinals, and will become four-player towers when frozen. The spikes of the center circle will always be pointed at the four towers not central to the arcs.
- Frigid Dive: The boss telegraphs a dive through the two central towers and the center spiked circle. This dive is a thick line AoE that will freeze those towers and center circle, activating them; players should stand near but not in line with the dive, then move in to take the tower.
- The center circle's plus/X AoE will then activate, freezing the remaining four towers; players who didn't soak the first two towers should stand near but not in line with the others, then move in to take them. (Players who did soak the first towers can and should also soak the second set of towers; no Vulnerability Up debuff is inflicted.)
- With a full raid of 48 players, assigning specific parties to specific towers is not generally necessary, as each only requires 4 players and players can use body language to convey the second tower they will move toward. However, a common method of assigning towers has the letter parties take the north/east center tower, and the number parties take the south/west center tower, with parties A and 1/D rotating counterclockwise and parties C and 3/F rotating clockwise for the second set of towers.
- Each player absent from a tower will inflict raidwide damage and a stack of
 Sustained Damage.
- Imitation Rain: The towers will spawn in a different random position.
- Frigid Dive: The telegraphed dive will change based on the new tower positions.
- Any Ice Golems still alive at this point will cast Frozen Heart, granting a strong
 Damage Up. Tanks should use their invulnerability abilities to survive their auto attacks.
 - The boss will reappear at the center of the arena (with
 Invincibility) and begin extremely slowly casting Lifeless Legacy.
 - Soon after, six Ice Sprites will appear at the edge of the arena, in the same positions as the Golems. They are all tethered to the boss, and will slowly move towards it. Each party must kill its Sprite before it reaches the boss, or it will buff the damage of the upcoming Lifeless Legacy; even a single Sprite reaching the boss will make Lifeless Legacy essentially lethal. The Sprites are vulnerable to Romeo's Ballad, which is typically used when the Sprites are near the boss.
- The boss's Invincibility is dispelled as soon as all six Sprites have been defeated.
Imitation Rain 3
- Wicked Water: Twelve players receive a targeting marker. Soon after, the marker is removed and replaced with two debuffs:
 Wicked Water and
  Throttle. While some players prefer to "wiggle" out of the group to make it easier to see if they've been targeted, this is not necessary to resolve the mechanic in time.
 - Imitation Rain: Identical to Imitation Rain 1.
- Imitation Icicle: Identical to Imitation Rain 1.
- Draconiform Motion
- Shortly after Draconiform Motion, the ice circles explode, setting off a chain reaction with the water circles.
- To dodge the chain reaction, a procedure identical to that used in Imitation Rain 1 is used.
- However, the players with Wicked Water will not perform any further dodges after moving to the side. They will be intentionally hit by the final ice AoEs, freezing their water bubbles into Gelid Gaols. This converts their Wicked Water debuff to a new
 Gelid Gaol debuff. Any player with Wicked Water that does not get frozen will be unable to cleanse their Throttle debuff and die when it expires.
 - All non-frozen players should quickly defeat these Gaols to free their allies and cleanse their Throttle debuffs before they are killed.
- Imitation Star
Imitation Rain 4 and Enrage
- Imitation Rain: Moderate raidwide with no castbar; spawns ten water circles. Four are at the cardinals, with the east and west circles having spikes; the other six spawn near the middle in two horizontal lines of three, and are towers.
- Frigid Twister: Spawns two ice twisters, one northeast and one southwest.
- Draconiform Motion
- Shortly after Draconiform Motion, the ice twisters begin rotating clockwise or counterclockwise (both move in the same direction, but which direction is random), setting off a chain reaction with the water circles.
- To dodge the chain reaction and safely soak the towers, watch the ice twisters and move away from the circles they are moving into.
- Remain out of the towers until after the first circle AoEs. Once the towers are active, each party moves into the tower near its waymark/golem/sprite position.
- After the towers are soaked, dodge away from the second water circles; all players should remain together (or at opposite ends) for the upcoming Draconiform Motion. Be aware that the twisters will continue rotating for the upcoming second set of water circles.
- Imitation Rain: Moderate raidwide with no castbar; spawns ten water circles. Four are at the cardinals, with the north and south circles having spikes; the other six spawn near the middle in two vertical lines of three, and are towers.
- Draconiform Motion
- As the twisters are still rotating, they will soon begin a second chain reaction with the new water circles.
- To dodge the chain reaction and safely soak the towers, the same procedure is used again.
- Parties A, C, 1/D, and 3/F will be able to simply soak the towers near their waymarks. Parties B and 2/E will need to slightly adjust; typically, party B soaks the center-east tower and party 2/E soaks the center-west tower.
- Imitation Star
- Dread Deluge
- Lifeless Legacy (enrage)
The Binding Lock ("Lockwards")
Throughout the hallways containing the Binding Lock and those beyond it, there are twelve groups of trap spawn locations, across which are fourteen normal traps and four unstable traps. (Their specific locations are shown in the annotated map in the Maps section below.) Thus, as with the Bridges encounter, they can be addressed either by revealing them with Trap Detection and having players navigate around them (possibly detonating some normal traps using Occult Falcon), or "pre-popping" all traps by using Occult Falcon. Some groups will also pre-pop traps in the area with the Binding Lock and merely reveal those after it - but no matter what, all players must be aware of the intended strategy to avoid unnecessary deaths.
The hallways containing the Binding Lock consist of an initial add pull (one each of Guardian Petroglyph, Tower Hippocerf, Tower Skatene, and Tower Marolith; of these, note that the Petroglyph is immune to instant kill effects), followed by six side rooms, then an encounter at the Binding Lock itself. The adds in the side rooms are presented in the order that most groups pull them. All of these enemies can be slowed.
Southwest: Guardian Wraith
- Scream: Large, late-telegraphed point-blank AoE. Inflicts
 Terror, causing hit players to be unable to move.
 - Lingering Resentment: Small circular fatal AoE on a random player; will select a player with Terror if there are any. The debuff will not expire before the AoE goes off, so the targeted player must be Rescued or they will die.
- These attacks repeat.
West: Guardian Berserker
- At the same time as the Guardian Wraith is being pulled, one tank and all players with instant kill effects ( Phantom Samurai,
 Phantom Cannoneer,
  Phantom Oracle,
  Phantom Gladiator) will pull the Guardian Berserker.
 - The Guardian Berserker has an undispellable and extremely strong Vulnerability Down; it will take essentially no damage from normal attacks. It must be defeated by the instant kill effects of Iainuki, Phantom Fire, Phantom Doom, or Finisher.
- Raging Slice: Line AoE pointed at a random player in range that passes through walls. This is the Berserker's only attack.
Northwest: Guardian Golem
- The Guardian Golem is typically pulled by a single tank, with all other players waiting a fair distance away. (Parties with a Phantom Oracle can also join.)
- Toxic Minerals: After a short time, the Guardian Golem will emit a purple-black gas, and all nearby players will be inflicted with
 Toxic Minerals. After 20 seconds, it will convert into a cleansable
  Doom lasting 20 seconds. If only a single tank pulls the Golem, this is easily cleansed with Esuna. Phantom Oracles can use Recuperation's AoE cleansing effect to allow their party to join the fight early; they must use it while Toxic Minerals is in effect or the cleanse will not come in time. After this attack is used, all other players can join the fight.
 - Earthen Heart x2: Circular AoEs on random players.
- Boulder Clap: Conal AoE.
- Obliterate: Huge point-blank AoE; can and must be interrupted.
- These attacks repeat.
Northeast: Guardian Knight
- The Guardian Knight begins with a dispellable Invincibility.
- Buster Knuckles: Large point-blank AoE.
- Earthquake: Late-telegraphed donut AoE quickly following Buster Knuckles. The Knight's Invincibility buff is restored and must be dispelled again.
- Line of Fire x2: The Knight turns to face a random player, then fires an untelegraphed line AoE that passes through walls.
- These attacks repeat.
East: Guardian Bat x3
- At the same time as the Guardian Knight is being pulled, one tank, any magical ranged DPS with
 Limit Break available, and any
  Phantom Rangers will pull the Guardian Bats.
 - The Guardian Bats have extremely high evasion; they should be defeated by using magical ranged DPS LBs (which cannot miss) and/or Phantom Aim to guarantee all attacks land. (If necessary, Phantom Samurai's Zeninage also cannot miss.)
- Aero III: Untelegraphed point-blank AoE. This is the Bats' only attack.
Southeast: Guardian Weapon
- The Guardian Weapon begins with
 Armed to the Teeth and a sword floating above it.
 - A
 Phantom Thief must use Pilfer Weapon - not Steal! - to remove the buff and the sword floating above it.
 - If the buff has not been removed, every attack the Weapon performs will be a massive, lethal AoE (Keen Wind). It isn't impossible to defeat with tanks using their invulnerability skills, Phantom Samurai's Shirahadori, and (particularly daring) players using ranged attacks immediately after AoEs and quickly ducking back out, but this is extremely inadvisable, only to be used as a last resort. If the buff has been removed, it will instead alternate between these attacks:
- Whirl of Rage: Late-telegraphed point-blank AoE.
- Smite of Rage: Late-telegraphed line AoE.
Activating the Binding Lock
The Binding Lock has six cylinders, each of which has three levels divided by lines, with one around the top as well. One line on each cylinder will be glowing. In each of the six add rooms, there is a large red circle; when one/two/three players stand on the circle, the corresponding cylinder is lowered by one/two/three levels. In total, twelve players will need to stand on the six circles to lower the cylinders such that the glowing lines of all cylinders are flush with the ground. In general, a player will shout the combination for later reference, e.g. "123 312," with these numbers referring to NW W SW and NE E SE, in that order. Once successful, the system message "Occult cylinders active. Initiate the authentication process." will be displayed.
Authentication
There are two possible procedures for authentication: a short procedure and a long one. "Skipping lockwards" refers to the short procedure, which is faster but provides fewer rewards; the long procedure provides greater rewards and spawns an enemy outside of the Forked Tower.
- Authentication begins by interacting with the Authorization Device. This will begin a 60 second countdown, as well as begin to spawn adds.
- At a gradually increasing pace, waves of three Lockwards will begin to spawn. Each will cast Cunning Keywork, which must be interrupted or the Binding Lock will deactivate and must be reactivated. After doing so, they only have heavy-hitting auto attacks. Tanks should establish enmity and use mitigation.
- During the fourth wave, the 60 second countdown will complete. If using the short procedure, a player will interact with the Unlock Mechanism, and after a significant delay (which allows the fifth wave to spawn), the Lockwards will despawn and the lock will open, glowing red.
- If using the long procedure, the Unlock Mechanism will be ignored for now. Starting with the fifth wave, the spawn rate of add waves is significantly increased. In the eighth wave, a Master Lockward will spawn as the center add. It will also cast Cunning Keywork, but must not be interrupted. If it successfully completes its cast, the system message "The occult cylinders have been reordered." will be displayed. No more adds will spawn, and all adds can now be defeated. The Master Lockward will eventually use Bolting Hammer, a powerful raidwide, if kept alive for too long.
- If the Master Lockward's cast of Cunning Keywork is interrupted, another will spawn in the tenth wave (and so on). Adds will continue to spawn until the Unlock Mechanism is used or a cast of Cunning Keywork is completed.
- A new combination will now be shown on the Binding Lock's cylinders, which is input by twelve players, as before. The group will then follow the short procedure, interacting with the Unlock Mechanism as soon as possible. After a significant delay, the Lockwards will despawn and the lock will open, glowing blue.
Treasure Rooms and Sanguine Recluse
To the left and right of the staircase are two hallways; a ![]() Phantom Thief must reveal hidden passages using Trap Detection to access the treasure rooms (Top Secret Nooks 1 and 2). Additionally, a second hidden passage can be revealed in the left treasure room. If the long procedure for authenticating the Binding Lock was used, an additional treasure chest will be to the left of the entrance to the map room (Top Secret Nook 3).
Phantom Thief must reveal hidden passages using Trap Detection to access the treasure rooms (Top Secret Nooks 1 and 2). Additionally, a second hidden passage can be revealed in the left treasure room. If the long procedure for authenticating the Binding Lock was used, an additional treasure chest will be to the left of the entrance to the map room (Top Secret Nook 3).
If the short procedure was used, the plinth cannot be interacted with, the room will appear as a dark void, and will have no function. If the long procedure was used, the plinth can be interacted with, and the room will show a large glowing map of the South Horn. Interacting with the plinth will cause a glowing beacon to appear somewhere on the map; a Sanguine Recluse will spawn at that position. (Possible spawn locations and mechanics can be found on its page.) Its position must be shouted by players in the raid, allowing players outside to locate and defeat it.
Infamy of Blood: Magitaur
The arena consists of an extremely large circle. Three large squares (one to the northwest, one to the south, and one to the northeast) point outward from the center, separated by 30-degree wedges. Around the outside of the arena are nine colored circles, in a pink-yellow-blue (clockwise) pattern. Parties A and 1/D are placed in the northwest square, parties B and 2/E are placed in the south square, and parties C and 3/F are placed in the northeast square.
Several mechanics of the Magitaur target or assign debuffs based on where players are standing in the arena, and some others cause entire sections of the arena to become unsafe. (Each square is its own section, and the rest of the arena is a single section.) As a general rule, being outside of one of the three squares when not explicitly required to be is dangerous, both to yourself and to other players.
Many North American groups use a set of waymarks intended to simplify the resolution of a particular mechanic (Assassin's Dagger). An image of these waymarks ("BAP Daggers") is included in the Maps section below, but other sets of waymarks are used by some groups. Nevertheless, to simplify the explanation of this mechanic, references based on these waymarks will be made:
- Each large square is a 10x10 grid of small squares; this is not used in any mechanics, but will be used for precise placement of waymarks if third-party tools are not being used to place them. In each square:
- The "left waymark" is placed on the fifth small square from the top, in the second column from the left edge of the square.
- The "right waymark" is placed on the fifth small square from the top, in the column directly along the right edge of the square.
- The "center waymark" is placed two columns inward from the right waymark.
Opening and First Conduits
- Unsealed Aura: Hard-hitting raidwide.
- Unseal: Magitaur unseals one of two weapons: a yellow axe or a blue lance, gaining the
 Unsealed buff. Shortly after unsealing its weapon, Magitaur will begin launching tankbuster-strength auto-attacks on two players in each section of the arena.
- If its yellow axe was unsealed, these attacks will target the two nearest players in each section.
- If its blue lance was unsealed, these attacks will target the two furthest players in each section.
- Three sets of auto-attacks will be used.
- Despite their animations, these auto-attacks are not AoEs.
- Assassin's Dagger: Three line AoEs will be telegraphed, offset from each other by 120 degrees; they will all begin either between the squares (the "north/right" pattern) or cutting through the middle of the squares (the "south/left" pattern). Daggers will shoot out from the boss along these lines, repeat (return to the middle) after a two-second delay, then shoot out again, rotated ~50 degrees clockwise. The daggers will shoot out and return a total of six times each. Being hit by a dagger inflicts a stack of Thrice-come Ruin.
- If the "north/right" pattern is used, the first three shoot outs and returns can be dodged by standing at the "right waymark" as described above.
- If the "south/left" pattern is used, the first three shoot outs and returns can be dodged by standing at the "left waymark."
- In both cases, the remaining daggers can be dodged by standing at (or colinear with, relative to the boss) the "center waymark."
- Critical Axeblow/Lanceblow: Each of these is cast once at random during Assassin's Dagger. The safe regions for Critical Axeblow are far away from the boss and inside the squares; the safe regions for Critical Lanceblow are near the boss and between the squares.
- The first cast of Critical Axeblow/Lanceblow resolves between the fourth shoot out and fourth return of Assassin's Dagger; the second cast resolves after the final return.
- If Critical Lanceblow is cast first, half of each safe region will be hit with Assassin's Dagger. In this case, the safe side of the safe region will be the left side for the "south/left" pattern and the right side for the "north/right" pattern.
- Forked Fury: Tankbusters on the nearest and furthest players in each section.
- After a short delay, two sets of auto-attacks based on the Unseal weapon will be used.
- Aura Burst/Holy: Hard-hitting raidwide; lethal unless the adds that spawn at the beginning of the castbar are correctly resolved before the cast completes.
- Seven of the nine colored circles around the outside of the arena rise out of the ground. All three yellow circles rise to reveal an Axe Empowerment Conduit (which has a ring in the middle), all three blue circles rise to reveal a Lance Empowerment Conduit (which has a sphere in the middle), and a random pink circle rises to reveal a Universal Empowerment Conduit (which has both in the middle). These adds are frequently referred to as "cans."
- If Magitaur's yellow axe was unsealed, the cast will be Aura Burst and all Axe Empowerment Conduits must be defeated. If Magitaur's blue lance was unsealed, the cast will be Holy and all Lance Empowerment Conduits must be defeated. Each square defeats the Conduit closest to it. In both cases, the Universal Empowerment Conduit must also be defeated.
- When an Axe/Lance Empowerment Conduit is defeated, it targets the nearest two players with Arcane Recoil, a catastrophically strong attack. If a square has at least two Phantom Knight tanks, these are simple to resolve by having them stand inside the Conduit and either using Pledge on themselves, their tank invulnerability, or Phantom Guard. If a square has only one, the Phantom Knight should identify a "pledge buddy" before beginning the encounter. This player will serve as the second player baiting Arcane Recoil, and the Phantom Knight will use Pledge on them.
- Meanwhile, a Phantom Berserker will defeat the Universal Empowerment Conduit on their own; its HP is significantly lower than that of the other Conduits. While doing so, they must stand between the Conduit and the wall, and must use Rage before it is defeated. This is because the Conduit will use Arcane Reaction when defeated, an extremely weak line AoE aimed at the nearest player that inflicts Hysteria for 1 minute; Rage grants immunity to Hysteria. Players near the Universal Empowerment Conduit must be extremely careful with large AoE attacks, as an Arcane Reaction at an unexpected time can cause the Phantom Berserker, or possibly a larger group of players, to be hit and inflicted with Hysteria.
Sage's Staff
- Sage's Staff: Three Sage's Staves appear in an arc, each either between squares or roughly in the middle of one.
- Critical Axeblow/Lanceblow
- Shortly after Critical Axeblow/Lanceblow, each of the Sage's Staves fires a line stack AoE (Mana Expulsion) at the nearest player.
- Two methods of resolving this mechanic are commonly used.
- In one method, each square is responsible for the staves that appear either in or directly opposite from their square.
- In the other method, all players stack at a single point (frequently the center of the arena or the A square's left waymark); while some players will be hit by all three staves at once, their damage is greatly reduced by being spread across the entire raid. This is frequently referred to as either "A staff" or "Spiral staff."
- Sage's Staff: Three more staves appear, opposite to the positions of the first three.
- Critical Axeblow/Lanceblow: Whichever wasn't used earlier.
- Shortly after Critical Axeblow/Lanceblow, each of the Sage's Staves fires a line stack AoE at the nearest player.
- Unsealed Aura: Hard-hitting raidwide.
Rune Axe
- Unseal: Magitaur will always unseal its yellow axe.
- Three sets of auto-attacks will be used, always on the nearest two players in each section.
- Rune Axe: Assigns debuffs based on where players are standing in the arena. It is extremely important that all players are within their square, or additional debuffs will be assigned that will cause several extra deaths. This guide will only explain the mechanic being resolved properly, with no additional debuffs.
- One player in square A will receive
 Prey: Greater Axebit with a duration of 10 seconds.
 - One player in each square will receive
 Prey: Lesser Axebit with a duration of 13 seconds.
 - One player in square A will receive Prey: Greater Axebit with a duration of 21 seconds, and one player in each of squares B and C will receive Prey: Lesser Axebit with a duration of 21 seconds.
- Each of these debuffs indicates a spread AoE (Ruinous Rune) that will go off when the debuff expires. Any section of the arena that is overlapped by these AoEs will glow, and being in a glowing region (Axeglow) inflicts a stack of Thrice-come Ruin.
- One player in square A will receive
- First, the player with a 10-second Prey: Greater Axebit will run out to the very edge of the arena, behind the nearest pink circle. At the same time, each player with a 13-second Prey: Lesser Axebit should be prepared to move to the center of their squares.
- Critical Lanceblow: After the first Prey: Greater Axebit AoE has gone off, that player can rejoin their party as they move to dodge Critical Lanceblow. The players with a 13-second Prey: Lesser Axebit must wait in the center of their squares until their AoEs have gone off, or they will cause the entire raid to be hit with Axeglow.
- Carving Rune: Moderate damage to four random players without debuffs. Between the resolutions of the second and third sets of debuffs, Carving Rune is used four times, hitting different players each time.
- Finally, all players that have no debuff will move to square A. The player with a 21-second Prey: Greater Axebit will run out to the very edge of the arena, behind the nearest pink circle, and the players with a 21-second Prey: Lesser Axebit will move to the center of their squares.
- Forked Fury
- After a short delay, two sets of auto-attacks on the nearest two players in each section will be used.
- Aura Burst: A full repeat of the Conduits mechanic. In this use, the Axe Empowerment Conduits must always be defeated.
Holy Lance
- Assassin's Dagger (including two uses of Critical Axeblow/Lanceblow)
- Unseal: Magitaur will always unseal its blue lance.
- Three sets of auto-attacks will be used, always on the furthest two players in each section.
- Holy Lance: Assigns debuffs based on where players are standing in the arena. Once again, it is extremely important that all players are within their square, or additional debuffs will be assigned that will cause several extra deaths. This guide will only explain the mechanic being resolved properly, with no additional debuffs.
- Three players in each square will receive
 Prey: Lancepoint. In each square, one will have a duration of 17 seconds, one will have a duration of 25 seconds, and one will have a duration of 33 seconds. Each of these debuffs indicates a stack (Holy IV) that will go off when the debuff expires. Any section of the arena that is overlapped by these stacks will glow, and being in a glowing region (Lancelight) inflicts a stack of Thrice-come Ruin.
 - At the same time, twelve Luminous Lances will spawn in a circle, clockwise from north. Considering the north lance to be lance 1, lances 2-4 are inside square C, lances 6-8 are inside square B, lances 10-12 are inside square A, and lances 1, 5, and 9 are in the outer area.
- Three players in each square will receive
- Critical Lanceblow
- Four seconds after Critical Lanceblow resolves, the first Luminous Lance will use Lancelight, an AoE covering the entire section the lance is inside, which inflicts a stack of Thrice-come Ruin. Each subsequent lance (clockwise from north) uses Lancelight two seconds after the previous lance.
- When the lances inside a party's square are using Lancelight, that party must stand outside of their square, around its back. Each other party must remain at the center of their square. These positions are necessitated by Prey: Lancepoint. If a party leaving their square moves between the squares, their stack will overlap with another square; if a party staying within their square is too far forward, their stack will overlap with the outer area.
- Immediately after lance 1 uses Lancelight, square C parties must stand outside their square, and return immediately after lance 4.
- Immediately after lance 5, square B parties must stand outside their square, and return immediately after lance 8.
- Immediately after lance 9, square A parties must stand outside their square, and return immediately after lance 12.
- In total, each square will resolve two Prey: Lancepoint within their square, and one outside of it. Players with these debuffs must be careful to position themselves without overlapping other sections, but otherwise move with their party.
- When the lances inside a party's square are using Lancelight, that party must stand outside of their square, around its back. Each other party must remain at the center of their square. These positions are necessitated by
- Critical Axeblow: Used two seconds after the final lance uses Lancelight.
- Unsealed Aura
- Forked Fury
- After a short delay, two sets of auto-attacks on the furthest two players in each section will be used.
- Holy: A full repeat of the Conduits mechanic. In this use, the Lance Empowerment Conduits must always be defeated.
- Assassin's Dagger (including two uses of Critical Axeblow/Lanceblow)
- Unsealed Aura (enrage)
Note: Resurrection debuffs will not be removed after defeating Magitaur, so any player that dies with ![]() Resurrection Denied will not be able to open the personal spoils coffer(s) from this boss or activate the Survey Point in the final room. However, they will still be rewarded with achievement progress.
Resurrection Denied will not be able to open the personal spoils coffer(s) from this boss or activate the Survey Point in the final room. However, they will still be rewarded with achievement progress.
Phantom Chemist Resurrection Strategy
In the event of a full raid wipe, all players must normally leave the raid regardless of how many stacks of ![]() Resurrection Restricted they still have, because the return prompt will take them back to the South Horn base camp. To allow for more boss attempts, players have devised a chemist "cheese" strategy:
Resurrection Restricted they still have, because the return prompt will take them back to the South Horn base camp. To allow for more boss attempts, players have devised a chemist "cheese" strategy:
- If a boss pull is deemed unsalvageable (e.g. there are too many deaths or if a DPS check will not be met), a designated chemist will sacrifice themselves by running into the death wall or incapacitating themselves via mechanics. It is also common to do this preemptively as "insurance" before common failure points such as the snowballs/fire tower mechanics in boss 2 or the Rune Axe/Holy Lance mechanics in boss 4.
- Another chemist will revive the sacrifice chemist, but that player will not accept the resurrection prompt. The Raise buff will need to be refreshed periodically to prevent it from expiring. Ideally, the reviving chemist should revive the sacrifice chemist outside of aggro range of the boss.
- Once the call to wipe has been made by the raid leader, all players will attempt to die at the south of the arena or outside of aggro range of the boss.
- After the party wipes and the boss resets, the sacrifice chemist will accept the raise.
- The sacrifice chemist will then revive the other players, ideally starting with chemists first so they can also help revive. All chemists will commonly be marked for visual identification.
- Once everyone's Weakness debuff has fallen off, the party can pull the boss again.
An alternative chemist "cheese" strategy requires a chemist to resurrect outside the arena and not participate in the fight:
- The chemist pulls the boss alone and dies near the entrance
- A second chemist waits outside the arena
- The remainder of the alliance enters the arena and begins their countdown
- With 5s to pull, the second chemist resurrects the dead chemist outside the arena
- With 5s left on the raise timer, the dead chemist accepts the raise.
This results in the chemist resurrecting outside the arena, which has already completed its 'automatic pull in' at 45s after pull.
Both strategies are normally not feasible outside of boss encounters: e.g., a full raid wipe during the bridges encounter will end the run in the vast majority of cases.
Loot
- 800
 Enlightenment Silver Pieces
 - 1920
 Phantom EXP
 - 80 Allagan Tomestones of Mathematics
- 40 Allagan Tomestones of Mnemonics
This duty uses personal loot, so players will need to interact with and loot treasure coffers themselves. A full clear with all chests yields 30 Sanguinite.
Defeating Magitaur will respawn 2 bronze and 1 silver overworld treasure coffers in the South Horn map, assuming the number of coffers available is not already capped. There is a 10% chance that a second silver coffer will respawn.
| Name | Type | Item Level | Rarity | Quantity |
|---|---|---|---|---|
| Notes on the Demon Tablet |
Other | 1 | Basic | 1 |
| Sanguinite |
Other | 1 | Basic | 1 |
 Personal Spoils (Secret Nooks)
There are four chests (two per side) in the hallways after the first boss. Each side has one room behind a locked door that can be opened from the other side by a Phantom Thief after maneuvering through a trick room, and two secret rooms in the north. The post-trick room chest yields 2 Sanguinite. A chest will appear in one of the two secret rooms in the north per side, yielding 3 Sanguinite.
| Name | Type | Item Level | Rarity | Quantity |
|---|---|---|---|---|
| Sanguinite |
Other | 1 | Basic | 2 |
| Name | Type | Item Level | Rarity | Quantity |
|---|---|---|---|---|
| Sanguinite |
Other | 1 | Basic | 3 |
It is not possible to obtain all four chests in a single run: players may only obtain the two chests on their side.
| Name | Type | Item Level | Rarity | Quantity |
|---|---|---|---|---|
| Notes on the Dead Stars |
Other | 1 | Basic | 1 |
| Sanguinite |
Other | 1 | Basic | 2 |
| Name | Type | Item Level | Rarity | Quantity |
|---|---|---|---|---|
| Notes on the Marble Dragon |
Other | 1 | Basic | 1 |
| Sanguinite |
Other | 1 | Basic | 2 |
Personal Spoils (Top Secret Nook 1)
There are two chests in a secret room after the lockwards in the Towertop Passage, to the right.
| Name | Type | Item Level | Rarity | Quantity |
|---|---|---|---|---|
| Sanguinite |
Other | 1 | Basic | 2 |
| Name | Type | Item Level | Rarity | Quantity |
|---|---|---|---|---|
| Sanguinite |
Other | 1 | Basic | 2 |
Personal Spoils (Top Secret Nook 2)
A secret room in the Towertop Passage, to the left. The coffer is directly in the path.
| Name | Type | Item Level | Rarity | Quantity |
|---|---|---|---|---|
| Sanguinite |
Other | 1 | Basic | 1 |
Personal Spoils (Top Secret Nook 3)
A secret room connected to Top Secret Nook 2. The coffer is just outside the entrance to the observatory room that marks the location of the Sanguine Recluse once the lockward puzzle is solved. This coffer will only spawn if the puzzle is solved.
| Name | Type | Item Level | Rarity | Quantity |
|---|---|---|---|---|
| Sanguinite |
Other | 1 | Basic | 5 |
At least one personal spoils coffers will appear after defeating the final boss.
| Name | Type | Item Level | Rarity | Quantity |
|---|---|---|---|---|
| Notes on Magitaur |
Other | 1 | Basic | 1 |
| Magitaur Card | Triple Triad Card | N/A | 1 | |
| Sanguinite |
Other | 1 | Basic | 5 |
A second coffer will appear if the Sanguine Recluse was defeated by players outside, after the raid lights up the observatory.
| Name | Type | Item Level | Rarity | Quantity |
|---|---|---|---|---|
| Sanguinite |
Other | 1 | Basic | 5 |
Achievements
This duty is associated with the following achievements:
| Name | Points | Task | Reward | Patch |
|---|---|---|---|---|
| A Fork to Be Reckoned With I | 10 | Complete the Forked Tower: Blood for the first time. | Demon Haul Horn | 7.25 |
| A Fork to Be Reckoned With II | 10 | Complete the Forked Tower: Blood 10 times. | - | 7.25 |
| A Fork to Be Reckoned With III | 10 | Complete the Forked Tower: Blood 50 times. | - | 7.25 |
| A Fork to Be Reckoned With IV | 20 | Complete the Forked Tower: Blood 100 times. | 7.25 |
Lore
Indecipherable tomes are strewn across the floor and piled haphazardly among the fallen shelves. Closer inspection reveals countless magical glyphs, likely representing a wealth of arcane knowledge.
— Collapsed Bookshelves
The polished surface glimmers with myriad symbols, none of which obviously resemble Eorzean script. Although unfamiliar, the patterns you discern imply the glyphs form a written system of some kind. Was this encoding designed to conceal knowledge considered a threat to civilization?
— Occult Epitaph
As you peruse the tablet's inscription, a wave of nausea compels you to avert your gaze. No doubt the document is imbued with some magical contrivance, shielding it from eyes deemed unworthy of the knowledge within.
— Ancient Tablet
At the pinnacle of the Tower of Blood sits an ancient study filled with tomes, tablets, and manuscripts from the Fifth Astral Era. Unfortunately, the entire collection is written in a script bearing no obvious resemblance to any extant language, rendering the documents indecipherable. Perhaps the owner concocted the script as a means of concealing the knowledge contained therein─but what could necessitate such elaborate encoding?
— Occult Record: The Secluded Stacks
Dialogue
Dead Stars: Oink, oink! Prepare to die at the hands of we tricksy three!
Dead Stars: Oink, oink! Everyone gets a piece of the action!
Dead Stars: Oink, oink, oink! Tricksy trio unite!
Phobos: Just kidding, it's Phobos's time to shine! Oink!
Liquified Triton: Glub...glub...
Liquified Nereid: Blub...glub...
Phobos: Oink, oink, oink! You're in for some toxic trouble now!
System: Phobos's toxins seep into your body!
Phobos: Brace yourselves for a putrid poison blast!
Liquified Triton: Glub...blub...
Liquified Nereid: Glub!?
Phobos: You poisoned princes suited your slimy transformation!
Triton: Oink, oink...
Nereid: O-Oink...
Triton: Now I'm livid!
Nereid: Unforgivable...
Phobos: Gyaaagh!
Phobos: F-Forgive me friends! I promise I'll behave myself now...
Dead Stars: The tricksy trio units anew, and this time we're serious! Oink!
Nereid: Oinking fools! It's Nereid's turn to take center stage!
Frozen Triton: F-Freezing!
Frozen Phobos: I can't feel my toes!
Nereid: You're nothing more than a pair of frosty unfortunates!
Nereid: Sssnooowed uuunder!
Frozen Triton: S-So cold...
Frozen Phobos: F-Frozen solid...
Triton: Oink, oink...
Phobos: Oooink...
Nereid: With friends like you, there's snow end to the fun!
Triton: Now I'm livid!
Phobos: Payback time...
Nereid: Gyaaagh!
Nereid: I-I'm sorry! I'll play nice... I swear!
Dead Stars: Oink, oink! Behold the true power of our tenacious triumvirate!
Triton: Or rather, behold the true power of Triton—star of the show!
Gaseous Phobos: This is an outrage!
Gaseous Nereid: Hot, hot, hot!
Triton: Oink, oink! I'm a flaming menace, through and through!
Phobos: Oooink...
Nereid: O-oink...
Triton: Get ready for Triton's flammable extravaganza!
Gaseous Phobos: I can't take much more!
Gaseous Nereid: Overcooked...
Triton: A scorching festival of flame! You two made for excellent kindling!
Nereid: Unforgivable...
Phobos: Payback time...
Triton: Gyaaagh!
Triton: My flame grows dim! I give in!
Phobos: My poisons have all dried up!
Nereid: Oinksome wretches! I can't stand the sight of you!
Dead Stars: Oink, oink, oink!
Dead Stars: Oooiiink!
Dead Stars: It's oink-oink-over! We're outta here!
System: Occult cylinders active. Initiate the authentication process.
System: Authentication complete in 30 seconds...
System: Authentication complete in 20 seconds...
System: Authentication complete in 10 seconds...
System: Authentication complete in 5...
System: Authentication complete in 4...
System: Authentication complete in 3...
System: Authentication complete in 2...
System: Authentication complete in 1...
System: Authentication complete. Begin the unlock process.
System: The occult cylinders have been reordered.
System: The lock is unbound... The path ahead is clear.
Magitaur: All who threaten the tower's sanctity will be purged!
Magitaur: I call forth the might of the sanguine!
Magitaur: Unfettered power!
Magitaur: Vile infractors, prepare to meet your end!
Magitaur: Power courses through my veins!
Magitaur: The tower must be protected!
Magitaur: I shall not fall!
Magitaur: I commit my strength, my blood...my life!
Music
| Section | Theme |
|---|---|
| Main | Exdeath's Castle (Dawntrail) |
| Boss 1-3 | FINAL FANTASY V: Battle 1 (Dawntrail) |
| Final Boss | Omega Squared |
Gallery
Screenshots
-
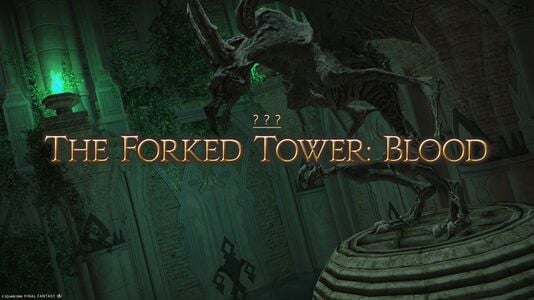
-
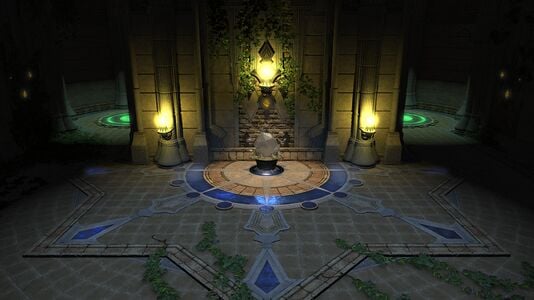
-
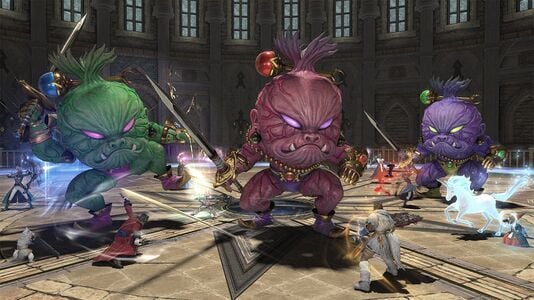
-
 Map Room
 -
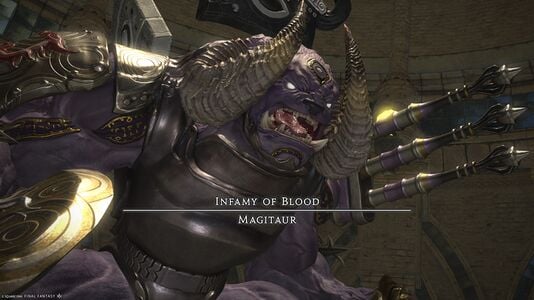
-
 Final Room


Maps
-
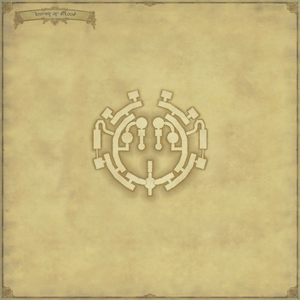 Central Passages
 -
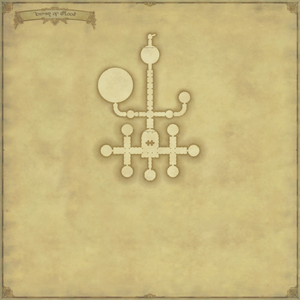 Binding Lock
 -
 Central Passages (annotated)
 -
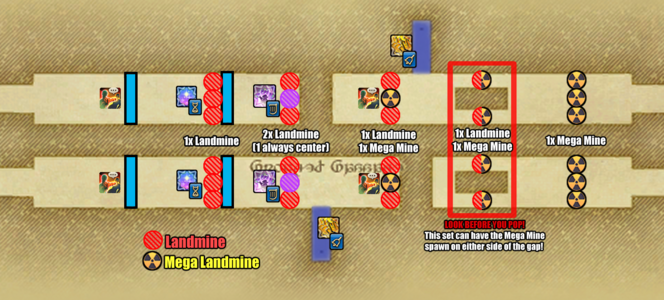 Bridges (annotated)
 -
 Binding Lock (annotated)
 -
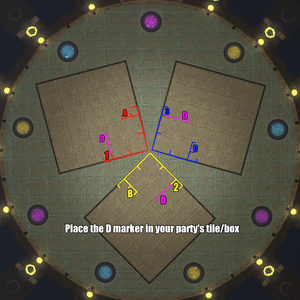 Common ("BAP Daggers") markers used for Magitaur


Trivia
- The dungeon is inspired by the Fork Tower dungeon from FFV.
- The world first clear was from "Aether Group 2" on May 30, 2025 at 4:22 PM PST, after a progression time of 3 days and 14 hours (including initial quest progression and leveling to prepare for the raid)[1].
History
- When originally released in patch 7.25, this raid was heavily criticized by the playerbase for being difficult to form groups and enter. Notable issues raised were:
- The inability of a 48-player alliance to reliably queue into the same South Horn instance. Players instead needed to queue as 6 separate parties, often ending up in different instances. Thus, parties would need to leave the instance and re-queue several times until all parties were in the same instance, a process that could take more than an hour. This became known as "island gacha" within the Japanese playerbase and "instance prog" within the Western playerbase.
- The long wait time until the auroral mirages weather appeared in a fresh instance.
- The short time availability of the weather (5 minutes), sometimes causing players in critical encounters to miss the window entirely.
- The possibility of random players to "snipe", i.e. take the spots of players in premade groups by offering more ciphers. This often resulted in frustration from premade groups especially if a member with a critical phantom job was unable to enter. In addition, the difficulty of the raid made it possible for individual players to wipe the entire run at several points, increasing the risk from random players joining.
- The lack of a story-difficulty mode compared to Bozja's in-instance raids. The hard mode version is the only difficulty, limiting its accessibility to more casual players or those who did not wish to organize using Discord servers to clear content.
- The apparent disconnect between the minimum number of players needed to spawn the tower (16) and the minimum number of players needed to resolve several mechanics (24).
- Square Enix addressed some of the more common criticisms in Letter from the Producer LIVE Part LXXXVII on June 20, 2025, which revealed that there had only been ~400 clears in the time that the raid was first released 23 days previously.
- The lack of a story mode, one of the main criticisms, was cited as due to having insufficient development resources in the allotted timeline.
- On July 1, 2025, Naoki Yoshida made a follow-up Lodestone post to clarify some of the changes that would be made, including:
- The ability to enter the Occult Crescent instance with a preformed alliance of up to 48 players
- Allowing auroral mirages to generate sooner after the Occult Crescent instance has loaded
- Improvements to the cipher offering UI
- Delaying auroral mirage generation until an active critical encounter has ended
- Enabling exclusive access to the Occult Crescent instance for a set time when joining with a preformed alliance of at least 24 players
- While these changes were originally scheduled for patch 7.3 in early August, the first two changes were instead implemented in an emergency hotfix on Thursday, July 3.
- The remaining changes, along with other adjustments such as requiring all participating players to submit at least one cipher and increasing the minimum number of participants from 16 to 24, were implemented in patch 7.3.
- In patch 7.4, cipher costs were lowered by 67%.
External Links
- Guides by Fae Fiyaa (Google Docs format)
- ABBA+ Strategies
- Magitaur Simulator
- Advanced Phantom Job guides for optimization purposes
References
| Locations | |||||||||||
|---|---|---|---|---|---|---|---|---|---|---|---|
| Activities | |||||||||||
| Phantom Jobs | |||||||||||
| Items |
| ||||||||||
| Currencies | |||||||||||
| Stormblood: The Forbidden Land, Eureka (Lv. 70) | |||||
|---|---|---|---|---|---|
| Shadowbringers: Save the Queen: Blades of Gunnhildr (Lv. 71-80) | |||||
| Dawntrail: Occult Crescent (Lv. 100) | |||||