Heaven-on-High
Heaven-on-High
- Level
- 61 (Sync: 70)
- Difficulty
- Normal
- Party size
- Flexible
1-4 man • 1-4
- Unsyncing
- Not Allowed
- Time limit
- 60 minutes
- Phoenix Down
- Available
- Duty Finder
- None (NPC entrance)
- Req. quest
- Knocking on Heaven's Door
- Entrance
- The Ruby Sea (X:21.4, Y:9.2)
- Patch
- 4.35
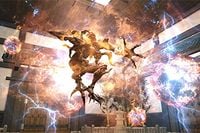
“Rising high above the Ruby Sea from the island of Onokoro, Heaven-on-High is said to be the stairway traversed by kami descending from their empyrean home. Following the discovery of a secret entrance, the Confederate leader Rasho asks you to investigate the tower and brave the hordes of vile fiends that lurk within.
— In-game description
Heaven-on-High is a level 61 deep dungeon introduced in patch 4.35 with Stormblood.
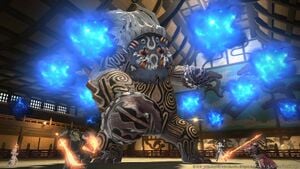
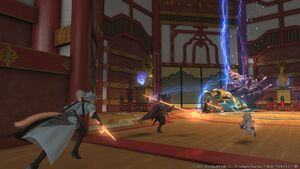
All players will begin at level 61, and only by fighting the enemies within will they be able to gain the strength and experience needed to explore its heights.
Players who choose to leave and return later can continue playing from where they last saved.
- Heaven-on-High save data is separate to data used for other Deep Dungeons. Two save data slots are available for Heaven-on-High.
Requirements
Complete the quest ![]() Knocking on Heaven's Door
Knocking on Heaven's Door
- Disciple of War or Magic level 61
- Starting NPC: Hamakaze
- NPC Location: The Ruby Sea
- Prerequisite: complete the quest
 Tide Goes in, Imperials Go Out and floor 50 of the
  Palace of the Dead.
Quests
| Quest | Type | Level | Quest Giver | Unlocks |
|---|---|---|---|---|
| Knocking on Heaven's Door | 61 | Hamakaze | ||
| On the Shoulders of Giants | 61 | Kyusei |
Entering Heaven-on-High
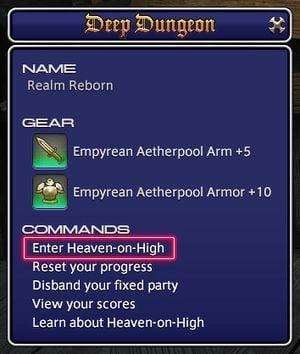
Players can enter Heaven-on-High by speaking with Kyusei in Crick in the Ruby Sea. When entering as a party, only the party leader can start the instance.
- As with the Palace of the Dead, it is possible to enter with a cross-world party.
Players who have cleared floor 30 of Heaven-on-High and the sidequest On the Shoulders of Giants will be given the option to start from floor 1 or floor 21 when creating a new save file. When starting from floor 21, players will be set to level 70 and their inventories will be cleared of pomanders.
Fixed Party
Players may enter with a group of up to four players, with no restrictions to classes, jobs, or roles.
Entering Heaven-on-High After speaking with Kyusei, select Enter Heaven-on-High, then choose an unused save slot. Next, select "Enter with a fixed party." All future forays into Heaven-on-High must be done with the party members and party composition chosen upon registering.
Party Composition When creating a fixed party, players are free to choose any combination of jobs and classes they desire.
Save Data Your character's level, empyrean aetherpool arm and armor strength, inventory, and floor progression will be recorded.
Resuming Play Players in a fixed party must have uniform save data. Moreover, this save data can only be used with the party members and party composition chosen when first entering Heaven-on-High.
Matched Party
Similar to the Duty Finder, players may choose to be randomly matched with other players on the same data center. Matched parties will always be comprised of four players. When registering with less than four players, any open party slots will be filled automatically.
Entering Heaven-on-High
After speaking with Kyusei, select Enter Heaven-on-High, then choose an unused save slot. Next, select "Enter with a matched party." All future forays into Heaven-on-High must be done with the class or job chosen when first registering.
Party Composition
Players in matched parties are free to choose any composition of jobs and classes they desire. It is not necessary to register with the same players each time. However, you must use the class or job you selected when first registering as a matched party.
Save Data Your character's level, empyrean aetherpool arm and armor strength, and floor progression data will be saved.
Resuming Play Players will be matched with party members who have the same floor progression saved. In order to be matched, players must enter with the same class or job that was equipped when progression was first saved. Furthermore, aetherpool weapons and gear strength must be above the requisite for the given floor. Players can join a party in progress by first checking the "Join Party in Progress" box in the Duty Finder menu, then speaking with Kyusei.
- Character level may be adjusted when joining a party in progress.
Recording Progress
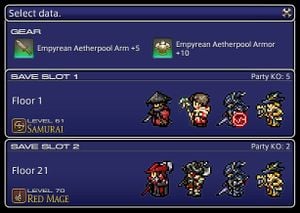
Boss enemies will appear every 10 floors. Upon defeating them, players will be able to record their progress, at which time they may choose to leave the deep dungeon. Please note that progress made in strengthening empyrean aetherpool arms and armor is saved independently and shared across all save data.
- Save data will not be updated in the event you log out or lose connection before defeating the boss and recording your progress.
Experience
To level a class to max level a common method is to run Heaven on High repeating floors 21-30. Since each run provides a set number of experience, this is used when players no longer have Main Scenario Quests to run and roulettes for the day have been completed or when training a new class (a max level Dark Knight levels their Dragoon).
Below is a chart of the experience a run of 21-30 will provide at each level in order to reach max level. This calculation does not include Heat of Battle II bonuses and any other experience bonuses. Rested Experience will also be ignored and does not change the experience awarded for completing the dungeon.
| Level | Base EXP Awarded |
EXP. Including Armoury bonus (+100%) |
EXP for next level |
Runs (without Armoury bonus) |
Runs (with Armoury bonus) |
|---|---|---|---|---|---|
| 61 | 252,500 | 505,000 | 1,456,000 | 5.77 | 2.88 |
| 62 | 255,000 | 510,000 | 1,534,000 | 6.02 | 3.01 |
| 63 | 257,500 | 515,000 | 1,621,000 | 6.30 | 3.15 |
| 64 | 260,000 | 520,000 | 1,720,000 | 6.62 | 3.31 |
| 65 | 262,500 | 525,000 | 1,834,000 | 6.99 | 3.49 |
| 66 | 265,000 | 530,000 | 1,968,000 | 7.43 | 3.71 |
| 67 | 267,500 | 535,000 | 2,126,000 | 7.95 | 3.97 |
| 68 | 270,000 | 540,000 | 2,137,000 | 7.91 | 3.96 |
| 69 | 272,500 | 545,000 | 2,550,000 | 9.36 | 4.68 |
| 70 | 272,500 | 545,000 | 2,923,000 | 10.73 | 5.36 |
| Level | Base EXP Awarded |
EXP. Including Armoury bonus (+50%) |
EXP for next level |
Runs (without Armoury bonus) |
Runs (with Armoury bonus) |
|---|---|---|---|---|---|
| 80 | ? | ? | ? | ? | ? |
Estimated runs required to reach level 70
| Without Armoury bonus |
With Armoury bonus |
|---|---|
| 63 | 32 |
Floor 31 and Beyond
While floors up to 30 are related to the story of Heaven-on-High, all floors after were created strictly as a challenge for players. For this reason, you cannot enter floors beyond 30 with a matched party. Furthermore, in addition to completing the sidequest ![]() On the Shoulders of Giants, players must meet the following requirements to challenge these floors:
On the Shoulders of Giants, players must meet the following requirements to challenge these floors:
- Start from floor 1 or floor 21 with a fixed party and clear up to floor 30.
- Party KO count must be zero.
Save data with one or more party KOs cannot be used on floor 31 or higher.
- Please be advised that the party KO count will also increase in the event your party abandons the duty or logs out while inside the instance.
Character Growth
Players will start Heaven-on-High at level 61 regardless of their current class or job level. By defeating monsters that appear in the dungeon, players will be able to gain EXP and level their characters up to 70. Your Heaven-on-High level is not directly related to your level outside of the dungeon.
Dungeon EXP
All enemies players encounter in Heaven-on-High will give a fixed amount of EXP regardless of the number of members in your party or the difference in level between you and the enemy. Rested experience and experience bonuses will also be ignored.
Actions
There will be no adjustments to or restrictions on any actions, additional actions, or statuses. However, players must first reach the required level in the dungeon to have access to them. Players will even have the opportunity to gain actions and statuses above their current level regardless of whether or not they have completed the necessary class or job quests.
- Please note that players who have entered the deep dungeon with a class will be restricted from using any job actions.
Empyrean Aetherpool Gear
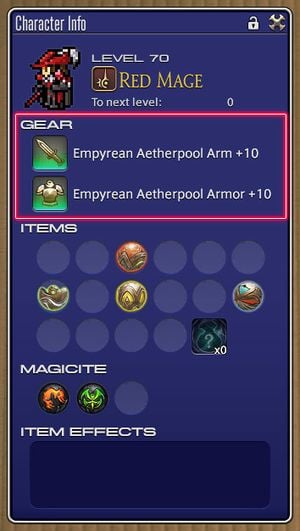
Players will be restricted to the use of an empyrean aetherpool arm and empyrean aetherpool armor when inside Heaven-on-High. In addition to gaining levels, players must enhance these items as they progress through the dungeon. Note that empyrean aetherpool armor will take the appearance of your current gear upon entering the instance.
- Normal gear has no effect on your character's attributes inside Heaven-on-High.
- Empyrean aetherpool gear progress in Heaven-on-High is tracked separately to that of aetherpool gear in other deep dungeons.
Strengthening Empyrean Aetherpool Gear
Empyrean aetherpool gear can be enhanced by accessing silver coffers. These coffers appear randomly on each floor and after defeating certain enemies. When enhancing gear, there is a chance of failure that varies depending on the current level of your gear and the floor where the silver coffer is found. Empyrean aetherpool gear can be enhanced to a maximum strength of +99. In the event the strength of your empyrean aetherpool gear exceeds the maximum allowed by your current level, its attributes will be synced.
Gear Durability and Spiritbonding
Empyrean aetherpool gear is not subject to durability loss, nor can it gain spiritbond when inside Heaven-on-High.
- This also applies to any gear equipped upon entering the instance.
Special Items
Pomanders
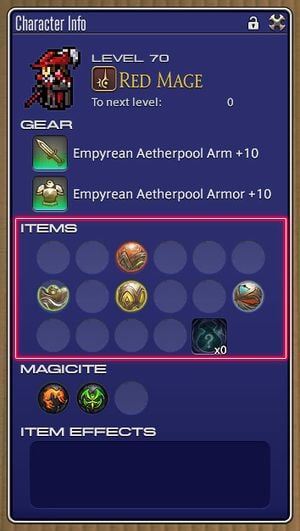
Gold coffers dropped by enemies or found in the dungeon may contain pomanders.
Players will, on occasion, obtain pomanders from treasure chests within Heaven-on-High. These items have various uses ranging from displaying the entire map of your current floor, to providing party members with beneficial effects. Up to three of each pomander can be held at any time. These items can be found in a shared inventory to be used by all party members.
- Normal items such as potions can still be used independently of this shared inventory.
Pomanders cannot be taken outside of Heaven-on-High. When in a matched party, they cannot be used after the completion of a set of floors. Pomanders that affect the map cannot be overwritten with the same item when their effect is already in play. Please note, however, that they will still be consumed upon use.
Some pomanders are exclusive to Heaven-on-High and are not found in the other deep dungeons. These are bolded in the table below.
| Pomander | Description | Notes |
|---|---|---|
| Removes all traps from the current floor. | This pomander doesn't remove coffer traps. Best used in Hall of Fallacies floors. | |
| Reveals the current floor's map and the location of all hidden traps. | While all hidden traps become visible, they can still be triggered. Useful for finding the exit quickly. | |
| Increases damage dealt and HP recovered via healing magic by 30%. | This effect lasts for 8 minutes. | |
| Decreases damage received by 40%. | This effect lasts for 8 minutes. If solo, this pomander is required to survive fighting some enemies in higher floors. | |
| Increases the number of treasure coffers on the next floor. | Number of coffers is increased by 50%, rounded down. Useful if low on important pomanders. | |
| Decreases the number of enemies on the next floor. | This also decreased the amount of kills needed to open the Beacon of Passage on the next floor. Both the number of enemies per room and number of kills required are halved (rounded up). Synergizes with Affluence (fewer enemies in the way of coffers) but anti-synergistic with Alteration (fewer enemies affected). | |
| Changes the enemy occupying a random room on the next floor into a mimic or a mandragora. | Mandragoras are passive mobs that die instantly after being aggroed. Both Mimics (i.e. Quivering Coffers) and Mandragoras have a higher chance to drop chests. | |
| Removes the Pox status. | This is for the Accursed Pox debuff applied by Quivering Coffers. | |
| Increases the chance enemies on the current floor will drop treasure coffers. | Useful for restoring pomander stocks and if planning to kill many enemies in the current floor (e.g. via magicite). | |
| Transforms all targets within range into a frog, imp, or chicken. | Polymorphs all enemies within a 20 yalm radius of the user into harmless creatures for 30 seconds, though they retain their normal HP and defense values and can still autoattack, the damage of these autoattacks depend on what the enemy turns into:
This effect generates a large amount of enmity for the user. | |
| Removes all enchantments from the current floor. | Use if current floor's enchantments cannot be handled and party does not have a Pomander of Petrification or magicite. Highly recommended to save one for floor 99, which always has 3 enchantments. | |
| Reveals the current floor's hidden treasure. | The effect of this pomander is carried over until an Accursed Hoard is found, therefore it's not required to reactivate it unless its effect is consumed. | |
| Instantly raises the first party member to be KOed. | Cannot spawn on floors 81+. Useful if player is about to die during a solo run. | |
| Weakens all enemies on the current floor for 3 minutes. | Stacks with Pomander of Strength/Steel. Also works on bosses. | |
| Renders party invisible to enemies and traps. | Useful to sneak past treasure rooms or proximity aggro enemies. Can also be used to test for fake beacons in a Hall of Fallacies (large open floor), which will not pulse. Effect will be cancelled if you use an ability, another pomander, open an explosive trapped silver coffer, or hit by an enemy's out-of-combat attack. Will not be cancelled by Sprint. | |
| Turns all enemies on current floor to stone for 30 seconds. | Petrified enemies will die in one hit to any attack. Useful for quickly clearing a Hall of Fallacies floor or a floor with many undesirable enemies. Newly spawned enemies (e.g. summoned by a luring trap) will not be petrified. |
Magicite
There is a small chance to obtain magicite when opening silver coffers dropped by enemies or found in the dungeon.
Magicite found in Heaven-on-High allows you to summon a primal, whose attack affects all enemies on the current floor. Up to three pieces of magicite can be held at once and are kept in a shared inventory.
- Magicite cannot be taken outside of Heaven-on-High. When in a matched party, it cannot be used after the completion of a set of floors.
Progression
Moving to Higher Floors
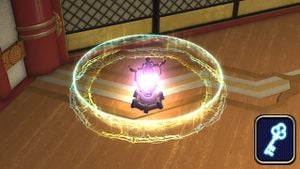
Floors are generated at random, and players may only progress by locating and activating the Beacon of Passage on each floor. These beacons have three phases, and will always be inactive when arriving at a new floor. Before the beacon can be fully activated, players must defeat the enemies that appear on the floor. As the phases progress, the color of the stone's map icon will change, and the perimeter around the beacon will glow when it becomes fully activated.
Resurrection
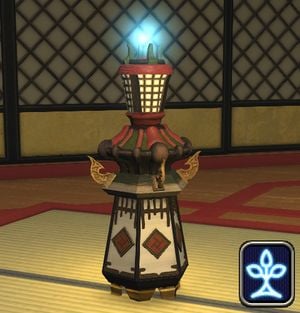
In addition to resurrection items and actions, players can use a Beacon of Return to raise all KO'd players. These beacons, like the Beacon of Passage, have three phases of activation and can only be used when fully activated. The beacon will be inactive when arriving at a new floor. Players must defeat the enemies that appear on the floor before the beacon can be fully activated. As the phases progress, the color of the beacon's map icon will change, and the beacon itself will glow when it becomes fully activated.
Traps and Enchantments
Traps
As players progress, they will arrive on floors with traps scattered around the rooms that will be set off when walked across. These traps are invisible unless a player has a Pomander of Sight which can reveal their locations. At most one trap will spawn per room, and traps do not spawn in starting rooms. Using a Pomander of Safety will remove all traps in the current floor.
As a general rule, the best way to prevent accidentally stepping on traps is to hug the walls, but there are some room layouts that may have traps by the wall.
| Trap | Effect | Notes |
|---|---|---|
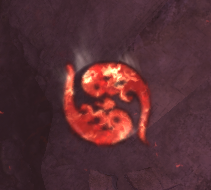 Enfeebling Trap Enfeebling Trap |
Causes Enervation status. | Enervation decreases damage dealt by 20% and increases damage taken by 30% for 60 seconds. This cannot be dispelled with Esuna. |
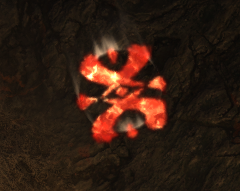 Impeding Trap Impeding Trap |
Causes Pacify and Silence statuses (30 seconds). Pets and enemies are also affected by this. | These can be dispelled with Esuna. |
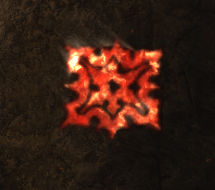 Landmine Landmine |
Causes approximately 80% of current HP damage to everything in range (including enemies) when stepped on. | Since this does damage depending on your current HP, this trap alone can never kill you, unlike the silver coffer trap which does damage of the player's max HP. |
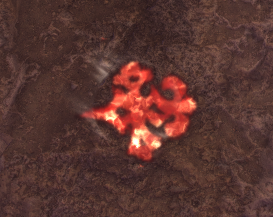 Luring Trap Luring Trap |
Spawns three random enemies from the floor to attack you. | All enemies will aggro on the person who stepped on the trap after a few seconds. |
 Otter Trap Otter Trap |
Causes Odder status for 20 seconds, transforming the player into an otter. | Odder debuff decreases your maximum HP by half and prevents you from taking any action; this includes using pet actions, and even opening treasure coffers. |
Enchantments
There is a chance for some floors to have one or more special effects, known as enchantments. Most enchantments are detrimental, but some are beneficial. Using a Pomander of Purity will remove all enchantments from the current floor.
Enchantments are divided in to three groups. It is possible to receive zero or one enchantment from each group upon spawning in a new floor, but not possible to receive more than one in the same group. Higher floors have a greater chance for more enchantments to spawn. In floor 99, three enchantments are guaranteed to appear.
Group 1
| Enchantment | Description | Notes |
|---|---|---|
| Use of abilities is prohibited for all party members. | ||
| Accuracy of all party members is reduced. | This enchantment effectively causes all attacks to miss more often. | |
| Damage dealt by all party members is reduced. | ||
| Weaponskill recast time, spell recast time, and auto-attack delay for all party members are reduced. | ||
| Maximum HP of all party members is reduced. | ||
| Maximum HP and MP of all party members are increased. | ||
| Movement speed of all party members is increased. |
Group 2
Group 3
| Enchantment | Description | Notes |
|---|---|---|
| Enemy movement speed is increased. Enemies also deal more damage while taking less. | The environment acquires a gloomy, pink-filled mist effect. |
Hall of Fallacies

Some floors contain only a single large room. There will be several Beacons of Passage but only one of them is a true beacon. If you attempt to activate one of the false beacons, it will trigger an explosive trap before disappearing.
Helpful NPCs
Floors will rarely contain an NPC that assist the party with a variety of buffs. Approaching the NPC will trigger an AoE effect that grants a buff to players within a 6-meter radius for 5 minutes. This effect can only trigger once.
| NPC | Effect |
|---|---|
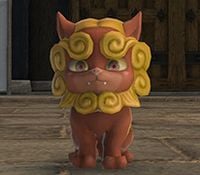 Komainu Komainu |
Increases damage dealt |
 Inugami Inugami |
Decreases damage taken |
 Fat Cat Fat Cat |
Restores HP over time |
Navigation Map
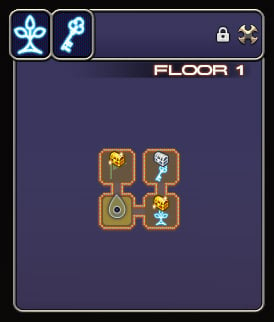
A special navigation map will be displayed, which can be used to progress through the rooms on a given floor. When any party member enters a room on the floor, the map will automatically update. The icons for the Beacon of Return and the Beacon of Passage will appear in their location on the map.
- Players can display or hide the map by pressing the M key. This is the same key for the Hold button to lock the map in position.
- The default navigational map will not be displayed in Heaven-on-High.
Beacon of Return
Beacon of Passage
Treasure Coffers
There are three types of treasure coffers which will randomly appear somewhere on the floor at the same time as enemies. While most of these coffers will give players various benefits, some will have traps, such as surprise enemy attacks.
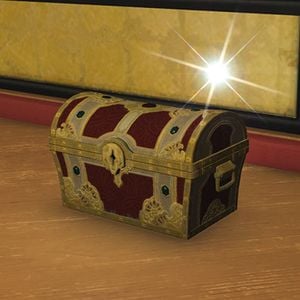
Gold Coffers - Gold Coffers may yield pomanders. The coffer will remain even if these items already exceed the inventory limit.
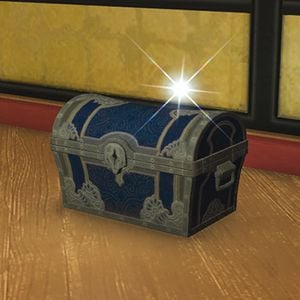
Silver Coffers - Silver Coffers may strengthen aetherpool arms and armor or contain magicite. However, there is a possibility that the strengthening effects will not take hold even if players' weapons and gear are not at maximum level. Opening these coffers will have no effect if the players' weapons and gear are at their maximum level of strength. Weapons and armor are strengthened separately, and one or the other will be randomly selected for each player.
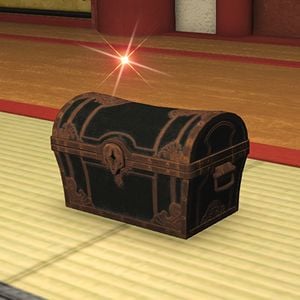
Bronze Coffers - Bronze Coffers may yield normal items such as potions or empyrean potsherds, which can be exchanged for special items with the Confederate Custodian in Crick in the Ruby Sea (X:21.2 Y:9.3).
The Accursed Hoard
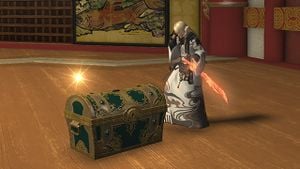
While exploring Heaven-on-High, players will, on occasion, discover hidden treasure known as the Accursed Hoard. Upon saving progress and exiting Heaven-on-High, players can take this treasure to the Confederate Appraiser in Crick in the Ruby Sea (X:21.3 Y:9.2) to have it appraised and discover what lies within.
Uncovering the Accursed Hoard
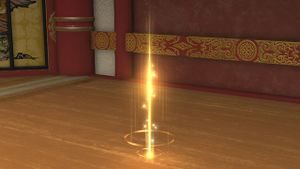
Players must remain stationary at the location where the treasure is hidden for a fixed period of time for the coffer to be uncovered.
Before the Accursed Hoard can be discovered, players must first use the pomander of intuition to reveal its location on the map.
Locating the Accursed Hoard
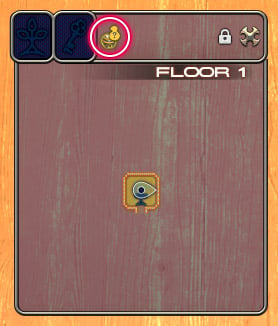
While a pomander of intuition is in effect, an icon on the navigation map will indicate the presence of a piece of the Accursed Hoard.
The Accursed Hoard Rewards
Contents
Depending on Heaven on High's level, Accursed Hoards are translated into different haloed sacks. Each sack contains varied items which range from fireworks to materia or even minions and mounts:
- Silver-haloed Sacks — Floors 1-30
- Gold-haloed Sacks — Floors 31-70
- Platinum-haloed Sacks — Floors 71-100
Appraising these sacks at the Confederate Appraiser will unveil their contents. If the outer ring flashes it will be a rare treasure, if the outer ring does not flash it will be a normal treasure.
Leaving Heaven-on-High
If all party members are KO'd inside Heaven-on-High, they will be removed from the instance.
- Unlike other dungeons, players cannot choose to return to the floor entrance if they are KO'd.
Save Data
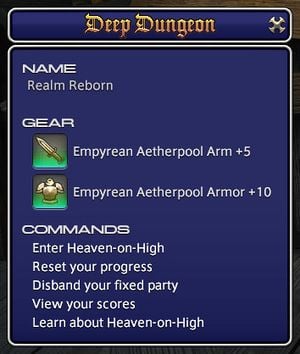
Players can manage their save data by talking with Kyusei located in Crick in the Ruby Sea (X:21.4 Y:9.2).
Resetting Progress
Players can reset their level and progression to floor 1. However, empyrean aetherpool arm and armor strength will carry over to the new file. This means players can reset and return to floor 1 to continue strengthening their weapons and gear if they have found that previous progression became too difficult.
- Reset save data cannot be recovered.
Disbanding a Fixed Party
Players can convert fixed party saved data to matched party saved data. Empyrean aetherpool arm and armor strength will be carried over, but pomander information will be reset. Under these conditions you will be able to be matched with other players who are currently playing on the same floor as you.
- If any members of a fixed party are unable to enter the deep dungeon after the deletion of save data or usage of the World transfer service, they must select "Disband your fixed party." to carry over their save data.
Rewards
The following rewards will be given based on the player's level and progress.
If your job or class is level-capped upon entering:
![]() Allagan Tomestones of Mathematics,
Allagan Tomestones of Mathematics, ![]() Allagan Tomestones of Mnemonics, and
Allagan Tomestones of Mnemonics, and ![]() Gil will be rewarded based on progress.
Gil will be rewarded based on progress.
If your job or class is below the level cap upon entering:
![]() Experience points,
Experience points, ![]() Gil, and
Gil, and ![]() Allagan Tomestones of Poetics will be rewarded based on progress.
Allagan Tomestones of Poetics will be rewarded based on progress.
- The Armory bonus will be applied to these rewards.
- Other bonuses, such as rested experience or from the Aetheryte Earring, will NOT be applied to these rewards.
Additional Rewards
Each time you clear floor 30, an Empyrean Potsherd will be awarded. This item can be traded to the Confederate Custodian in Crick in the Ruby Sea (X:21.2 Y:9.3).
Each time you clear floor 100, an Empyrean Reliquary will be awarded. This item can also be traded to the Confederate Custodian for various rewards, including four accessories (requiring 4 reliquaries total). Upon obtaining all accessories, you may speak to the Cast-off Confederate in the Ruby Sea (X:21.6 Y:9.9) to obtain an Juedi Horn, unlocking the Juedi mount.
Empyrean Aetherpool Weapons
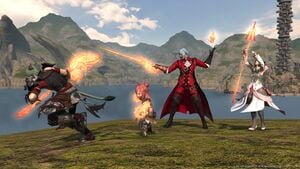
If you have strengthened your empyrean aetherpool arm and empyrean aetherpool armor to +10 in addition to clearing floor 30 of Heaven-on-High, you can receive an Empyrean Aetherpool Grip.
Receiving a grip will reduce the strength of your empyrean aetherpool arm and armor by 10 each.
10 grips can be exchanged for a weapon of your choosing by speaking with the Confederate Custodian in Crick in the Ruby Sea (X:21.2 Y:9.3).
Scores
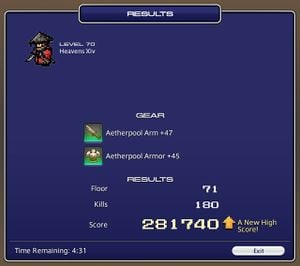
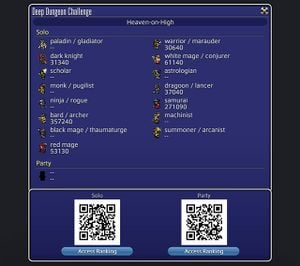
When challenging certain floors or when the entire party is KO'd, players will receive a score based on a number of factors such as highest floor reached and number of enemies slain. Separate scores for both solo and party play will be assigned after being defeated or clearing certain floors. High scores can be confirmed by speaking with Kyusei in Crick in the Ruby Sea (X:21.4 Y:9.2).
These scores may also appear on the rankings page on the Lodestone. The rankings page will be updated daily, so we encourage you to brave the ever-changing corridors of the dungeon, and prove yourself the realm's greatest pathfinder!
See Heaven-on-High High Scores
Floors
- Floors 1-10
- Floors 11-20
- Floors 21-30 (preferred for
 experience)
 - Floors 31-40
- Floors 41-50
- Floors 51-60
- Floors 61-70
- Floors 71-80
- Floors 81-90
- Floors 91-100
Achievements
Heaven-on-High is associated with the following achievements:
| Name | Points | Task | Reward | Patch |
|---|---|---|---|---|
| She's So High I | 5 | Clear the 10th floor of Heaven-on-High. | - | 4.35 |
| She's So High II | 5 | Clear the 20th floor of Heaven-on-High. | - | 4.35 |
| She's So High III | 5 | Clear the 30th floor of Heaven-on-High. | 4.35 | |
| She's So High IV | 10 | Clear the 50th floor of Heaven-on-High. | - | 4.35 |
| She's So High V | 10 | Clear the 100th floor of Heaven-on-High. | 4.35 | |
| Heaven Is a Lonely Place I | 10 | Clear the 1st through the 50th floors of Heaven-on-High solo and record a score on floor 51 or below. | - | 4.35 |
| Heaven Is a Lonely Place II | 10 | Clear the 1st through the 100th floors of Heaven-on-High solo. | 4.35 | |
| Dressed for Heaven | 10 | Speak with the cast-off Confederate while in possession of all four of the empyrean accessories. | 4.35 | |
| Empyrean Dreams | 10 | Obtain an empyrean aetherpool weapon. | - | 4.35 |
Music
| Section | Theme |
|---|---|
| Floors 1-3 Random 3-floorset |
The Open Box |
| Random 3-floorset | Aftermath |
| Random 3-floorset | Alienus |
| Random 3-floorset | A Light in the Storm |
| Random 3-floorset | Another Brick |
| Random 3-floorset | Apologies |
| Random 3-floorset | Bibliophobia |
| Random 3-floorset | Birds of a Feather |
| Random 3-floorset | Dark Vows |
| Random 3-floorset | Dawnbound |
| Random 3-floorset | Deception |
| Random 3-floorset | Descent |
| Random 3-floorset | Down the Up Staircase |
| Random 3-floorset | Down Where Daemons Dwell |
| Random 3-floorset | Earth, Wind, and Water |
| Random 3-floorset | Far From Home |
| Random 3-floorset | Forgotten by the Sun |
| Random 3-floorset | Gates of the Moon |
| Random 3-floorset | Grounded |
| Random 3-floorset | Heavy Rain |
| Random 3-floorset | He Who Continues the Attack |
| Random 3-floorset | Holy Consult |
| Random 3-floorset | Horizons Calling |
| Random 3-floorset | Ink Long Dry |
| Random 3-floorset | Iroha |
| Random 3-floorset | Jewel |
| Random 3-floorset | Like a Summer Rain |
| Random 3-floorset | Most Unworthy |
| Random 3-floorset | No Sound, No Scutter |
| Random 3-floorset | Poison Ivy |
| Random 3-floorset | Quicksand |
| Random 3-floorset | Riptide |
| Random 3-floorset | Silver Tears |
| Random 3-floorset | Slumber Eternal |
| Random 3-floorset | The Ancient City |
| Random 3-floorset | The Edge |
| Random 3-floorset | Their Deadly Mission |
| Random 3-floorset | The Scars of Battle |
| Random 3-floorset | The Warrens |
| Random 3-floorset | Tricksome |
| Random 3-floorset | Unbreakable (Duality) |
| Floors 10-20 Bosses | Answer on High |
| Floor 30 Boss | Triumph |
| Floors 40-90 Bosses | Revenge Twofold |
Lore
“A slender tower of stone stacked to impossible heights, seemingly piercing the very heavens. Aside from a Far eastern myth that attributes its creation to the kami, little is known about the structure. During a time of war, audacous pirates of the Confederacy made landfall and claimed the spot for their own.
— Encyclopedia Eorzea vol.2
The Pillar Of The Kami
Rising from the isle of Onokoro on the Ruby Sea and disappearing unto the heavens, this monumental and mysterious tower has been the subject of rife speculation since ancient times. Be it a ladder by which the gods graced their creation or a lift by which the ancients reached the moon, its legends are as diverse as they are plentiful. Despite the abundance of interest, however, there has been a dearth of discoveries pertaining to Heaven-on-High. For the pall of superstition has ever lain thick about the isle, promising divine wrath, and its occupation by Confederate forces in recent years has added a very tangible deterrent to investigation.
Amidst this benighted state of affairs, a member of the Confederacy has come forward to shed light upon the truth of Heaven-on-High. Speaking, on condition of anonymity, the individual claims that the tower was built in the distant past by an advanced people. That it serves as a proving ground for heroes who may one day deliver the world from calamity. That its interior teems with fell fiends, and by striving for the apex, one might hone body, mind, and spirit. While it indeed makes for compelling storytelling, for want of any evidence, for now we can but regard it as another myth among many.
Hiruko
According to myth, an unfinished kami named Hiruko washed up on the shores of Onokoro. If there is any truth to the tale, he may well have taken up residence within Heaven-on-High.
More
An artist's depiction of the tower’s apex. Said to be unreachable even by airships, what is actually to be found there is likely to remain a mystery.

