Eureka Orthos
Eureka Orthos
- Level
- 81 (Sync: 90)
- Difficulty
- Normal
- Party size
- Flexible
1-4 man • 1-4
- Unsyncing
- Not Allowed
- Time limit
- 60 minutes
- Phoenix Down
- Available
- Req. quest
- Delve into Myth
- Entrance
- Mor Dhona (X:34.8, Y:19.2)
- Region
- Mor Dhona
- Patch
- 6.35
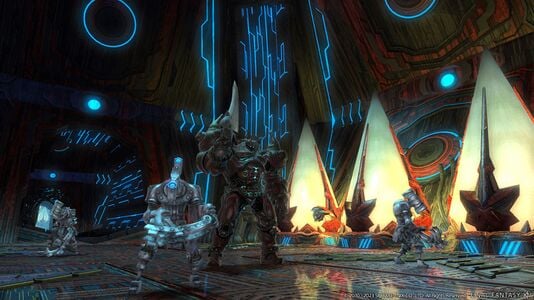
In the late Third Astral Era, when the ancient Allagan Empire was at the zenith of its glory, researchers toiled deep under the Crystal Tower to uncover secrets which might uplift their motherland to even greater heights. Their laboratory was dubbed Eureka Orthos, where impossible concepts of immortality, cloning, and dominion over the divine were made reality. So fantastic was this research that the legend of Eureka has endured through the ages, and now you have been tasked by the archmagus Noah to bring the laboratory's buried secrets into the light of day.
— In-game description
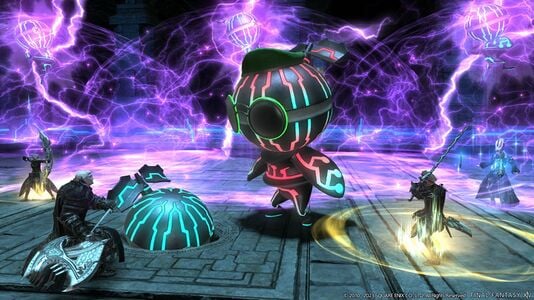
Eureka Orthos is a level 81 deep dungeon introduced in patch 6.35 with Endwalker.
All players will begin at level 81, and only by fighting the enemies within will they be able to gain the strength and experience needed to explore its depths.
Players who choose to leave and return later can continue playing from where they last saved.
- Eureka Orthos save data is separate to data used for other Deep Dungeons. Two save data slots are available for Eureka Orthos.
Requirements
Complete the quest Delve into Myth
- Disciple of War or Magic level 81
- Starting NPC: Koh Rabntah
- NPC Location: Mor Dhona (X:21.8 Y:8.1)
- Prerequisite: complete the main scenario quest Endwalker and floor 50 of the Palace of the Dead.
Quests
| Quest | Type | Level | Quest Giver | Unlocks |
|---|---|---|---|---|
| Delve into Myth | 81 | Koh Rabntah | ||
| Rage Extinguished | 81 | Koh Rabntah | ||
| Orthos Unveiled | 81 | Koh Rabntah |
Entering Eureka Orthos
Players can enter Eureka Orthos by speaking with Khatun in the Eight Sentinels, Mor Dhona (X:34.8 Y:19.2). When entering as a party, only the party leader can start the instance. It can also be entered with a cross-world party.
- All party members must be in the same Mor Dhona instance to enter Eureka Orthos.
Players who have cleared floor 30 of Eureka Orthos and the sidequest Rage Extinguished will be given the option to start from floor 1 or floor 21 when creating a new save file. When starting from floor 21, players will be set to level 90 and their inventories will be cleared of protomanders and demiclones.
Once Eureka Orthos is unlocked, players may quickly travel to the Eight Sentinels area by talking to Burnel in Mor Dhona (X:21.8 Y8.1) who is located by the Revenant's Toll aetheryte.
Character Growth
If starting from floor 1, players will start at level 81 regardless of their current class or job level. By defeating enemies that appear in the dungeon, players will be able to gain EXP and level their characters up to 90. Your Eureka Orthos level is not directly related to your level outside of the dungeon.
While it is possible to use Eureka Orthos to level from 81-90, it is an unpopular method and subject to lengthy queue times using matchmaking. The Save the Queen: Blades of Gunnhildr (i.e. Bozja) field operation is a more popular method of leveling to 90.
Orthos Aetherpool Gear
Players will be restricted to the use of an Orthos aetherpool arm and Orthos aetherpool armor when inside Eureka Orthos. In addition to gaining levels, players must enhance these items as they progress through the dungeon.
Note that Orthos aetherpool armor will take the appearance of your current gear upon entering the instance.
- Normal gear has no effect on your character's attributes inside Eureka Orthos.
- Aetherpool gear strength will not carry over from other deep dungeons.
Floor 31 and Beyond
While floors up to 30 are related to the story of Eureka Orthos, all floors after were created strictly as a challenge for players. For this reason, you cannot enter floors beyond 30 with a matched party. Furthermore, in addition to completing the sidequest "Rage Extinguished," players must meet the following requirements to challenge these floors:
- Start from floor 1 or floor 21 with a fixed party and clear up to floor 30.
- Party KO count must be zero. (As of patch 7.5, this will not increase in the event of a party wipe until reaching floor 30).
Save data with one or more party KOs cannot be used on floor 31 or higher.
- Please be advised that the party KO count will also increase in the event your party abandons the duty or logs out while inside the instance.
Unlike Palace of the Dead and Heaven-on-High, which place a greater emphasis on fighting only certain enemies on higher floors due to highly dangerous auto-attack damage, enemies in Eureka Orthos deal comparatively less auto-attack damage and focus more on avoiding late telegraphed or untelegraphed AoE attacks. Past floor 31, being hit by most of these AoEs will deal lethal damage. In addition, boss mechanics in Eureka Orthos are typically more involved and "modernized" compared to earlier deep dungeon bosses.
Protomanders
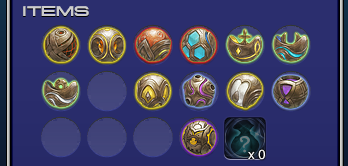
Players will, on occasion, obtain protomanders (known as pomanders in other deep dungeons) from treasure chests within Eureka Orthos. These items have various uses ranging from displaying the entire map of your current floor, to providing party members with beneficial effects. Up to three of each protomander can be held at any time. These items can be found in a shared inventory to be used by all party members.
Some protomanders are exclusive to Eureka Orthos and are not found in the other deep dungeons. These are bolded in the table below.
| Protomander | Description | Notes |
|---|---|---|
| Removes all traps from the current floor. | This pomander doesn't remove coffer traps. | |
| Reveals the current floor's map and the location of all hidden traps. | While all hidden traps become visible, they can still be triggered. Useful for finding the exit quickly. | |
| Increases damage dealt and HP recovered via healing magic by 30%. | This effect lasts for 8 minutes. | |
| Decreases damage received by 40%. | This effect lasts for 8 minutes. Can help with surviving some avoidable AoEs from enemies and bosses that would otherwise be one-shot. | |
| Increases the number of treasure coffers on the next floor. | Number of coffers is increased by 50%, rounded down. Useful if low on important pomanders. | |
| Decreases the number of enemies on the next floor. | This also decreased the amount of kills needed to open the Pylon of Passage on the next floor. Both the number of enemies per room and number of kills required are halved (rounded up). Synergizes with Affluence (fewer enemies in the way of coffers) but anti-synergistic with Alteration (fewer enemies affected). | |
| Changes the enemy occupying a random room on the next floor into a mimic or a mandragora. | Mandragoras (i.e. Korrigans) are passive mobs that die instantly after being aggroed. Both Mimics and Mandragoras have a higher chance to drop chests. | |
| Removes the Pox status. | This is for the Accursed Pox debuff applied by Mimics. | |
| Increases the chance enemies on the current floor will drop treasure coffers. | Useful for restoring pomander stocks and if planning to kill many enemies in the current floor. | |
| Transforms all targets within range into a frog, imp, or chicken. | Polymorphs all enemies within a 20 yalm radius of the user into harmless creatures for 30 seconds, though they retain their normal HP and defense values and can still autoattack, the damage of these autoattacks depend on what the enemy turns into:
This effect generates a large amount of enmity for the user. | |
| Removes all enchantments from the current floor. | Use if current floor's enchantments are undesirable. | |
| Reveals the current floor's hidden treasure. | The effect of this protomander is carried over until an Accursed Hoard is found, therefore it's not required to reactivate it unless its effect is consumed. | |
| Instantly raises the first party member to be KOed. | Cannot spawn on floors 81+. Useful if player is about to die during a solo run. | |
| Inflicts all enemies on the floor with a very potent slow for 10 minutes. Auto-attack delay as well as weaponskill and spell cast and recast time are increased. | Useful during emergency situations, like Witching. Can give more time to react to enemy attacks with late telegraphed AoEs or have dangerous out-of-combat AoEs. | |
| Reduces the HP of all enemies on the current floor to a single digit | Unless if there is an auto-heal penalty, out-of-combat enemies will begin to regenerate their HP after this, so requires planning if using as a floor wipe. Can group up multiple enemies before using, then kill them with one AoE attack. Useful for easily defeating Dread Beasts. | |
| Transforms user into a dreadnaught. Grants Rotosmash that kills most enemies in one hit, and Wrecking Ball that inflicts Vulnerability Up. | Essentially a combined version of the Pomander of Rage and Pomander of Lust from Palace of the Dead. Rotosmash will instantly kill non-boss enemies. However, this will not instantly kill enemies when the floor has the Knockback Penalty enchantment. Useful for clearing a floor quickly, but be careful of traps. |
Demiclones
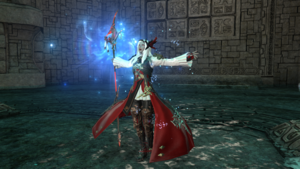
Players will, on occasion, obtain tomestones from silver treasure coffers in Eureka Orthos, which can be used to generate demiclones. These items can be used by all party members once acquired.
Up to three tomestones can be held at once and are kept in a shared inventory. Tomestones cannot be taken outside of Eureka Orthos. When in a matched party, they cannot be used after the completion of a set of floors.
Demiclones will follow and fight alongside the player who generated them. Each demiclone has unique strengths, so choose carefully to turn the tides in your favor. Demiclones will despawn if the player who summoned them dies, or once the party leaves the floor.
Traps
As players progress, they will arrive on floors with traps scattered around the rooms that will be set off when walked across. These traps are invisible unless a player has a Protomander of Sight which can reveal their locations. At most one trap will spawn per room, and traps do not spawn in starting rooms. Using a Protomander of Safety will remove all traps in the current floor.
As a general rule, the best way to prevent accidentally stepping on traps is to hug the walls, but there are some room layouts that may have traps by the wall.
| Trap | Effect | Notes |
|---|---|---|
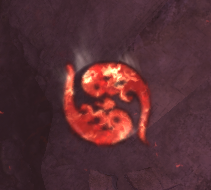 Enfeebling Trap Enfeebling Trap |
Causes Enervation status. | Enervation decreases damage dealt by 20% and increases damage taken by 30% for 60 seconds. This cannot be dispelled with Esuna. |
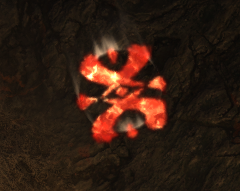 Impeding Trap Impeding Trap |
Causes Pacify and Silence statuses (30 seconds). Pets and enemies are also affected by this. | These can be dispelled with Esuna. |
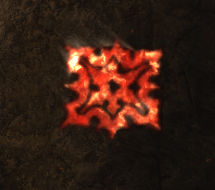 Landmine Landmine |
Causes approximately 80% of current HP damage to everything in range (including enemies) when stepped on. | Since this does damage depending on your current HP, this trap alone can never kill you, unlike the silver coffer trap which does damage of the player's max HP. |
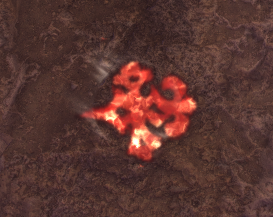 Luring Trap Luring Trap |
Spawns three random enemies from the floor to attack you. | All enemies will aggro on the person who stepped on the trap after a few seconds. |
 Owlet Trap Owlet Trap |
Causes Owlet status for 20 seconds, transforming the player into an owlet. | Owlet debuff decreases your maximum HP by half and prevents you from taking any action; this includes using pet actions, and even opening treasure coffers. |
Enchantments
There is a chance for some floors to have one or more special effects, known as enchantments. Most enchantments are detrimental, but some are beneficial. Using a Protomander of Purity will remove all enchantments from the current floor.
Enchantments are divided in to three groups. It is possible to receive zero or one enchantment from each group upon spawning in a new floor, but not possible to receive more than one in the same group. Higher floors have a greater chance for more enchantments to spawn.
Group 1
| Enchantment | Description | Notes |
|---|---|---|
| Use of abilities is prohibited for all party members. | ||
| Accuracy of all party members is reduced. | This enchantment effectively causes all attacks to miss more often. | |
| Damage dealt by all party members is reduced. | ||
| Weaponskill recast time, spell recast time, and auto-attack delay for all party members are reduced. | ||
| Maximum HP of all party members is reduced. | ||
| Maximum HP and MP of all party members are increased. | ||
| Movement speed of all party members is increased. |
Group 2
| Enchantment | Description | Notes |
|---|---|---|
| HP regeneration for all party members is disabled. | Applies to out-of-combat passive HP regeneration. This also applies to HP regen of enemies | |
| Use of demiclones is prohibited for all party members. | ||
| Use of items (including protomanders) is prohibited for all party members. | Protomanders of Serenity are still usable (and remove the effect). | |
| Knockback and draw-in effects for both enemies and allies are disabled. | The Dreadnaught transformation no longer one-shots enemies with Rotosmash since that effect depends on the knockback. |
Group 3
| Enchantment | Description | Notes |
|---|---|---|
| Enemy movement speed is increased. Enemies also deal more damage while taking less. | The environment acquires a gloomy, pink-filled mist effect. |
Dread Beasts
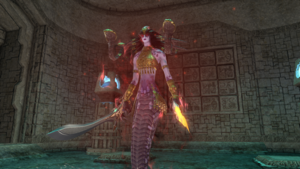
Dread Beasts are powerful enemies found in Eureka Orthos. Each time the party enters a floor, there is a chance a Dread Beast may spawn, as indicated by a system message. There are three Dread Beasts: Demi-Cochma, Lamia Queen, and Meracydian Clone.
Due to their high damage and health, these should be avoided when possible, although they can be easily slain if one has a Protomander of Storms available. Defeating it will grant a 30 min buff to all party members that can stack with similar buffs granted from other sources. Dread Beasts are immune to knockback, so using Rotosmash as a Dreadnaught (from Protomander of Dread) is ineffective.
Players will gain the strength of dread beasts that lurk within Eureka Orthos by defeating them:
- Demi-Cochma will grant a (10%)
 Vulnerability Down, decreasing damage received.
 - Lamia Queen will grant
 Rehabilitation, restoring HP over time.
 - Meracydian Clone will grant a (10%)
 Damage Up, increasing damage dealt.
In addition, defeating a dread beast will grant a piece of the Accursed Hoard and a random treasure coffer.
The Accursed Hoard
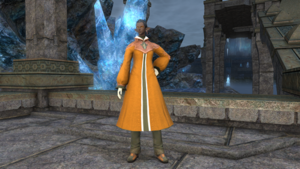
While exploring Eureka Orthos, players will, on occasion, discover hidden treasure known as the Accursed Hoard. While a protomander of intuition is in effect, an icon on the navigation map will indicate the presence of a piece of the Accursed Hoard.
Upon saving progress and exiting Eureka Orthos, players can take this treasure to Valeroine in Mor Dhona (X:34.9 Y:19.1) to have it appraised and discover what lies within.
- Bronze-tinged Sacks — Floors 1-30
- Silver-tinged Sacks — Floors 31-70
- Gold-tinged Sacks — Floors 71-100
Rewards
The following rewards will be given based on the player's level and progress.
Level Capped
If your job or class is level-capped upon entering:
 Allagan Tomestones of Mathematics,
  Allagan Tomestones of Mnemonics, and
  Gil will be rewarded based on progress.
Floor 10
 10 Allagan Tomestones of Poetics
 20 Allagan Tomestones of Mathematics
 5 Allagan Tomestones of Mnemonics
 1,000 Gil
Floor 20
 20 Allagan Tomestones of Poetics
 40 Allagan Tomestones of Mathematics
 10 Allagan Tomestones of Mnemonics
 1,500 Gil
Floor 30 and beyond
 30 Allagan Tomestones of Poetics
 60 Allagan Tomestones of Mathematics
 15 Allagan Tomestones of Mnemonics
 2,000 Gil
Below the Level Cap
If your job or class is between levels 81 and 90 upon entering:
![]() Experience points,
Experience points, ![]() Gil, and
Gil, and ![]() Allagan Tomestones of Poetics will be rewarded based on progress.
Allagan Tomestones of Poetics will be rewarded based on progress.
- The Armoury bonus will be applied to these rewards.
Floor 10
 10 Allagan Tomestones of Poetics
 Experience
 1,000 Gil
Floor 20
 20 Allagan Tomestones of Poetics
 Experience
 1,500 Gil
Floor 30 and beyond
 30 Allagan Tomestones of Poetics
 Experience
 2,000 Gil
Additional Rewards
Each time you clear floor 30, an Orthos Aetherpool Fragment will be awarded. This item can be traded to the Synthesis Node in Mor Dhona (X:34.9 Y:19.0).
Each time you clear floor 100, an Orthos Tomestone will be awarded. This item can also be traded to the Synthesis Node for various rewards, including four accessories (requiring 4 tomestones total). Upon obtaining all accessories, you may speak to Koh Rabntah in Mor Dhona (X:34.7 Y:19.3) to obtain an Aeturna Horn, unlocking the Aeturna mount.
Orthos Weapons
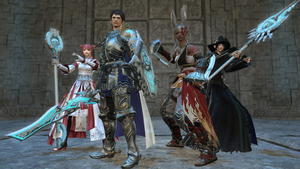
If you have strengthened your Orthos aetherpool arm and Orthos aetherpool armor to +10, in addition to clearing floor 30 of Eureka Orthos and completing the sidequest Rage Extinguished, you can receive an Orthos Aetherpool Grip, 3 of which can be exchanged for a item level 620 weapon of your choosing by speaking with the Synthesis Node in Mor Dhona (X:34.9 Y:19.0). Each Orthos Aetherpool Grip reduces the current Orthos aetherpool arm and armor levels by 10.
Enaretos Weapons
After completing floor 100 of Eureka Orthos, upgraded Orthos Weapons that are item level 625 with special particle effects will be unlocked for purchase from the Synthesis Node. These require the corresponding Orthos Weapon and 6 Orthos Aetherpool Grip.
Scoring
When challenging certain floors or when the entire party is KO'd, players will receive a score based on a number of factors such as highest floor reached and number of enemies slain. Separate scores for both solo and party play will be assigned after being defeated or clearing certain floors.
High scores can be confirmed by speaking with Khatun in Mor Dhona (X:34.8 Y:19.2).
Scores from expeditions beyond floor 30 may also appear on the rankings page on the Lodestone. The rankings page will be updated daily.
List of Floors
- Floors 1-10
- Floors 11-20
- Floors 21-30
- Floors 31-40
- Floors 41-50
- Floors 51-60
- Floors 61-70
- Floors 71-80
- Floors 81-90
- Floors 91-100
Achievements
Eureka Orthos is associated with the following achievements:
| Name | Points | Task | Reward | Patch |
|---|---|---|---|---|
| Le Morte d'Allagan Monstrosities I | 5 | Clear the 10th floor of Eureka Orthos. | - | 6.35 |
| Le Morte d'Allagan Monstrosities II | 5 | Clear the 20th floor of Eureka Orthos. | - | 6.35 |
| Le Morte d'Allagan Monstrosities III | 5 | Clear the 30th floor of Eureka Orthos. | 6.35 | |
| Le Morte d'Allagan Monstrosities IV | 10 | Clear the 50th floor of Eureka Orthos. | - | 6.35 |
| Le Morte d'Allagan Monstrosities V | 10 | Clear the 100th floor of Eureka Orthos. | 6.35 | |
| All by Eurekaself I | 10 | Clear the 1st through the 50th floors of Eureka Orthos solo and record a score on floor 51 or below. | - | 6.35 |
| All by Eurekaself II | 10 | Clear the 1st through the 100th floors of Eureka Orthos solo. | 6.35 | |
| Vintage Vogue | 10 | Speak with Koh Rabntah while in possession of all four of the enaretos accessories. | 6.35 | |
| Eureka Moment | 10 | Obtain an Orthos weapon. | - | 6.35 |
| Reliable Enaretor | 10 | Obtain an enaretos weapon. | - | 6.35 |
Music
Floors 1-98
| Section | Theme |
|---|---|
| Floors 1-3 Random 3-floorset |
Forbidden Land (Endwalker) |
| Random 3-floorset | Unbreakable |
| Random 3-floorset | Unbreakable (Duality) |
| Random 3-floorset | A Long Fall |
| Random 3-floorset | A Long Fall (Pulse) |
| Random 3-floorset | Equilibrium (Pulse) |
| Random 3-floorset | Oblivion (Pulse) |
| Random 3-floorset | Neath Dark Waters (Pulse) |
Floors 4-39
Includes floors 1-98 tracks, and:
| Section | Theme |
|---|---|
| Random 3-floorset | Silver Tears |
| Random 3-floorset | Descent |
| Random 3-floorset | Slumber Eternal |
| Random 3-floorset | Roar of the Wyrm |
| Random 3-floorset | Ink Long Dry |
| Random 3-floorset | Imagination |
| Random 3-floorset | Holy Consult |
| Random 3-floorset | Apologies |
| Random 3-floorset | Grounded |
| Random 3-floorset | Dawnbound |
| Random 3-floorset | Alienus |
| Random 3-floorset | Their Deadly Mission |
| Random 3-floorset | Far From Home |
Floors 41-98
Includes floors 1-98 tracks, and:
| Section | Theme |
|---|---|
| Random 3-floorset | Tumbling Down (Muffled version inside Cerberus) |
| Random 3-floorset | Omega Squared |
| Random 3-floorset | A Battle Decisively |
| Random 3-floorset | Battle |
| Random 3-floorset | A Land Long Dead |
| Random 3-floorset | To Fire and Sword |
| Random 3-floorset | Figments |
| Random 3-floorset | Unwound |
| Random 3-floorset | Deep Down |
| Random 3-floorset | In the Belly of the Beast |
| Random 3-floorset | The Grand Cosmos |
| Random 3-floorset | Floundering in the Depths |
| Random 3-floorset | Where All Roads Lead |
| Random 3-floorset | Freshly Glazed Porxie |
| Random 3-floorset | Seven Flames |
| Random 3-floorset | Tower of Zot |
| Random 3-floorset | Garlemald Express |
| Random 3-floorset | As the Sky Burns |
| Random 3-floorset | Miracle Works |
| Random 3-floorset | The Aetherial Sea |
| Random 3-floorset | FINAL FANTASY IV: Battle 2 (Endwalker) |
Bosses
| Section | Theme |
|---|---|
| Floors 10-20 Bosses | Calamity Unbound |
| Floor 30 Boss | From the Ashes |
| Floors 40-80 Bosses | Insatiable (Scions & Sinners: Band) |
| Floor 90 Boss | On Blade's Edge |
| Floor 99 Boss | Insatiable |

