Exploratory Missions/Old
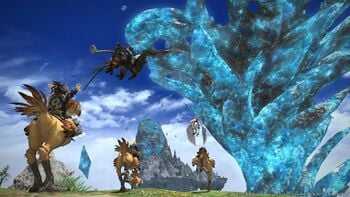
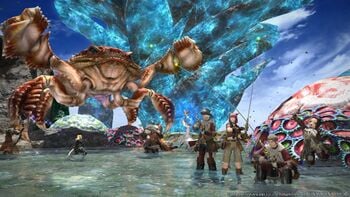
The use of airships has grown increasingly popular in recent times, and adventurers near and far now labor to conquer an exciting new frontier—the Diadem! Those with the courage to venture deep within the Sea of Clouds will find a veritable treasure trove of natural resources. But these islands are as treacherous as they are bountiful. Home to bloodthirsty beasts and otherworldly creatures, only the brave and the bold may survive its hardships, and stake their claim to untold fortunes.


![]() Exploratory Missions, introduced in Patch 3.1, allowed individual adventurers and Free Companies to journey to faraway locations via airship. The Diadem was the first set of islands released.
Exploratory Missions, introduced in Patch 3.1, allowed individual adventurers and Free Companies to journey to faraway locations via airship. The Diadem was the first set of islands released.
How to Participate
| Entry Requirement | Disciple of War or Magic level 60* |
| Item Level Requirement | Average item level 179 or above |
| Party Size | Entering via company workshops: 2~24 (three parties of eight)* Entering via Ishgard's airship landing: 1~8 |
| Time Limit | 90 minutes |
| Prerequisites | Players must complete the Main Scenario Quest |
*Disciples of the Land are not required to be level 60.
*Please note that while players may enter the Diadem as an alliance, upon entering, the group will not be treated as an alliance, but as three separate parties.
Entry Requirements
Players must first complete the main scenario quest ![]() Heavensward. To undertake exploratory missions with a free company, players can access them via the Company Workshop. To undertake exploratory missions without a free company, players must first speak with the NPC Aurvael in The Pillars (x14,y10).
Heavensward. To undertake exploratory missions with a free company, players can access them via the Company Workshop. To undertake exploratory missions without a free company, players must first speak with the NPC Aurvael in The Pillars (x14,y10).
Free Company Exploratory Missions
When undertaking exploratory missions using a free company airship, players must form a party of at least 2 people. Players can also form an alliance of up to 24 players. There are no role requirements for entering the Diadem as an alliance. Each party or alliance member must have a tank of Mission Ceruleum in their possession, which can be purchased in exchange for ![]() Company Credits. One tank is required for each mission.
Company Credits. One tank is required for each mission.
Ishgardian Exploratory Missions
Players can also journey to the Diadem via Ishgardian airships. Players can undertake Isghardian exploratory missions solo or in a party of up to 8 people. Each player of the party must have a Mission Ceruleum Voucher in their possession, which can be purchased from the NPC Jaquoinie in The Pillars (x14,y10) for ![]() gil. One voucher is required for each mission. There are no role requirements when entering as a full party. However, parties with less than 8 players must adhere to the standard composition of 2 tanks, 2 healers, and 4 DPS.
gil. One voucher is required for each mission. There are no role requirements when entering as a full party. However, parties with less than 8 players must adhere to the standard composition of 2 tanks, 2 healers, and 4 DPS.
Rules and Limitations
Entry Limitations
Before undertaking an exploratory mission, whether via company workshops or the airship landing in Ishgard, at least 2 hours must have elapsed since last entering the Diadem. This timer is shared between all difficulty levels.
Loot Rules
When undertaking exploratory missions via a free company workshop, or with a full party via Ishgard, parties may set loot rules to Normal, Greed Only, or Loot Master. When undertaking exploratory missions via Ishgard with less than eight players, the loot rules will be set to Greed Only.
Difficulty
There are three difficulty levels for exploratory missions. Players can select their desired difficulty prior to undertaking a mission. The strength of enemies and rewards obtained will vary based on this setting. Please note that in order to select the hardest difficulty, you must first chart a route by deploying your airship on an exploratory voyage to specific islands.
Changing Class and Jobs
After entering the Diadem, players can freely change between classes and jobs when out of combat.
Rewards
Treasure Coffers
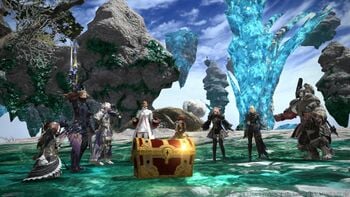
Treasure Coffers are dropped after defeating enemies. They are divided into 3 tiers: Gold, Silver and Bronze. Players may sometimes find gear inside treasure coffers. This gear is unique in that its appearance and parameters are assigned at random.
- Only treasure coffers discovered by your party will appear on the field.
Brass Sky Pirate Spoils
Unwanted gear obtained from treasure coffers can be exchanged for Brass Sky Pirate Spoils by speaking with Spoils Trader in The Pillars (x14,y10). These brass sky pirate spoils can then be used to purchase goods from the Spoils Collector.
Steel Sky Pirate Spoils
Disciples of the Land can gather Steel Sky Pirate Spoils in the Diadem. These can be redeemed for a variety of goods by speaking with the Spoils Collector in the Pillars (x14,y10).
- Spoils traders and collectors can also be found inside the Diadem and residential areas.
Other Rewards
By completing a certain number of the objectives listed for a given mission, players will receive other rewards including Allagan Tomestones.
The Diadem
Players can explore the Diadem for hidden treasure coffers by slaying creatures and gathering rare items. While exploring the Diadem, players will find unique pieces of gear whose appearance and parameters are random. Up to nine parties (72 players) can explore in a single instance.
Mission modes are divided into 3 difficulties Easy, Normal and Hard. Players can only participate in Hard mode with their Free Company members and Free Company Airships. Players join PUG groups for Easy and Normal modes from the Pier in Ishgard.
- As long as someone in the Free Company is hosting the airship, players can invite non-FC members to join your FC's expeditions.
Hard Mode has to be unlocked by completing Sector 22 in Free Company Airships' Exploratory Voyages.
Flying Mounts
By attuning to the aether turbulences found inside the Diadem, players can use their mounts to fly. Please note that your attunement to these currents will be lost upon leaving the Diadem, and you must attune to them again should you return.
Enemies
The icon next to enemy names is an indication of their relative strength.
Field Objects
As you explore the Diadem, you may encounter constructs with various effects. Proper use of these constructs is essential to a successful mission.
Shops and NPCs
Within the Diadem are small settlements with merchants who offer the following services:
- Gear repair
- Exchange of unwanted gear for brass sky pirate spoils
- Sale of goods for brass and steel sky pirate spoils
- Weather forecasts for islands in the Diadem
Spiritbonding
Gear will gain spiritbonding at an increased rate in the Diadem in comparison to other duties.
- The increased spiritbond gain does not apply to crafting or gathering.
Mission Results
When time has expired, or you choose to end the exploratory mission early, you can view a list of completed objectives.
- Mission Time
- Enemies Slain
- NMs Slain
- Coffers Discovered
- Gold Coffers
- Silver Coffers
- Bronze Coffers
Special Rewards
Guides
Tips
- The best way to get 210 pieces to drop is to get good credit for killing a rank V or rank ★ monster. First team to hit the mob gets credit for sure. Otherwise, if you don't do enough damage you won't get a chest. Gold Chests are what you really want. (There is a small chance a IV will drop a Gold chest.)
- The best way to get Vs to spawn seems to be to kill IVs. Since mobs have a LOT of HP and don't do very much damage, having the tank pull 3-4 things at a time seems to be solid here. But don't bother with Rank IIs and IIIs if you can.
- Therefore, it seems that the best practice to get 210 drops is, get with another party or two, esp. FC parties, kill IVs to spawn V and ★ rank dudes.
- Tracks on the ground - Interact and it spawns a V or ★.
- The initial Island can take you 30 minutes to clear. You don't want that. Check your map, get the aether currents and get out of there. If you like you can clear the 4 mob kill objective off your to-do list. But the to-do list is easy to complete, so don't spend a lot of time on that. It is worth doing sac-pulls to get aether currents if you have to.
- The Return spell is awesome.