The Diadem (Hard) Guide
The Diadem Hard Mode Guide is created by /u/Raubahn
Introduction
First I would like to clear something about Dino Island. Farming in dino island is a bad idea, yes the Rank V (Easterly Sanuwa) and Rank IV (T-Rex) are tempting to kill but keep in mind that the Sanuwas have a push back ability resulting in DPS doing less damage which causes them to die at a much slower rate so much slow. Killing another Rank IV or V is much faster. Additionally, the area is cramped which means if a Star rank pop and lets say (Brachi) it would be difficult not to avoid getting aggro from other mobs which may result in a wipe or getting killed. Resulting in no credit. With that said, lets begin the guide.
Fresh Tracks and Messages
Fresh tracks is the "NM Pop method". After successfully killing a mob, you start to gain points indicated by "Party Messages". Other parties will not get the same message as yours.
Party Messages
The messages that you should be aware off are:
- You feel a foul presence nearby.
- You feel a foul presence in the immediate vicinity.
- You feel a foul presence right on top of you.
Nearby means you are 2 messages away from getting tracks. Immediate vicinity means you are 1 message away from getting tracks. On top of you means that the fresh tracks appeared on top of a party member so beware if 1 member is on a starting area or on another island, it might pop on him. When you pop them it will 100% spawn an NM (Star rank).
Now I do not know the exact amount of Kills you need to advance through each stage but keep in mind that "Lower Rank mobs will give you less points towards your next stage if killed with multiple parties." And we still do not know what SE means by "Lower Rank", does it mean Rank 3 and lower? Rank 4 and Lower?.
Zone Wide Message
- The Air is thick with murderous intent.
The message means that an NM has spawned in the zone. It could spawn anywhere (Including caves). When this message appears, I suggest only 1 person in your party (a DPS if you have 1 Healer , or a Healer if you have 4 DPS) to go out and search for the NM. It is a treat from SE, when you find it make sure to shout out the location and order other people to stop pulling more mobs.
Buried Chest
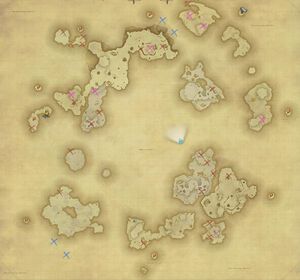
Finding a buried chest and popping it will give you more points toward the fresh tracks for messages. the chests are hidden in each island, either under a bush or beneath a big mushroom. Surprisingly, these chests can give a ton of points. When you get 10 of them, you get the message "You feel a foul presence in the immediate vicinity". Getting 10 equals a free star mob which means a free gold chest. The only problem with these buried chests is that they act the same way as the Crystals found in the zone, anyone can see them, and anyone can pop them BUT, they do have a timer. Also, it appears that some of the buried chests are golden ones (In HM), so there is more than enough reason to search for them.
Buried Coffers Treasure Map
| Marker Color | Location |
|---|---|
| Red | On the island and on the same level as the island. |
| Purple | On the island but on higher ground. |
| Blue | Inside the caves. |
Farming Methods
Now before I begin I believe that separating into 3 groups on each island isn't good. The reason is that if everyone is separated you risk someone else having tracks on another island and popping it before you can reach it due to killing normal mobs while they popped their NM. The other thing is that you will be killing mobs slowly, resulting in less chance of spawning a gold from a normal mob, as well only having 1 set of track for each party because the mobs take a long time to kill. Square Enix has stated that killing lower rank mobs reduces the points you get for spawning tracks, they didn't say it eliminates them. Therefore the methods below mostly consist of a zerg fest of 4-7 parties although it can work for 3 party formations.
Triangle of Doom
Poison,Sleep and Paralyze
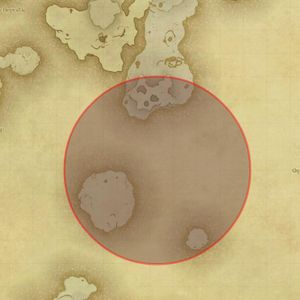
This is an effective method for farming Gold chests and Tracks. Start at the small Island, kill the two Rank V Pteranodons on it > move to the left island and kill all the mobs > then jump into the south side of the Celphies/Pelicans island. The benefit of this method is that the mobs are all Rank IV and Above which means you will be getting a shot at both getting tracks, getting a Gold off a Normal Mob, and getting more silver chests (Silver contains 210 gears). The only downside is that the mobs are rather annoying. The Pelicans have Poison, Paralyze, Sleep and Petrify Breath, The Celphies have super petrify (easily dodge-able, just don't face them), Paralyze (cold stare) and Vulnerability Up (Can be cleansed , SCHs should use selene). With 5-7 Parties you can get about 8 NMs to spawn with this method. It requires a lot of groups at at least 7 or 8 parties.
Up and Down We Go!
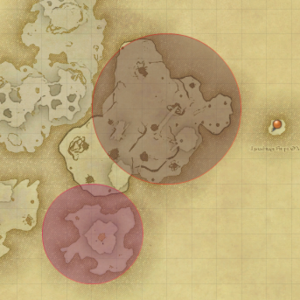
The method is good for parties that want to pop tracks and get many Silver and Bronze chests. What makes this method shine is that the upper Island has a high chance of spawning "Territorial Mobs", which spawn from the chests. The upper island consist of 3 Rank V (two Pteranodon and 1 Tree). It's still considered a good Island. Sadly I didn't record how many NMs, we have spawned doing this method, but each party can spawn 1-2 depending those Territorial mobs.
Isle Keepers and Celphies Land
Pretty much like Dino Island, not so bad of an island until someone decides 2 Celphies and 1 Isle Keeper make things go faster and better. Only pull 1 Celphie at a time, don't have more than one unless your group can handle 2. When the celphie is about to die (20%-15%) HP, pull another. Having 2-3 Isle keepers are good as long as the tank actually tank them. Don't have much to say about this method other than that it works. Healers should cleanse the vulnerability up debuff.
Pelicans and Celphies
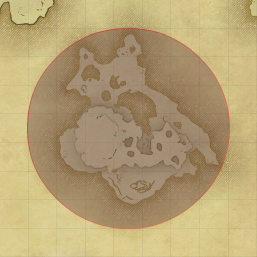
Pretty much like above. Not going to add more to that just beware of the pelicans' debuffs.
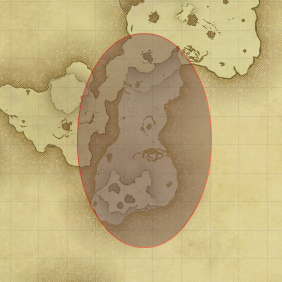
The Northwest Island
This is the JP method of farming diadem, they focus on killing as many rank IV and III. They get a lot of bronze and silvers doing this method. What peaked my interest is that if each party can spawn 1 NM, it means that a full group in diadem (9 Parties) can theoretically spawn 9 NMs. They get a chance to have a 210 piece to drop off a silver chest, as well as a chance for a gold to spawn of a rank IV.
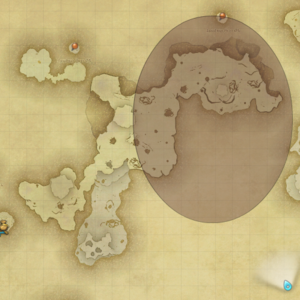
Weather
There are two special weathers in the diadem Hyperelectricity and Umbral Wind. The first spawns Rafflasia clone monsters in each spawning area (T6 Boss) it has a chance to drop a Proto Ultima Exoplating which can be traded for Ultima Horns not much to say about the second weather other than that Easterly Sanuwas will spawn on each starting Island, their special drop is still unknown during this weather.
Community Observations
- Fresh Tracks can spawn on party members , therefore it can spawn in landing zone if one used return.
Unsolved Mysteries
- How much is the decrease in points when killing lower ranked mobs with multiple parties. (So far it seems like the lower ranks are 1-3. Killing a mob with multiple parties splits its points into how many parties killed it or got credit for it)
- Does the special weather enemies have a higher chance to drop gold chests.
- SE wanted divide the NMs into normal NMs and HNMs (High notorious monsters) so far we have not seen an HNM unless they mean that Rank Vs are NMs and Star ranks are HNM.
TL;DR
Do not farm on Dino Island in HM, it's a waste of your time.