Sleep Now in Sapphire
Sleep Now in Sapphire

- Quest giver
- Resistance Officer
- Location
- The Lochs (X:11.3, Y:22.5)
- Quest line
 The Sorrow of Werlyt Quests
┗ Garlemald's Machinations Quests- Level
- 80
- Experience
 0
0- Gil
 0
0- Previous quest
- Ruby Doomsday
- Next quest
- Blood of Emerald
- Patch
- 5.3
- Links
- EDB GT TC
Information relating to the Weapon project has been uncovered, and your allies prepare to depart for distant lands.
— In-game description
Rewards
Walkthrough
The player will control the G-Warrior in a series of solo instance battles in Terncliff Bay serving as a tutorial for G-Warrior combat before facing the Sapphire Weapon in a duel. The G-Warrior has 185,000 HP (on Normal difficulty) and 10,000 EP (essentially functioning as MP).
G-Warrior's Actions
| Action | Type | EP | Cast Time | Recast Time | Description |
|---|---|---|---|---|---|
| Weaponskill | 0 | Instant | 2.00s | Deals unaspected damage with a potency of 600. | |
| Weaponskill | 300 | Instant | 2.00s | Executes the following weaponskills in succession: 1. Aethersaber (Gap closer) | |
| Weaponskill | 800 | 2.50s | 5.00s | Deals unaspected damage with a potency of 1,200 to all enemies in a straight line before you. Triggers the cooldown of weaponskills and spells upon execution. | |
| Weaponskill | 800 | 2.50s | 30.00s | Deals unaspected damage with a potency of 300 to target and all enemies nearby it. Additional Effect: Increases target's damage taken by 20% | |
| Ability | 0 | Instant | 25.00s | Restores up to 40% of own HP and 30% of own EP. | |
| Ability | 0 | Instant | 3.00s | Reduces cast time and recast time of weaponskills by 25% and increases movement speed by 25%. HP is drained while in use. Effect ends upon reuse. | |
| Ability | 0 | Instant | 3.00s | Reduces damage taken by 50%. EP is drained while in use. Effect ends upon reuse or when EP is depleted. |
Time Limit: 15 minutes
Objective: Destroy the target
This serves as a tutorial for G-Warrior combat. The Guidance System is a training dummy and will not attack the player. After defeating it, the player receives a tutorial on using Pyretic Booster.
Objective: Destroy the target while evading its attacks
Similar as before, but the Guidance System will now use Aerial Bombardment, spawning four large circular AoEs below the player. Use Pyretic Booster to dodge these easily. After defeating it, the player receives a tutorial on using Aetherial Aegis.
Objective: Destroy the target while defending against its attacks
Similar as before, but the Guidance System will now use Attack, dealing large damage that should be mitigated with Aetherial Aegis.
 Mark IV Anti-Eikon Warmachina: The Sapphire Weapon
Time Limit: 30 minutes
General G-Warrior Rotation
- Activate Pyretic Booster unless if HP is low.
- Keep the 1-minute
 Vulnerability Up debuff from Aether Mine up.
 - Use Final Fluorish Combo as your primary attack.
- Use Aether Cannon as a last resort attack if EP is low.
- Use Auto Restoration as needed to heal HP and EP.
- Only use Aetherial Aegis to mitigate unavoidable attacks.
Strategy
- Tail Swing: A massive telegraphed point-blank AoE centered on the boss. Use the speed boost from Pyretic Booster to dodge.
- Optimized Judgement: A telegraphed donut AoE centered on the boss.
- Activate: Spawns four untargetable Regula's Image adds. These will each do a massive, telegraphed 270-degree AoE in front of them (Magitek Spread) so move behind one.
- Optimized Ultima: Unavoidable damage. Use Aetherial Aegis to mitigate.
- The boss will disappear and reappear after several seconds, using Swiftbreach, unavoidable damage that can be mitigated with Aetherial Aegis. It will then do one of two attacks
- Sapphire Ray: One large glowing orb will appear in front of the boss, indicating a line AoE. Move to its sides to avoid. Has no AoE indicator.
- Siderays: Two glowing orbs will appear to the sides on the boss, indicating side cleave AoEs. Move directly in front of it to avoid. Has no AoE indicator.
- Plasma Shot: Heavy unavoidable damage. Use Aetherial Aegis to mitigate.
- Turret: Spawns two groups of eight Magitek Turrets. These will periodically use a telegraphed line AoE (Magitek Ray) aimed at the player. Aim Ultima Buster to destroy an entire row at once. If these are not killed quickly enough, they will cast Self-destruct, dealing damage.
- Plasma Cannon: A massive telegraphed circle AoE aimed at the player. Use the speed boost from Pyretic Booster to dodge.
- When the boss disappears and reappears for the final time, it will become untargetable and slowly begin casting Flood Ray.
- Two groups of four Magitek Turrets will spawn to its sides, which can be defeated with Ultima Buster.
- Four Ceruleum Servants will spawn. These will attack with a telegraphed line AoE (Servant Roar) and must all be defeated to make the boss vulnerable.
- The boss must be defeated before Flood Ray is allowed to cast or the player will be defeated.
- Note: Despite Gaius's dialogue, there is plenty of time to destroy the Turrets first to remove their AoEs.
Steps
- Speak with the Resistance Fighter.
- Speak with Severa at Alliance Headquarters.
- Speak with Gaius.
- Speak with Gaius again.
- Speak with Gaius yet again.
- Speak with Gaius one last time.
- Speak with Gaius.
- Speak with Valdeaulin.
- Speak with Severa.
- Speak with the Resistance officer at Porta Praetoria.
Journal
- The troops stationed at Porta Praetoria have been given orders to escort you to Alliance Headquarters by Gaius himself, an arrangement that does not sit well with the rank and file. It would appear the investigation into the Empire's Weapon project has finally borne fruit, though you will need to speak with those directly involved to learn more.
- Despite having visited Alliance Headquarters on several occasions, your comrades still feel the need to have you escorted there and back each time. The Resistance fighter nearby will be more than happy to show you the way.
- You discuss the latest findings of the Ironworks with Severa and Cid, whose earlier hypotheses surrounding the Ruby Weapon have been proven correct. It was equipped with a synthetic auracite system designed to forcibly supplant the consciousness of the pilot with data collected from more experienced soldiers. As Cid explains it, said data was collected via magitek devices akin to soul crystals affixed to the magitek armor of high-ranking officials. This is likely how the Garleans were able to retrieve the combat data of Nael van Darnus, who was killed prior to the Calamity, although there yet remain many questions surrounding the bizarre phenomena witnessed during the battle with the Ruby Weapon. As the Ironworks engineers endeavor to unravel this mystery, you decide to consult with Gaius and plan the next move.
- Valdeaulin gives a brief account of his mission to trace the Ruby Weapon's path back to its source. It is believed to have come from an imperial base in Werlyt, which happens to be where Alfonse and the other orphans lived before they were taken into Gaius's care. In addition, a large machina resembling a Weapon was seen being transported to the coastal town of Terncliff a few days past, and the most logical course of action is to disable it as quickly as possible. The considerable distance between the suspected Weapon and your current location poses a major obstacle, but Cid claims to have prepared a top secret plan for such an occasion.
- Cid takes great pleasure in revealing his trump card: the G-Warrior, an enormous Allagan warmachina restored to working order. He proposes that it be flown to Terncliff using the Enterprise, where it will battle the latest Weapon. It seems you were the only candidate considered as pilot, presumably owing to your preternatural abilities and abundance of combat experience. Gaius, having previously taken helm of the Ultima Weapon, will provide support remotely. Before heading to Terncliff, Cid requests that you familiarize yourself with the G-Warrior's controls using a simulator.
- Armed with a fundamental understanding of the G-Warrior, you and your allies make your way by airship to Terncliff, where the Weapon is poised to attack in the bay below. Though your fledgling abilities as a pilot are sorely tested, you eventually succeed in overcoming your foe, which now lies defeated, but largely intact, on the ocean's surface.
- After disembarking from the G-Warrior, you join the rest of your party in the now-liberated town of Terncliff. You decide to discuss the aftermath of the battle with Gaius, who may have some fresh insight to share.
- The Echo affords you a glimpse of events that unfolded prior to your arrival in Werlyt, and a conversation between Rex and Ricon, two of the orphans fostered by Gaius. With the Eorzean forces on their doorstep, Rex was committed to pilot an as-of-yet-unfinished Sapphire Weapon to afford his comrades time to escape. After much pleading, however, Ricon convinced him to trade places, and instead see the remaining Weapons to a safe location. The vision also confirms the theories surrounding the synthetic auracite and a system known as Oversoul, which fuses the pilot with the Weapon's core and replaces their consciousness with that of another soldier. After expounding on what you saw to Gaius, Cid arrives to confirm the cold, hard truth of your words.
- As Gaius is in no state of mind to speak with anybody whatsoever at present, you turn to Valdeaulin, who reveals how he came to travel alongside the former imperial legatus. After his entire village, including his wife and daughter, were captured and used in Garlean experiments on the poisonous gas that would later become Black Rose, he joined the Order of the Twin Adder to exact his revenge. He joined the assault on the Praetorium and was almost crushed as the fortress was brought crashing down, but thereupon encountered Gaius Baelsar, who was close to death. Just as Valdeaulin prepared to land the killing blow, Gaius asked that he stay his hand, at least until he could exterminate the Ascians who had orchestrated the war on Eorzea. Ever since that day, Valdeaulin has followed Gaius on his hunt, that he may judge his true intentions and slay him the moment he breaks their agreement. Valdeaulin seeks to bring a swift end to the threat posed by the Weapon project and return to eliminating the root cause rather than the symptoms of the Ascian menace.
- Now that the true nature of Oversoul has come to light, Gaius is more determined than ever to disable the remaining Weapons before they can be deployed. To that end, he and Valdeaulin will pursue Rex and the fleeing Garlean soldiers, while Cid continues to examine the imperial facility at Terncliff and the Sapphire Weapon. Your only task at present is to relay the outcome of the battle to the Resistance members at Porta Praetoria and await further instructions.
- You arrive back at Porta Praetoria where the officer in charge offers you a warm welcome. Pleasantries aside, you inform him of all that transpired at Werlyt. There is naught left to do but await further news from headquarters, though you suspect it will not be long before you and your allies are drawn back into conflict with the Empire.
History
Prior to the patch 6.0 stat squish, the G-Warrior had 600,000 HP.
Dialogue
Accepting the quest
Resistance Officer: [Forename]. I'm afraid we haven't much in the way of information to share from the front line.
Resistance Officer: We have, however, received word that Gaius wishes to speak with you at Alliance Headquarters.
Resistance Officer: I've arranged an escort to take you to headquarters, so when you're ready to depart, speak with the fellow over there.
(Optional)
Resistance Officer: I wouldn't like to hazard a guess at exactly what it is your presence is required for, but it's probably not the sort of thing that can be put off until later.
Speaking with the Resistance fighter
Resistance Fighter: Ready to head out?
Speaking with Severa at Alliance Headquarters
Severa: Good. You're here.
Severa: The Ironworks have completed their analysis of the Ruby Weapon, and Cid Garlond wishes to share his findings.
Severa: I take it you can spare a few moments?
Severa: Very good. Please wait here while I inform him of your arrival.
Cutscene
Cid: Glad you could make it, [Forename]. I'm sure you're as anxious as anyone to hear what we've uncovered.
Cid: Our early hypotheses were proven correct. The Garleans have designed a system whereby a pilot's consciousness can be forcibly supplanted with data based on the memories and experience of another.
Severa: So, even a rank amateur could obtain the combat capabilities of a seasoned warrior?
Cid: Precisely, and we learned how this was made possible when we opened the cockpit. The monitors were still operational, and among the messages displayed, one particular phrase caught my attention: “synthetic auracite system.”
Severa: Which is what, exactly?
Cid: Well, the core of the Ultima Weapon was referred to as the Heart of Sabik by the Ascians. We believe it to have been a type of auracite.
Cid: I can't say much for the synthetic sort at this stage, but I've encountered real auracite before. It was extremely potent, perhaps equal in power to the Heart of Sabik.
Cid: It's unclear whether the Garleans' simulacrum possesses the same properties as genuine auracite, but I intend to follow this avenue of inquiry to see where it leads.
Severa: What we do know is that it was used to implant the combat data of Nael van Darnus into the pilot, who has been presumed dead since before the Calamity. Are you any closer to discovering how they were able to retrieve this data?
Cid: The link didn't occur to Gaius at first, but he later told me of devices fitted to the magitek armor of the Empire's high-ranking officers.
Cid: There is reason to believe they were designed to emulate the soul crystals used throughout Eorzea.
Severa: Yes, that was rumored to be its true purpose, but it was never publicly acknowledged. Perhaps those in the upper echelons of command wanted to avoid comparisons to the so-called “savages” they were meant to be conquering.
Cid: There is also the question of whether this system even functions as intended.
Cid: From what we've seen, we can assume they were successful in gathering combat data of those wearing armor equipped with the device. If the comparison with soul crystals is valid, perhaps this data was transferred via aether.
Cid: However, it seems that it extracted not only memories relating to combat, but the soldier's very essence. As you saw, the pilot succumbed entirely to the will of van Darnus.
Cid: Though this is merely supposition, it's possible that being fused with the Ruby Weapon's core accelerated the process and caused the deceased legatus to manifest in corporeal form.
Severa: Could it be that the death of the pilot was caused by the system malfunctioning?
Cid: It's hard to say. The Ruby Weapon itself was still largely intact when it deactivated, which strongly implies that it was the synthetic auracite running amok that killed her, rather than the damage incurred during the battle.
Cid: But even after our analysis, I'm afraid we still don't have enough information. For now, perhaps we should consult with Gaius as to our next plan of action.
Optional
Cid: I still need to get to the bottom of how the synthetic auracite system works, and whether the pilot's fusion with the core was a malfunction or planned from the start.
Severa: Gaius will know how best to proceed.
Valdeaulin: I have just returned from my reconnaissance, and I shall reveal my findings before taking a long overdue rest.
Speaking with Gaius (Cutscene)
Gaius: Valdeaulin has come bearing vital information.
Valdeaulin: I traced the Ruby Weapon's path back to the occupied territory of Werlyt, which appears to be where it was built.

< What will you say? >
< Where exactly is Werlyt? >
< My grasp of geography is surprisingly poor. Care to enlighten me? >
(Both)
Severa: While Ala Mhigo is placed on the western edge of Ghimlyt, Werlyt lies on the opposite side, to the east. It was once a proud and prosperous city, until it was brought to its knees by the imperial invaders.
Valdeaulin: You seem rather well-informed. Perhaps I should've taken you with me.
Severa: Hmph. I thought that much was common knowledge.
Gaius: It is also where Alfonse and the others were born.
Gaius: And now, the Weapon project has brought them home...
Valdeaulin: Yes, the place is now rife with imperials. They have established an airship supply depot in the coastal town of Terncliff. According to the locals, something resembling one of the Weapons was transported there a few days ago.
Gaius: This bodes ill indeed. Were it possible, I would attempt to capture Alfonse and his followers before they can launch an offensive.
Gaius: However, the distance between here and Terncliff presents a considerable obstacle, and in all likelihood, their Weapon will be ready long before we arrive. Approaching by sea would allow us to save time by circumventing their ground-based troops, provided we were able to secure a vessel.
Cid: Or you could use the Enterprise and take the most direct route of all: as the crow flies. In fact, this is the perfect chance to put my top secret plan into action.
Gaius: And might I ask what that entails?
Cid: It wouldn't be much of a secret if I told you, now would it?
Cid: What I can say is there's a starring role planned for you, [Forename].
Cid: Why so surprised? You didn't think I'd let you get off that easily, did you? It'll be here soon, so don't go anywhere!
Optional
Severa: I must admit, I am not fond of surprises, or secrets for that matter.
Valdeaulin: Many imperials who fought at Ghimlyt withdrew to Werlyt, though they will have had ample time to recuperate by now. Were we to approach by land, we could expect considerable resistance.
Speaking with Gaius again
Gaius: I see Cid still delights in keeping others in suspense. I can only hope he does not make us wait overlong.
Cutscene
Cid: Here it is, [Forename].
Cid: I present Garlond Ironworks' adaptation of the Ultima Warrior, the G-Warrior!
Gaius: I know Allagan design when I see it. Excavated from one of their ruins, no doubt.
Cid: Azys Lla, to be precise. We came across it during the course of our investigations and decided it would be a shame to let it go to waste.
Gaius: And you will be taking this refitted relic to face the enemy head-on, yes? Perhaps my knowledge of the Ultima Weapon will be of use.
Cid: I'm counting on it, as it happens. But first, we'll need to perform a test run in the simulator before throwing you into battle. Come, we haven't much time.
Solo Duty
System: In the coming battle, you will fight as the G-Warrior.
Cid: Let's begin the G-Warrior training simulation. I've prepared three trials to teach you the basics.
Cid: First, I want you to try attacking the guidance system. Don't worry, it won't fight back!
Cid: The G-Warrior is armed with a range of weaponry. Now's your chance to learn what it's capable of.
Cid: So far, so good. Let's move on to something a bit more advanced, shall we?
Cid: The G-Warrior also comes equipped with the Pyretic Booster, which diverts even more power to its weapons and increases its speed and maneuverability.
Cid: This, however, comes at a price. Activating it places a huge strain on the G-Warrior, so it must only be used in short bursts.
Cid: That's why it's best to practice here before heading into battle.
Now, try activating the Pyretic Booster!
Cid: You'll notice that your movement speed is much improved. But as shown on your monitor, the G-Warrior becomes more and more structurally unstable as time passes.
Cid: To deactivate the Pyretic Booster, press the same button again.
Cid: Auto Restoration can mitigate a certain amount of damage incurred, but don't rely on it to carry you through the battle!
Cid: Now to try using the Pyretic Booster to destroy the target.
Cid: This time, the node will launch wide reaching attacks in quick succession. But with your increased movement speed, you should have no trouble evading them.
Cid: Excellent work, [Forename]! You'd best deactivate the Pyretic Booster while I explain the final trial.
Cid: We've covered offense, now to look at defense. This is where the Aetherial Aegis should come in handy.
Cid: Unfortunately, you can't keep the barrier up indefinitely as it will drain the G-Warrior's power reserves. You might even run out of energy for the weapons, so watch out.
Cid: First, let's try deploying the Aetherial Aegis.
Cid: The monitor shows how much power is being drained. Don't let it get too low!
Cid: That's enough for now. Turn off the barrier using the same button used to deploy it.
Cid: For the last trial, we'll use the Aetherial Aegis while attempting to destroy the target.
Cid: Unlike before, there is no way to escape its attacks, so you'll need to weather them using the barrier.
Cid: You're a natural! All right, that's everything. Time to end the simulation.
Optional
Valdeaulin: I suppose that in theory, any one of us could be the pilot, but I daresay your preternatural abilities give you a certain advantage.
Severa: Incredible... But how does it compare to the Weapons?
Ironworks Technician: Back for more training, eh?
Speaking with Gaius again
Gaius: Are you sufficiently prepared?
< What will you say? >
< Yes, I'm ready. >
< Some more practice wouldn't go amiss. >
< Some more practice wouldn't go amiss. >
Gaius: In that case, you should have the technician run the simulator again.
(Dialogue Ends)
< Yes, I'm ready. >
Gaius: Then we shall depart for Terncliff at once.
Cutscene
Gaius: It seems they were expecting us. But who is the pilot...?
Cid: [Forename], we're almost there! You'd better have your wits about you!

< What will you say? >
< Initiate combat mode! >
< I have control! >
< Erm... G-Warrior, do... the thing! >
(All)
Cid: Now, get ready to strike!
< What will you say? >
< It's time to fry this overgrown squid! >
< Ah... Is it too late to back out? >
< G-Warrior, engage! >
< It's time to fry this overgrown squid! >
Cid: Haha! And save some for me! For research purposes, that is...
< Ah... Is it too late to back out? >
Cid: That's the [Forename] I know, always with a joke at the ready! Wait, you're not joking are you?
< G-Warrior, engage! >
Cid: That sounds awfully familiar...
(All)
Pilot of the Sapphire Weapon: I can't afford to lose... It's all or nothing!
Pilot of the Sapphire Weapon: >> Activating Oversoul! <<
Synthetic Auracite System: Hydrus combat sample ready.
Initiating organic core overwrite.

Pilot of the Sapphire Weapon: Nnngh... Noooooo! I can't...hold on...!
Gaius: I will be monitoring the situation from the air. Follow my instructions and eliminate the target.
Solo Duty
System: In the coming battle, you will fight as the G-Warrior.
Man's Determined Voice: Well, well. It seems the savages have been busy...
I shall enjoy breaking their new toy.
Gaius Baelsar: It must have absorbed an aquatic eikon.
Be sure to use the Pyretic Booster and Aetherial Aegis!
Man's Determined Voice: My likeness reborn in ceruleum flames!
Gaius Baelsar: Is that...Ultima?
Use the Aetherial Aegis!
Gaius Baelsar: It's submerged, but not for long.
Watch for signs of movement!
Gaius Baelsar: It's preparing to strike!
Quickly, deploy the Aegis!
Gaius Baelsar: The turrets are preparing to self-destruct.
Destroy them with the Ultima Buster!
Gaius Baelsar: Activate the Pyretic Booster and keep moving!
The Sapphire Weapon: Your wild flailing shall avail you naught!
Gaius Baelsar: Destroy the ceruleum servants, then focus your attacks on the Sapphire Weapon!
You mustn't let it launch its next attack!
Gaius Baelsar: The ceruleum servants are protecting the Weapon.
Ignore the turrets for now and destroy the servants!
Gaius Baelsar: The turrets can wait─ You must eliminate the ceruleum servants first!
It's the only way!
Man's Determined Voice: I tire of these games. Now to send you to a watery grave!
Cutscene
Gaius: The target has been silenced.
< What will you say? >
< That damned squid never stood a chance! >
< Understood. >
(Both)
Gaius: Now that the immediate threat has been dealt with, we should gather what information we can in Terncliff.
Optional
Severa: I must admit, I envy your talents. Would that I possessed even a fraction of your skill, that I could better serve Gaius.
Valdeaulin: I cannot help feeling there was a simpler way to defeat the Weapon. Perhaps shooting it in the head with a large cannon would have sufficed?
Resistance Fighter: Most of the VIIth Legion troops stationed here withdrew before you arrived. I expect they're regrouping somewhere and getting ready to retake the town.
Resistance Fighter: I even heard one of the members of the Weapon project is still hiding somewhere in the town.
Lonely Widow: Those Garlean bastards are finally gone, and it's all thanks to you.
Lonely Widow: My husband died defending our town when they first invaded, and for all the years since, it felt like he'd died for nothing. Now, his soul might at last find peace.
Rueful Civilian: What do you want with me, lad/lass?
Former Imperial Conscript: I've been separated from my family ever since I was forced into the army, but I was able to sneak away in the confusion. I've got you and your friends to thank for that.
Former Imperial Conscript: My main concern is that Legatus Valens won't take this lying down. That man is like a dog with a bone. Once he sinks his teeth in, he never lets go. He'll be back, I'm sure of it.
Speaking with Gaius (Cutscene)
Gaius: You did well to pilot the G-Warrior so adeptly in so short a time.
Gaius: And with the Weapon largely intact, Cid and his researchers should be able to gather a wealth of valuable information. Before it is dismantled, perhaps we should take one last look upon our fallen foe.
Cutscene
Echo
Rex: We should've known Father and his friends would track us down sooner or later. Now, they're at our doorstep, and the Sapphire Weapon still isn't ready!
Rex: Even so, it should still be able to fend them off, or at least buy us some time.
Rex: Not quite how I'd imagined it, but this seems as good a way to die as any.
???: Rex, I...
Rex: >> Ricon!? Why are you still here!? You're supposed to be moving the other Weapons to a safe location! <<
Ricon: You can take care of that...while I pilot the Sapphire Weapon.
Rex: >> What are you talking about!? I'm the pilot, not you! There's no need to put your life on the line. <<
Rex: Besides, it's still incomplete. It can barely perform basic maneuvers, so it'll be practically useless in a real fight.
Ricon: We have a solution: Oversoul.
Rex: >> You want to end up like Milisandia!? <<
Ricon: No, of course not. I wouldn't wish that on my worst enemy.
Ricon: But she didn't give her life in vain. The Ruby Weapon left behind data that's been used to improve the system, to prevent any further malfunctions.
Rex: What difference does that make!? Once Oversoul is activated and the pilot fuses with the core, there's no way back.
Ricon: That's why I should be the one to pilot the Sapphire Weapon, not you, Rex. Alfonse needs you.
Ricon: You and I both know I'm the least qualified pilot we have. There's less to lose if I don't make it back.
Rex: No! I won't let you!
Ricon: Please, Rex. Hear me out. Ever since we were children, I was the smallest, the weakest, too afraid to stand up for myself. But I had the best brothers and sisters a boy could wish for. You were always there for me, protected me.
Ricon: Now, it's my turn to protect you.
Ricon: Take the other Weapons and get out of here. See this through to the end.
Ricon: Do it for me. For Milisandia. I'm counting on you, Rex.
Rex: Hmph. You always did have a stubborn streak. All right, Ricon. I won't let you down.
Rex: Just promise you'll wait for me...on the other side. We'll meet again, Brother.
Ricon: You all made me happier than I had any right to be. And now...I've finally found my purpose. I have no regrets.
Ricon: Come on, Sapphire. We may be far from perfect, but we have a job to do. Let's give Father something to remember us by!
Gaius: The Echo, I presume. What did it reveal to you?
Gaius: Ricon... My poor boy. You were braver than most could ever hope to be.
Cid: It's as we feared. I'm sorry, Gaius.
Gaius: First Milisandia, now Ricon! We must find the remaining Weapons and end this madness.
Optional
Gaius: ...
Severa: Valdeaulin has never been one to openly express himself, at least not in front of Gaius and myself. Even so, I cannot help but notice that something is amiss
Speaking with Valdeaulin (Cutscene)
Valdeaulin: Tell me: what do you make of Gaius Baelsar?
Valdeaulin: I understand the two of you have been acquainted since his days as the Black Wolf. He claims to have shed his pelt when he took up the hunt for Ascians, but he's still the same man deep down.
Valdeaulin: He certainly kept quiet about having a flock of foster children back in the Empire, though. It seems he would rather bare his teeth to his former masters than allow harm to come to them.
Valdeaulin: Yet try as I might, I cannot make sense of it. Does he truly fight for the good of mankind, as he would have us all believe, or is he merely biding his time before he reveals his true colors?
Valdeaulin: Whatever the answer may be, in the end he will always be a Garlean. And though there may be honorable men and women among them, I have suffered much and more as a result of their conquests. Barbaric campaigns in which Gaius Baelsar played no small part.
Valdeaulin: My first encounter with the Garleans was twenty years ago, shortly after the fall of Ala Mhigo. They continued their march into the lands that had long been home to we Duskwights.
Valdeaulin: We sought to repel the invaders, but we were woefully unprepared. Our bows and arrows were no match for their magitek, and even our most powerful magicks did little to slow their advance.
Valdeaulin: I fought on the front line, but was knocked unconscious in the opening exchange. When I came to, I was alone, the rest of my unit slaughtered. I hurried back to my village to look for my wife and daughter, only to find the place deserted.
Valdeaulin: My search lasted for days, then weeks, then months, and it seemed they had disappeared without a trace. I finally learned from two imperials held at Bittermill that the villagers had been captured and used as test subjects for the poison gas that would later be known as Black Rose.
Valdeaulin: They were never seen again.
Valdeaulin: For twenty long years I roamed aimlessly, with nothing but hatred to keep me alive. I eventually found myself at the Order of the Twin Adder, who offered me a place among their ranks. The desire for revenge was the only thing I had left, so without a moment's hesitation, I accepted.
Valdeaulin: Were it not for the war with Garlemald, I would have been loath to work alongside the city-dwelling Gridanians who for so long had treated my kind as outcasts. But none of that mattered anymore.
Valdeaulin: It all culminated with Operation Archon. As you led the charge into the Praetorium, we were right behind you. And when the place came crumbling down, most of us were caught in the rubble. I escaped with my life, though many others were less fortunate.
Valdeaulin: Having dragged myself free from the rubble, I sought a way out. It was then that I encountered none other than Gaius Baelsar, on the verge of death. The gods had delivered to me the man whose conquests had robbed me of everything.
Valdeaulin: I was poised, ready to exact my revenge. And then, he spoke.
Valdeaulin: "I will not beg for mercy. I only ask that you stay your hand a while longer.
Valdeaulin: "I cannot die until I have rid the world of the Ascian menace. For millennia, mankind has danced to their tune. But no more. Then, once we are finally free, my life is yours for the taking.“
Valdeaulin: I would have struck him down there and then had I not sensed truth in his words. So, I decided to grant him a stay of execution and join him on his hunt.
Valdeaulin: All this time, I've kept a close eye on Gaius. Though he is ever on the watch for pursuers, he has granted me ample opportunity to slay him if I so choose. And I still might, if he shows even the slightest sign of betraying our agreement.
Valdeaulin: But for now, the Ascians are my chosen quarry. If they are indeed the ones pulling the Empire's strings, then it shall not end until they have been eradicated, every last one. Though I could not save my kin, there are those who may yet be spared the horrors of war.
Valdeaulin: Unfortunately, dealing with the Ascians will have to wait until we have brought an end to Garlemald's Weapon project.
Valdeaulin: Though we may have vanquished two of the new Weapons, we must make every effort to prepare for whatever the Garleans throw at us next. Perhaps Severa can tell us whether the Ironworks engineers have uncovered any information of note?
(Optional)
Valdeaulin: (I'd rather you didn't share what we've discussed with my...traveling companions. It would only complicate matters.)
Speaking with Severa (Cutscene)
Severa: The Ironworks engineers are still at work dismantling the Sapphire Weapon and investigating the Terncliff magitek facility. Though they have yet to make their report, they may have some news to share at this juncture. Please, wait here a moment.
Cutscene
Cid: We've yet to finish our investigation, but I can give you a preliminary report.
Gaius: Were you able to recover anything of note?
Cid: Before abandoning the facility, they'd attempted to destroy anything they couldn't take with them, including many of their research materials. Luckily, some information relating to the Sapphire Weapon's combat data was intact.
Gaius: Judging by what we saw during the battle, it was extracted from Regula van Hydrus, correct?
Cid: It also appears that the Sapphire Weapon was actually in an incomplete state, and therefore unable to perform at full capacity.
Valdeaulin: Even so, it was immensely powerful. Had they been given the chance to finish it before we'd arrived, who knows how it would've ended?
Cid: Indeed. We may not be so fortunate next time, so we must prepare for the worst. The Ironworks will continue to investigate the Sapphire Weapon and look into possible countermeasures.
Gaius: The Echo afforded you a glimpse into the conversation between Ricon and Rex prior to the Weapon's deployment. Do you remember any other details?
Cid: Improvements were made to the synthetic auracite system to prevent malfunctions? Then it was never their intent to create a manifestation of Nael van Darnus...
Cid: But there's one thing that was intended...
Gaius: Oversoul. Its activation results in the pilot being absorbed by the core, killing them in the process. Rex and Ricon were fully aware of this, were they not?
Gaius: Then the death of the pilot was by design all along...
Gaius: Alfonse, how could you!? Sacrificing your own siblings to fuel these accursed war machines!
Severa: Surely, there is no cause worth paying such a price.
Valdeaulin: Aye. Nothing is more precious than family.
Gaius: This nightmare is far from over. It appears that Rex has fled with the remaining Weapons, and we can assume that Alfonse has every intention of sending them into battle.
Gaius: We must find a way to disable them before Oversoul can be activated.
Gaius: I have seen enough death. I do not wish to see any more.
Valdeaulin: Then there is no time to waste. Let's be about it, Gaius.
Valdeaulin: Severa, you're in charge here. Keep Cid and his team safe while they carry out the investigation.
Severa: Understood. Please see that no harm comes to Gaius.
Valdeaulin: While we're gone, I need you to relay everything to the Resistance troops. Your firsthand account should prove useful. If there are any developments, we'll be sure to contact you.
Optional
Gaius: Alfonse, I will find you, wherever you are.
Valdeaulin: If the other Weapons have been moved elsewhere, the locals must've seen the direction in which they've headed. At this stage, any information at all would be better than what we have now, which is next to nothing.
Ironworks Technician: This lift leads down to the storage area where the Weapons were kept. Unfortunately, the imperials didn't leave an awful lot behind for us to investigate, but they did give us a place to carry out maintenance on the G-Warrior.
Ironworks Technician: In fact, I can take you down there for a closer look, if you're interested.
Speaking with the Resistance officer at Porta Praetoria.
Resistance Officer: Welcome back! It sounds like you've been on quite the journey. All the way to Terncliff!
Resistance Officer: And judging by the fact you made it here in one piece, I trust everything went according to plan?
Resistance Officer: What an astonishing account... I wouldn't mind putting that G-Warrior through its paces myself! Certainly a lot more stimulating than supervising this rabble, I'd imagine.
Resistance Officer: Anyway, as before, I'll compile the information into a report and leave it over there for your perusal, should you feel so inclined. If we hear anything from headquarters, we'll be sure to pass it on.
Cutscene
Meanwhile, in the VIIth Legion's Werlyt headquarters...
Alfonse: I have come to deliver my report, Lord Valens.
Valens van Varro: Ah, so you have returned, young Alfred. Or was it Allwick?
Valens van Varro: Not that it really matters, of course. I hear that you and your darling “brothers and sisters” have allowed the Sapphire Weapon to fall into the hands of the enemy. Do tell me it isn't so...
Alfonse: I am afraid that is the case, Lord Valens.
Valens van Varro: Oh, come now. No need to be so sullen. As they say, “to err is human, to forgive, divine.” And you know how forgiving I can be. When it suits me...
Valens van Varro: So, tell me, whatever-your-name-is: who was able to best the Sapphire Weapon?
Alfonse: Our sources state that the one known as the Warrior of Light was assisted by Cid Garlond and...Gaius van Baelsar, my lord.
Valens van Varro: Gaius, Gaius, Gaius. Yes, it seems he's been quite the troublemaker of late. Defecting from Garlemald, assassinating the Emperor... Whatever next? Oh well, there's no use crying over spilt milk.
Valens van Varro: Speaking of which, I've become quite the connoisseur since arriving in Werlyt. This particular variety comes from a rare breed of cow, you know. Only a hundred of them in existence and pampered every day of their lives.
Valens van Varro: Yes, they are quite valuable. Until their milk dries up, that is. When it does, they are sent to the slaughterhouse like all the rest. For that is their lot in life...
Valens van Varro: ...to be discarded once they have served their purpose.
Valens van Varro: Did I create the Ruby and Sapphire Weapons so that you could deliver them gift wrapped to the enemy!? I can see it now─Cid nan Garlond rubbing his hands with glee at all the technological marvels we've bestowed upon him!
Valens van Varro: >> And you let Gaius van Baelsar of all people get the better of you! How do you think this reflects on me!? The legatus of the VIIth Legion humiliated by that traitor! Humiliated, I say! <<
Valens van Varro: >> There's only one way to deal with worthless provincial filth like you! Wait for me in the correction chamber. You need to be taught a lesson in obedience. <<
Alfonse: Yes, my lord.
Imperial Messenger: Forgive my intrusion, Lord Valens, but it's time for your meeting with the head of magitek development.
Valens van Varro: Oh, how time flies when you're whipping useless soldiers into shape! Yes, yes, I'll be along once I've made myself presentable. Can't have people thinking I've let my standards slip, now can I?
Valens van Varro: What are you doing here?
Allie: You wished to see me, Lord Valens?
Valens van Varro: Did I now?
Valens van Varro: ...Ah yes, that's right.
Valens van Varro: So, you're Allie, yes? And you joined the military of your own free will along with your fellow orphans?
Valens van Varro: Such devotion! What an inspiration you are! You see, it is my firm belief that love grants us the power to move mountains, to overcome any obstacle.
Valens van Varro: Together, we shall discover the strength that lies within you. Take my hand, child. I will show you the way.
Gallery
-
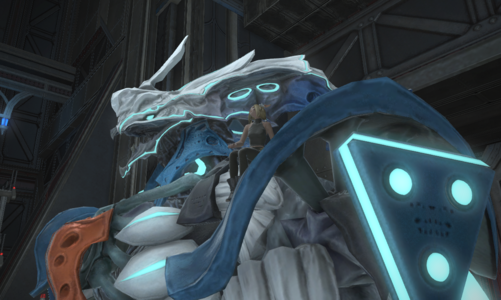
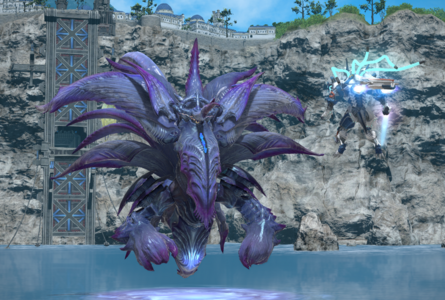
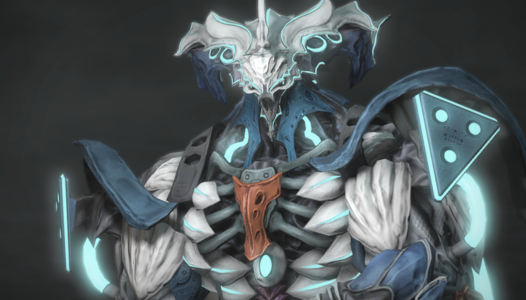 G-Warrior
 -
-
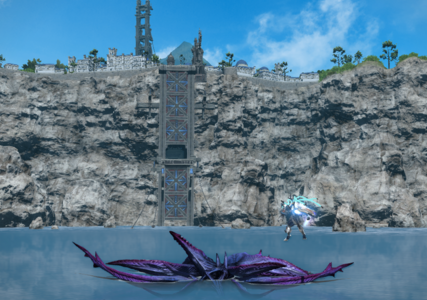
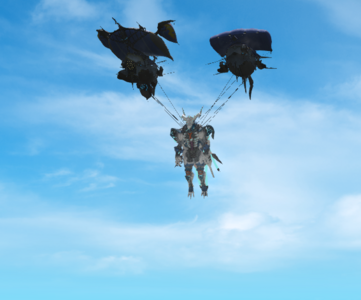 G-Warrior in transit
 -
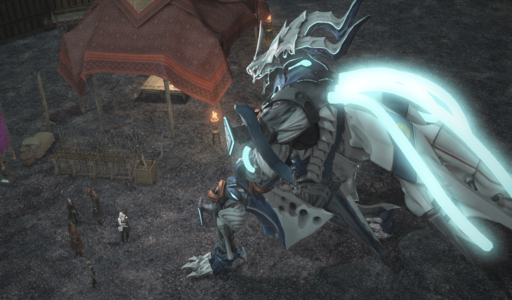
 G-Warrior controls
 -
-
-